Google Security Command Center
Setup
Connect to your Google Security Command Center app for OAuth.
To setup your Google Security Command Center app in Cobalt for OAuth, you will need the following credentials from your Google Cloud Console dashboard:
 Provide the acquired Client ID and Client Secret under Settings of the app and save it.
 Once the scopes has been added to the project in Cobalt, go to your Google Cloud Console dashboard and update the scopes as added on Cobalt.
Navigate to
Once the scopes has been added to the project in Cobalt, go to your Google Cloud Console dashboard and update the scopes as added on Cobalt.
Navigate to
- Client ID
- Client Secret
- Scopes
Pre-requisites
- Google Cloud Console account. You can create one here.
- Your users should have the appropriate roles for the APIs to work correctly.
Learn more about the required IAM Roles here.
Required Settings
- Mandatory Scopes
If you haven’t already created a project in Google Cloud Console, you’d need to create one.
Creating an app in Google Security Command Center
To create a Google Security Command Center app and acquire the above mentioned credentials, please follow the steps mentioned below:- Log in to your Google Cloud Console dashboard.
- Click on the
Create Projectbutton in the top right.
- Enter the Project Name for your application, select Organization and Location.
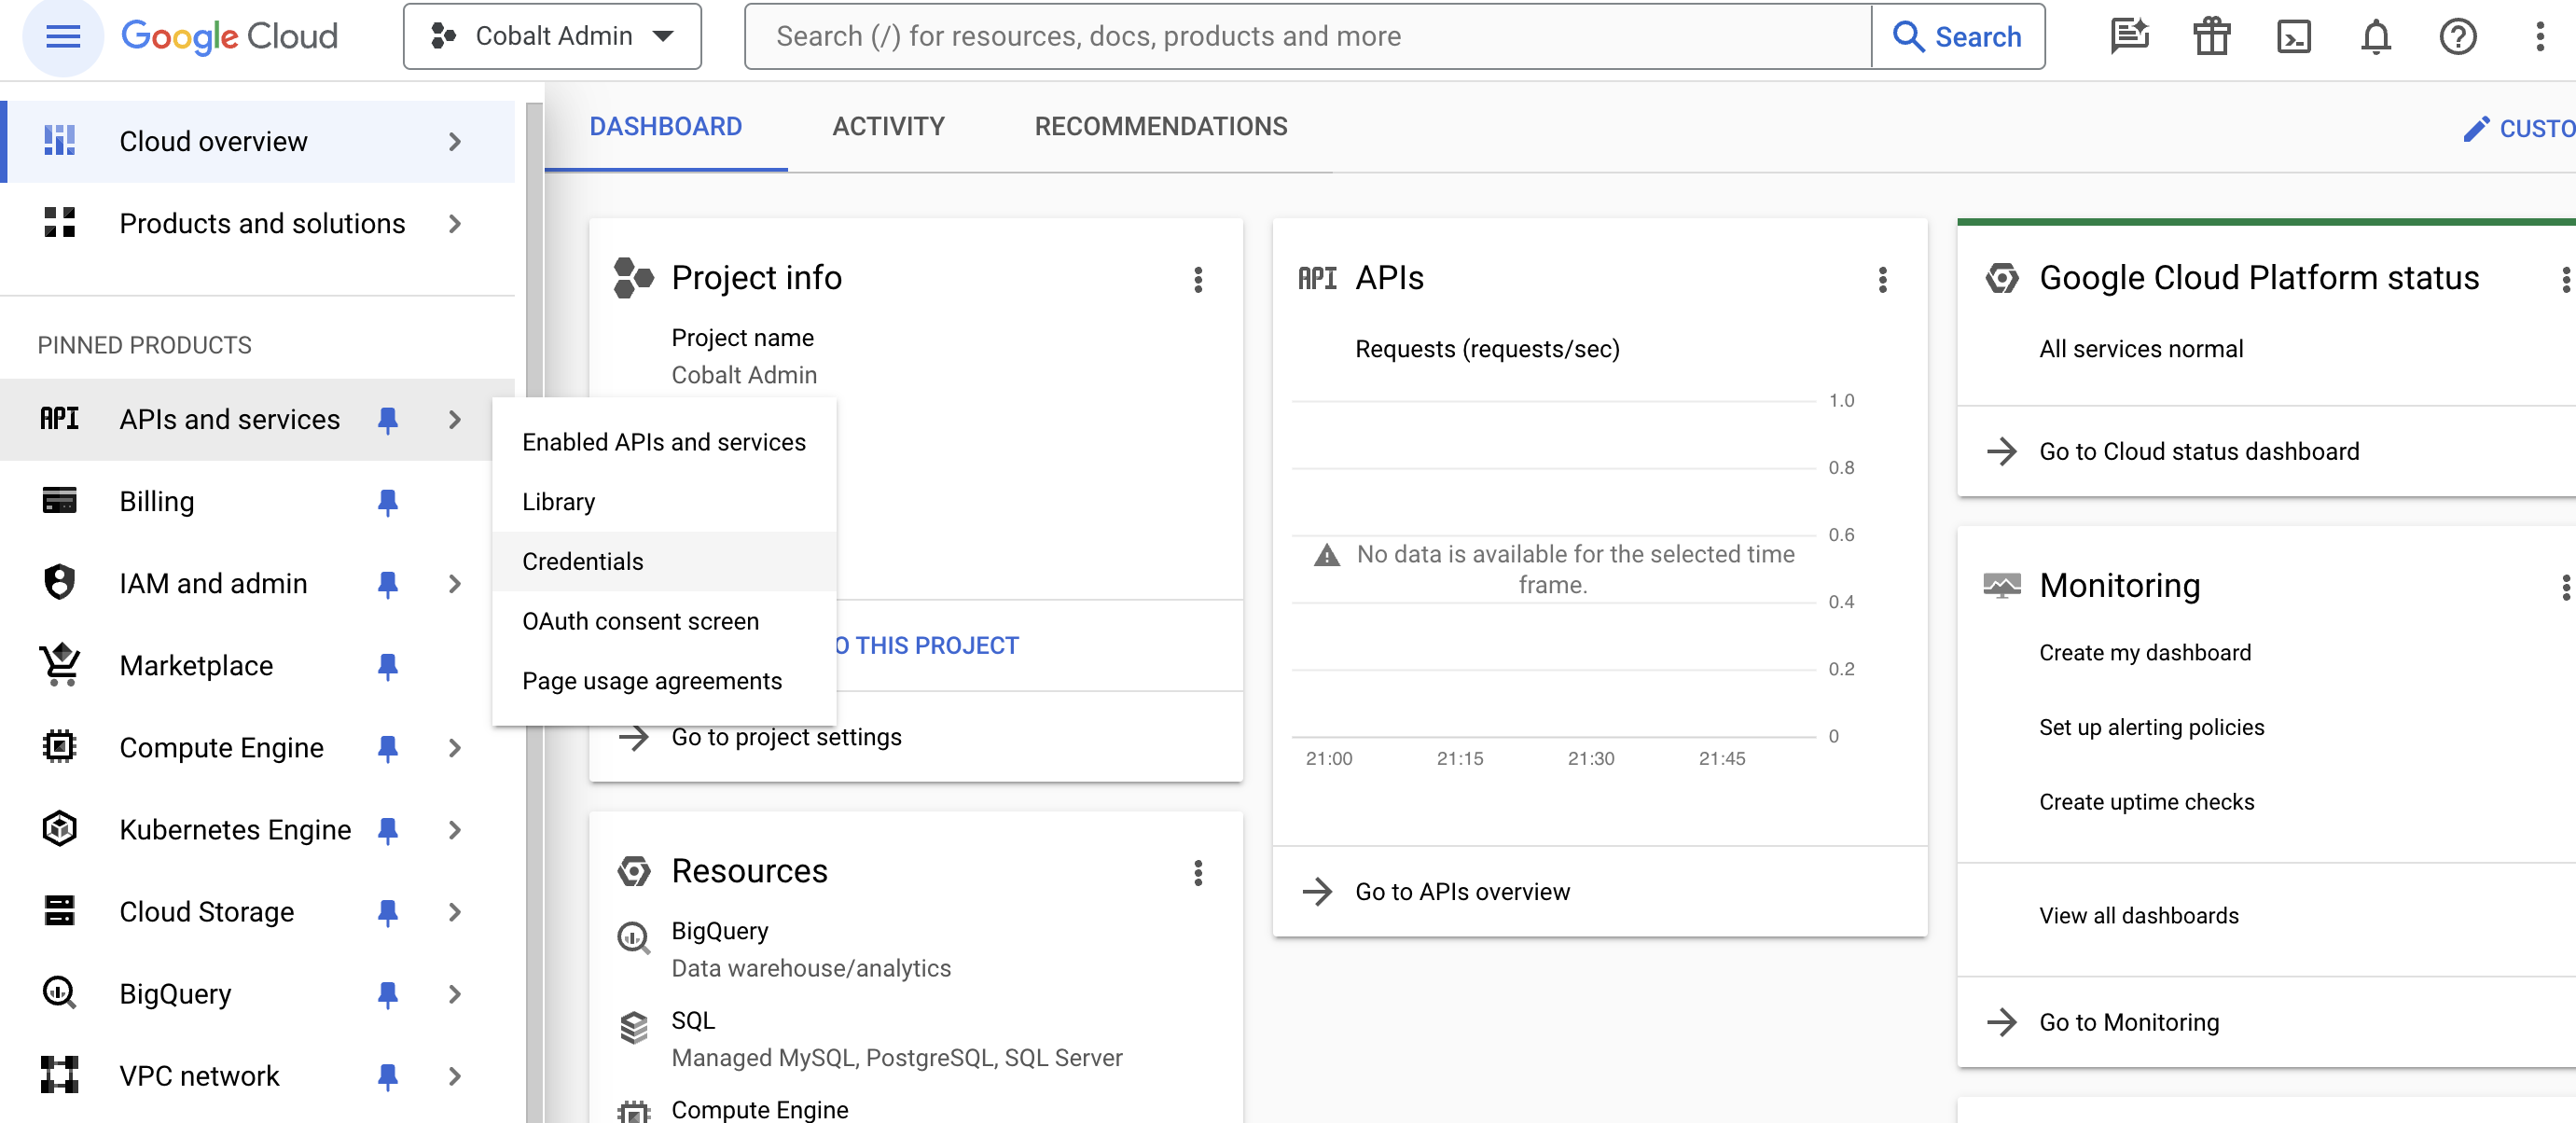
- In the Google Cloud Console dashboard, navigate to
APIs and services>Credentialsin the left side menu.
Ensure that the correct app is selected by checking the name of the app in the dropdown in the top navigation bar.
- Go to your
Apps catalogin Cobalt > Search forGoogle Security Command Center>Settings>Use your credentials>Callback Url> Copy it. - Click on
+ Create Credentialsbutton in the top in the Cloud Console app and selectOAuth client ID.
Note: You will need to configure Google’s consent screen for access to Client ID and Client Secret if not done previously.
- Select
Web applicationfrom the Application type dropdown > scroll toAuthorized redirect URIssection > Click+ Add URIbutton > Paste the Callback Url > ClickCreatebutton in the bottom. - Navigate to
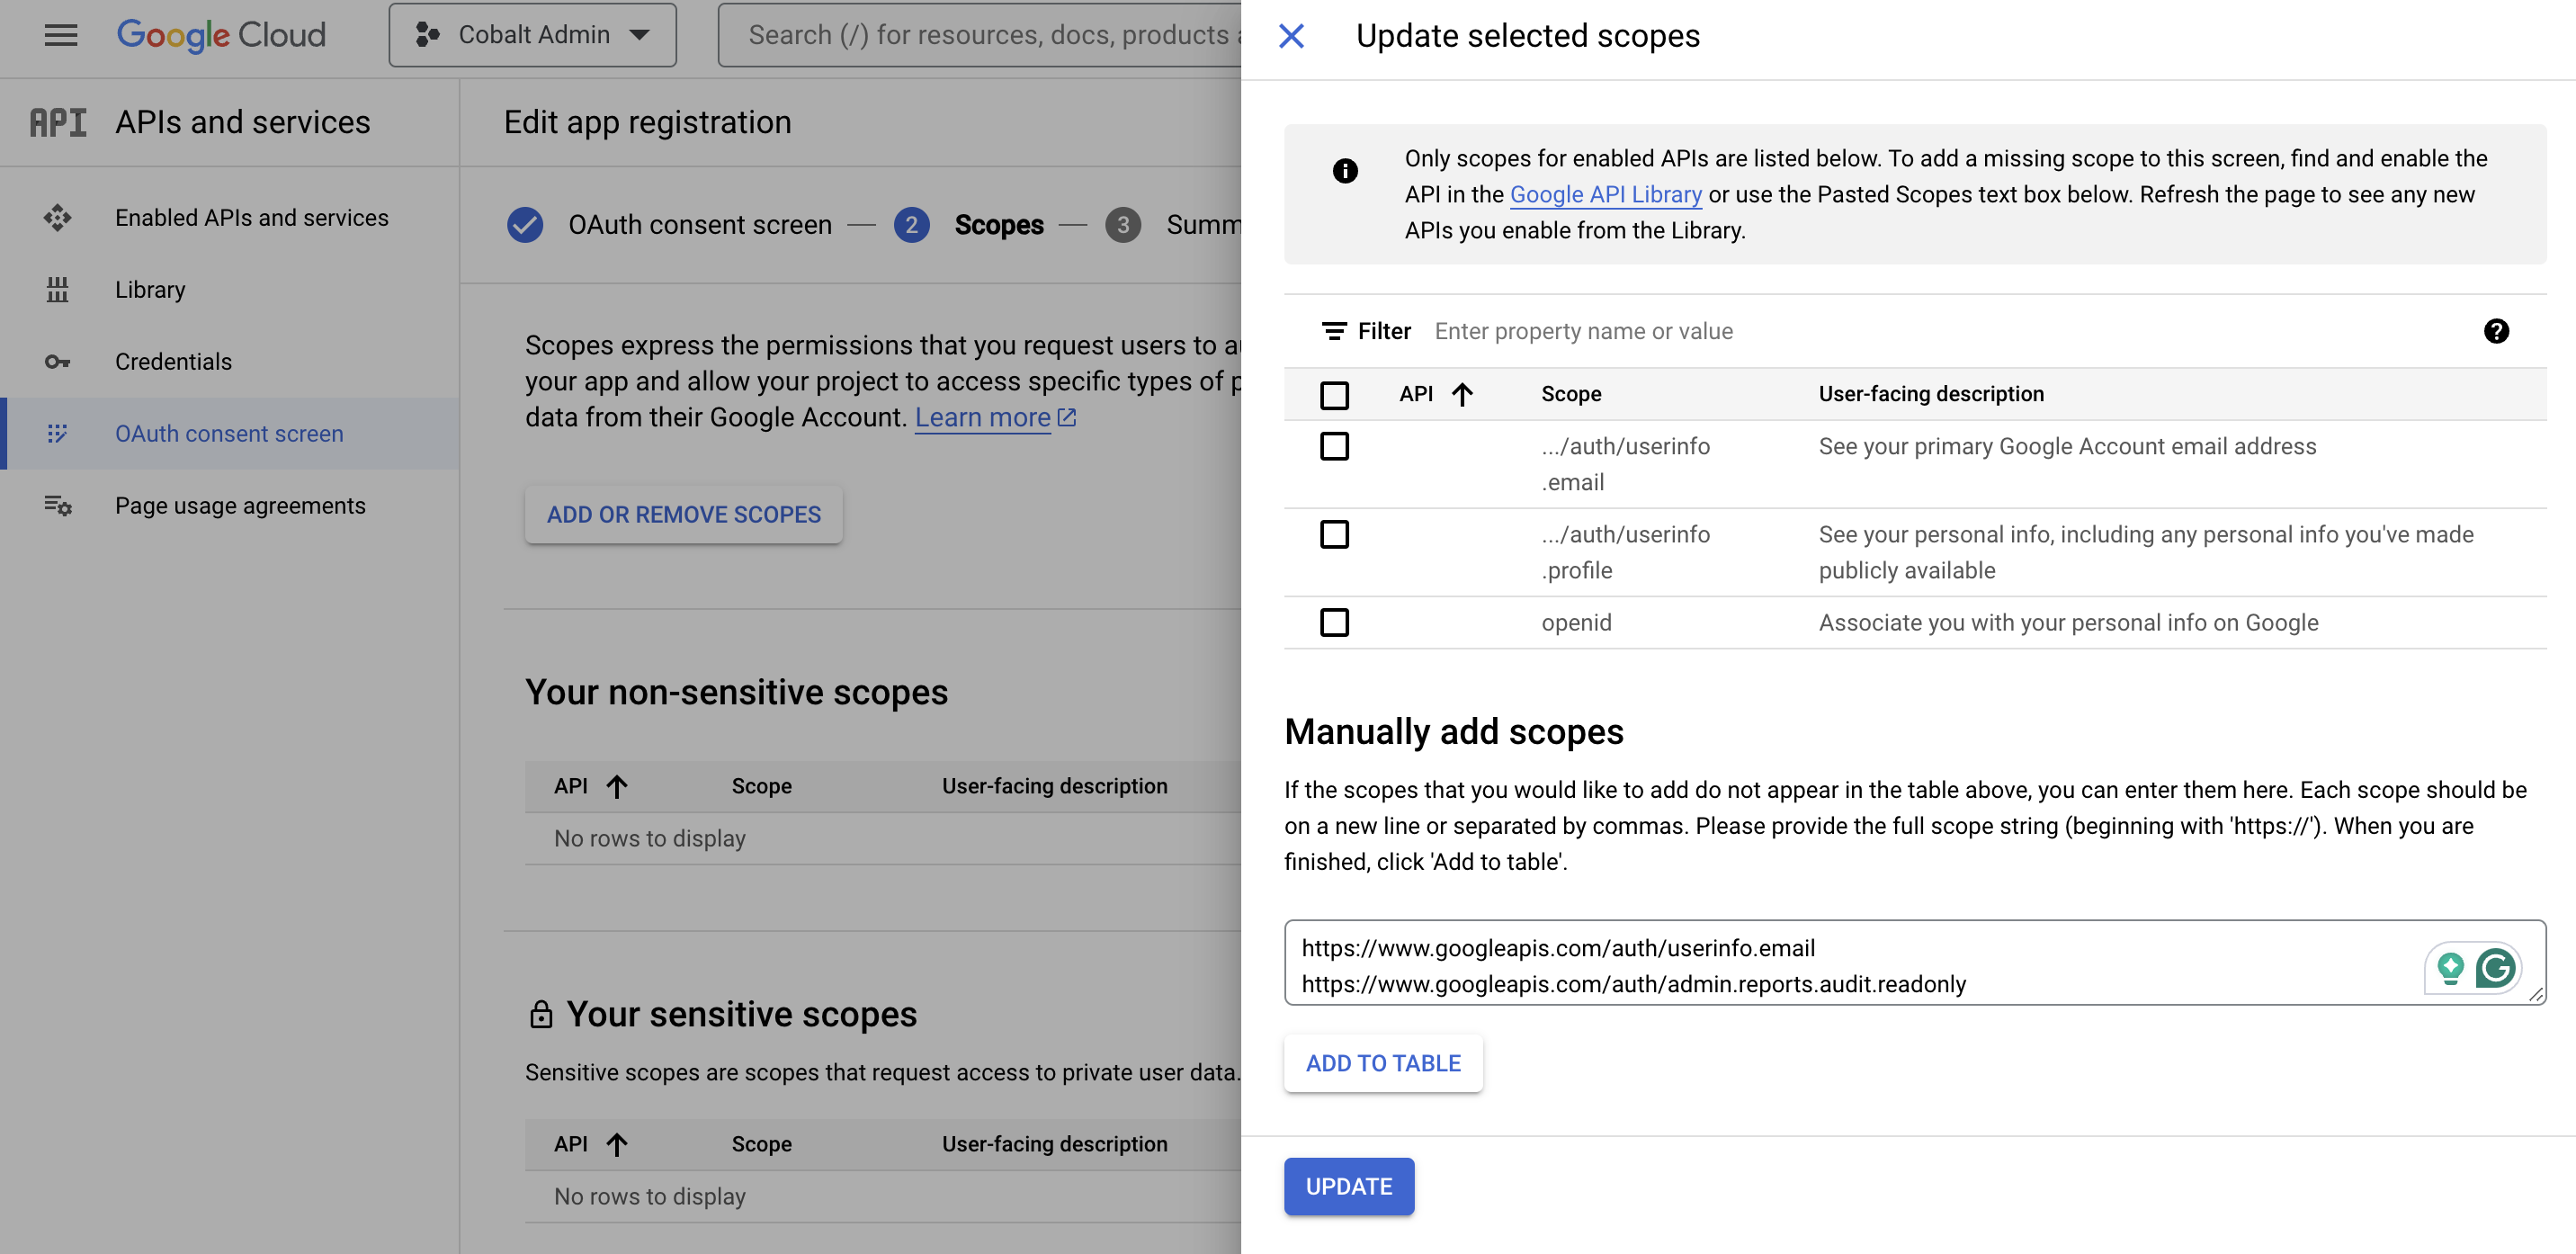
OAuth consent screenin the left menu underAPIs and services> Click on theEdit Appbutton > Scroll down > ClickSave and Continuein the OAuth consent screen section > ClickAdd or Remove Scopesbutton in the Scopes section. - Enter the mandatory scopes under
Manually add scopes> Click onAdd To Table> Click onUpdate> Click onSave and Continueat the bottom of the page.
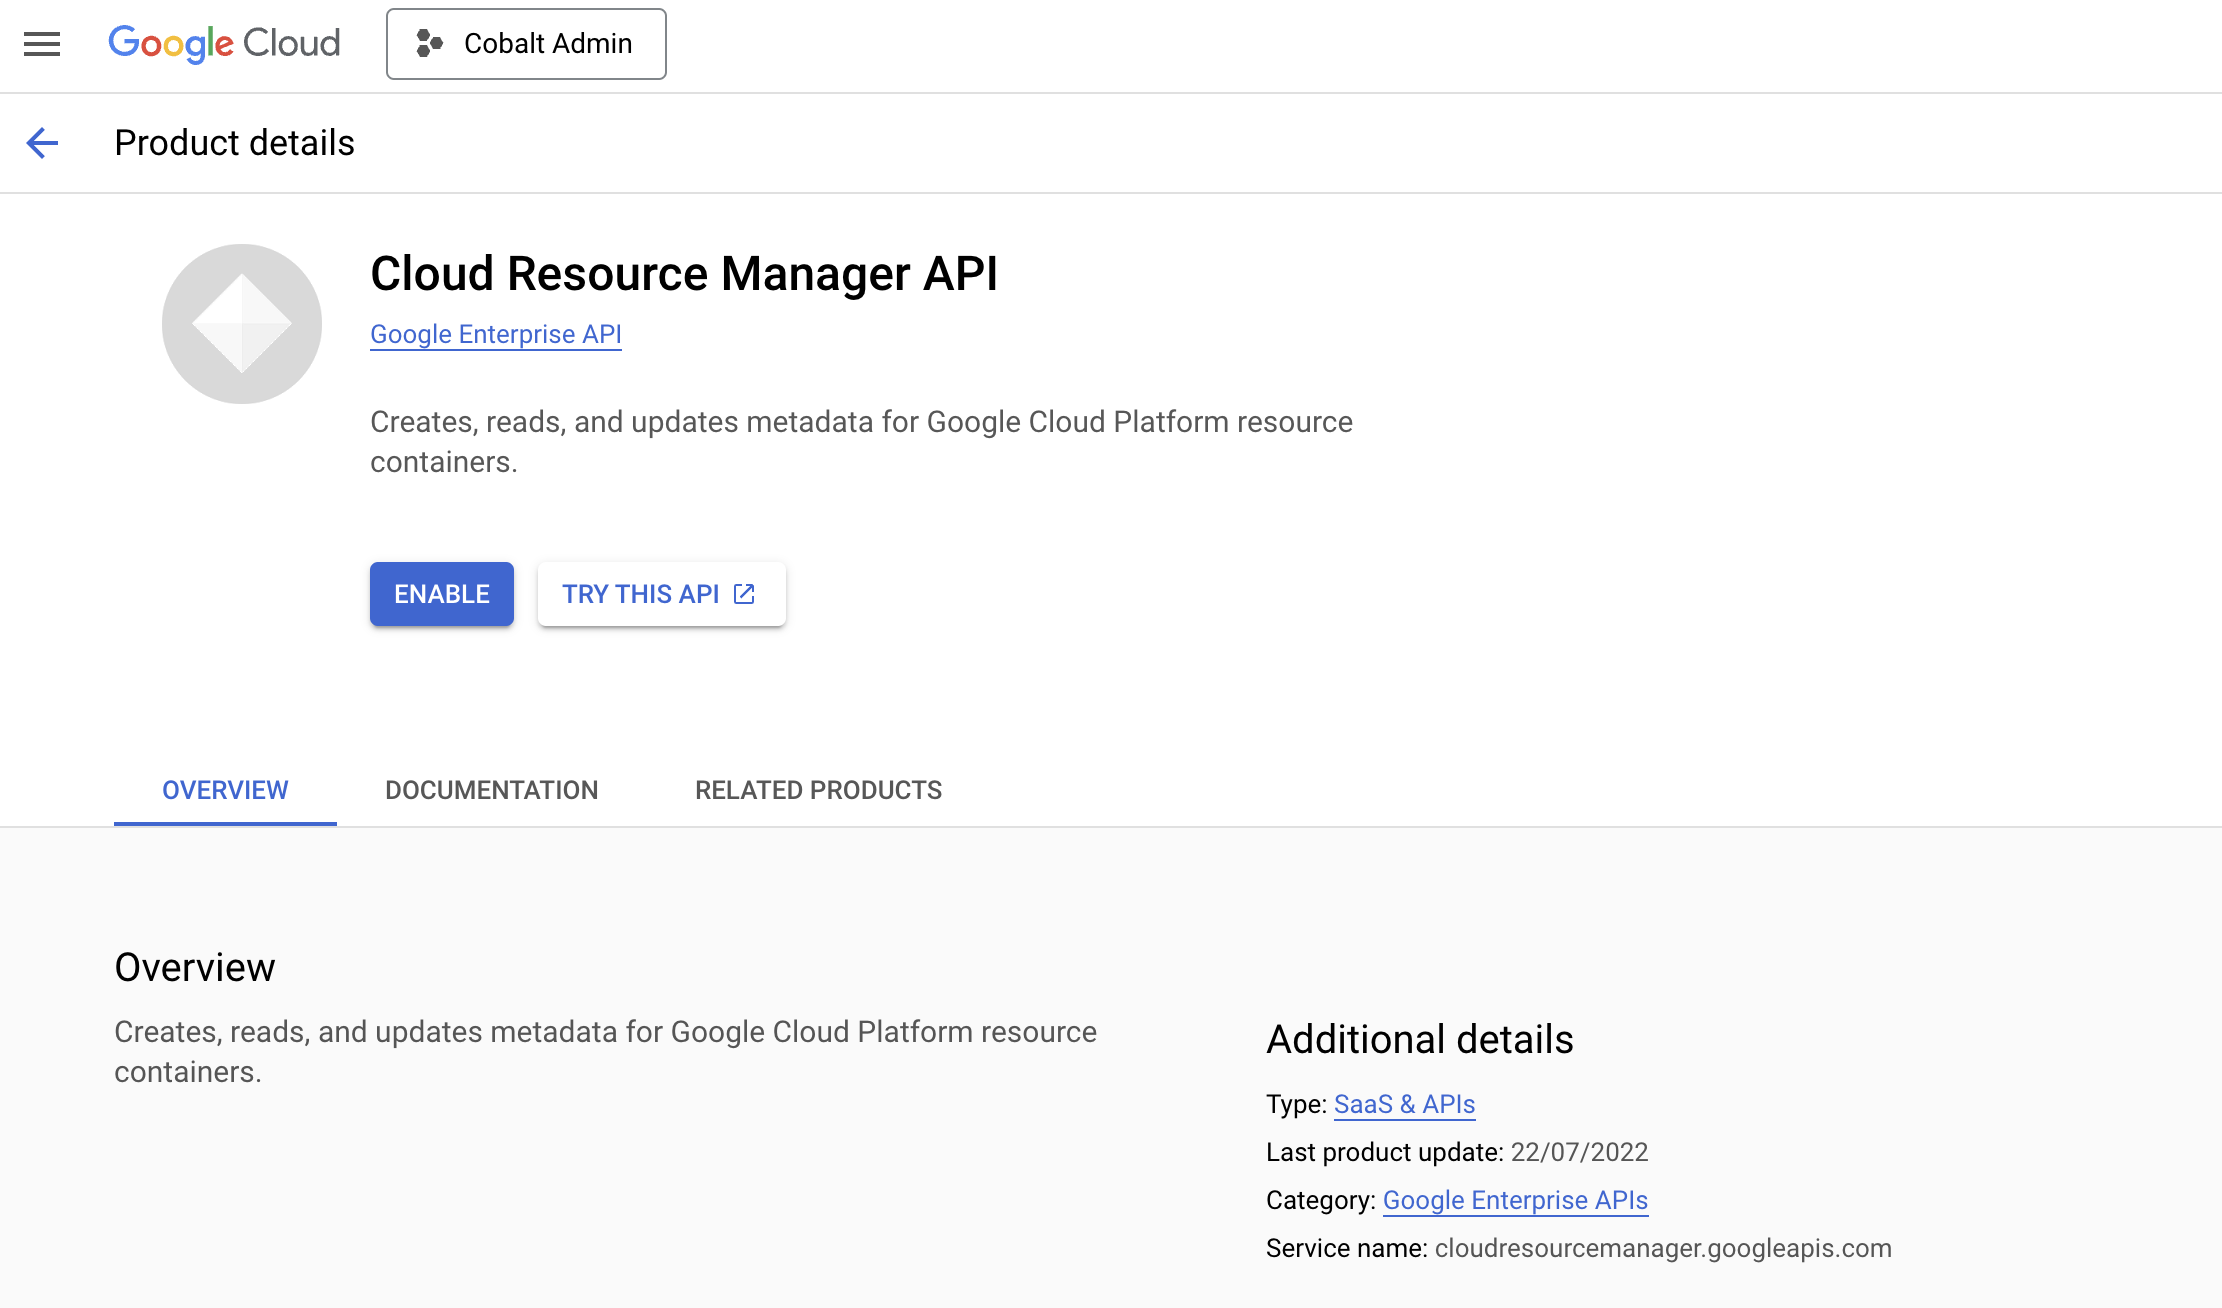
- Go to
Enabled APIs and servicesin the left menu under APIs and services > Click on+ Enable APIs and Services> Search forCloud Resource Manager API& alsoSecurity Command Center API> Click onEnablefor both.
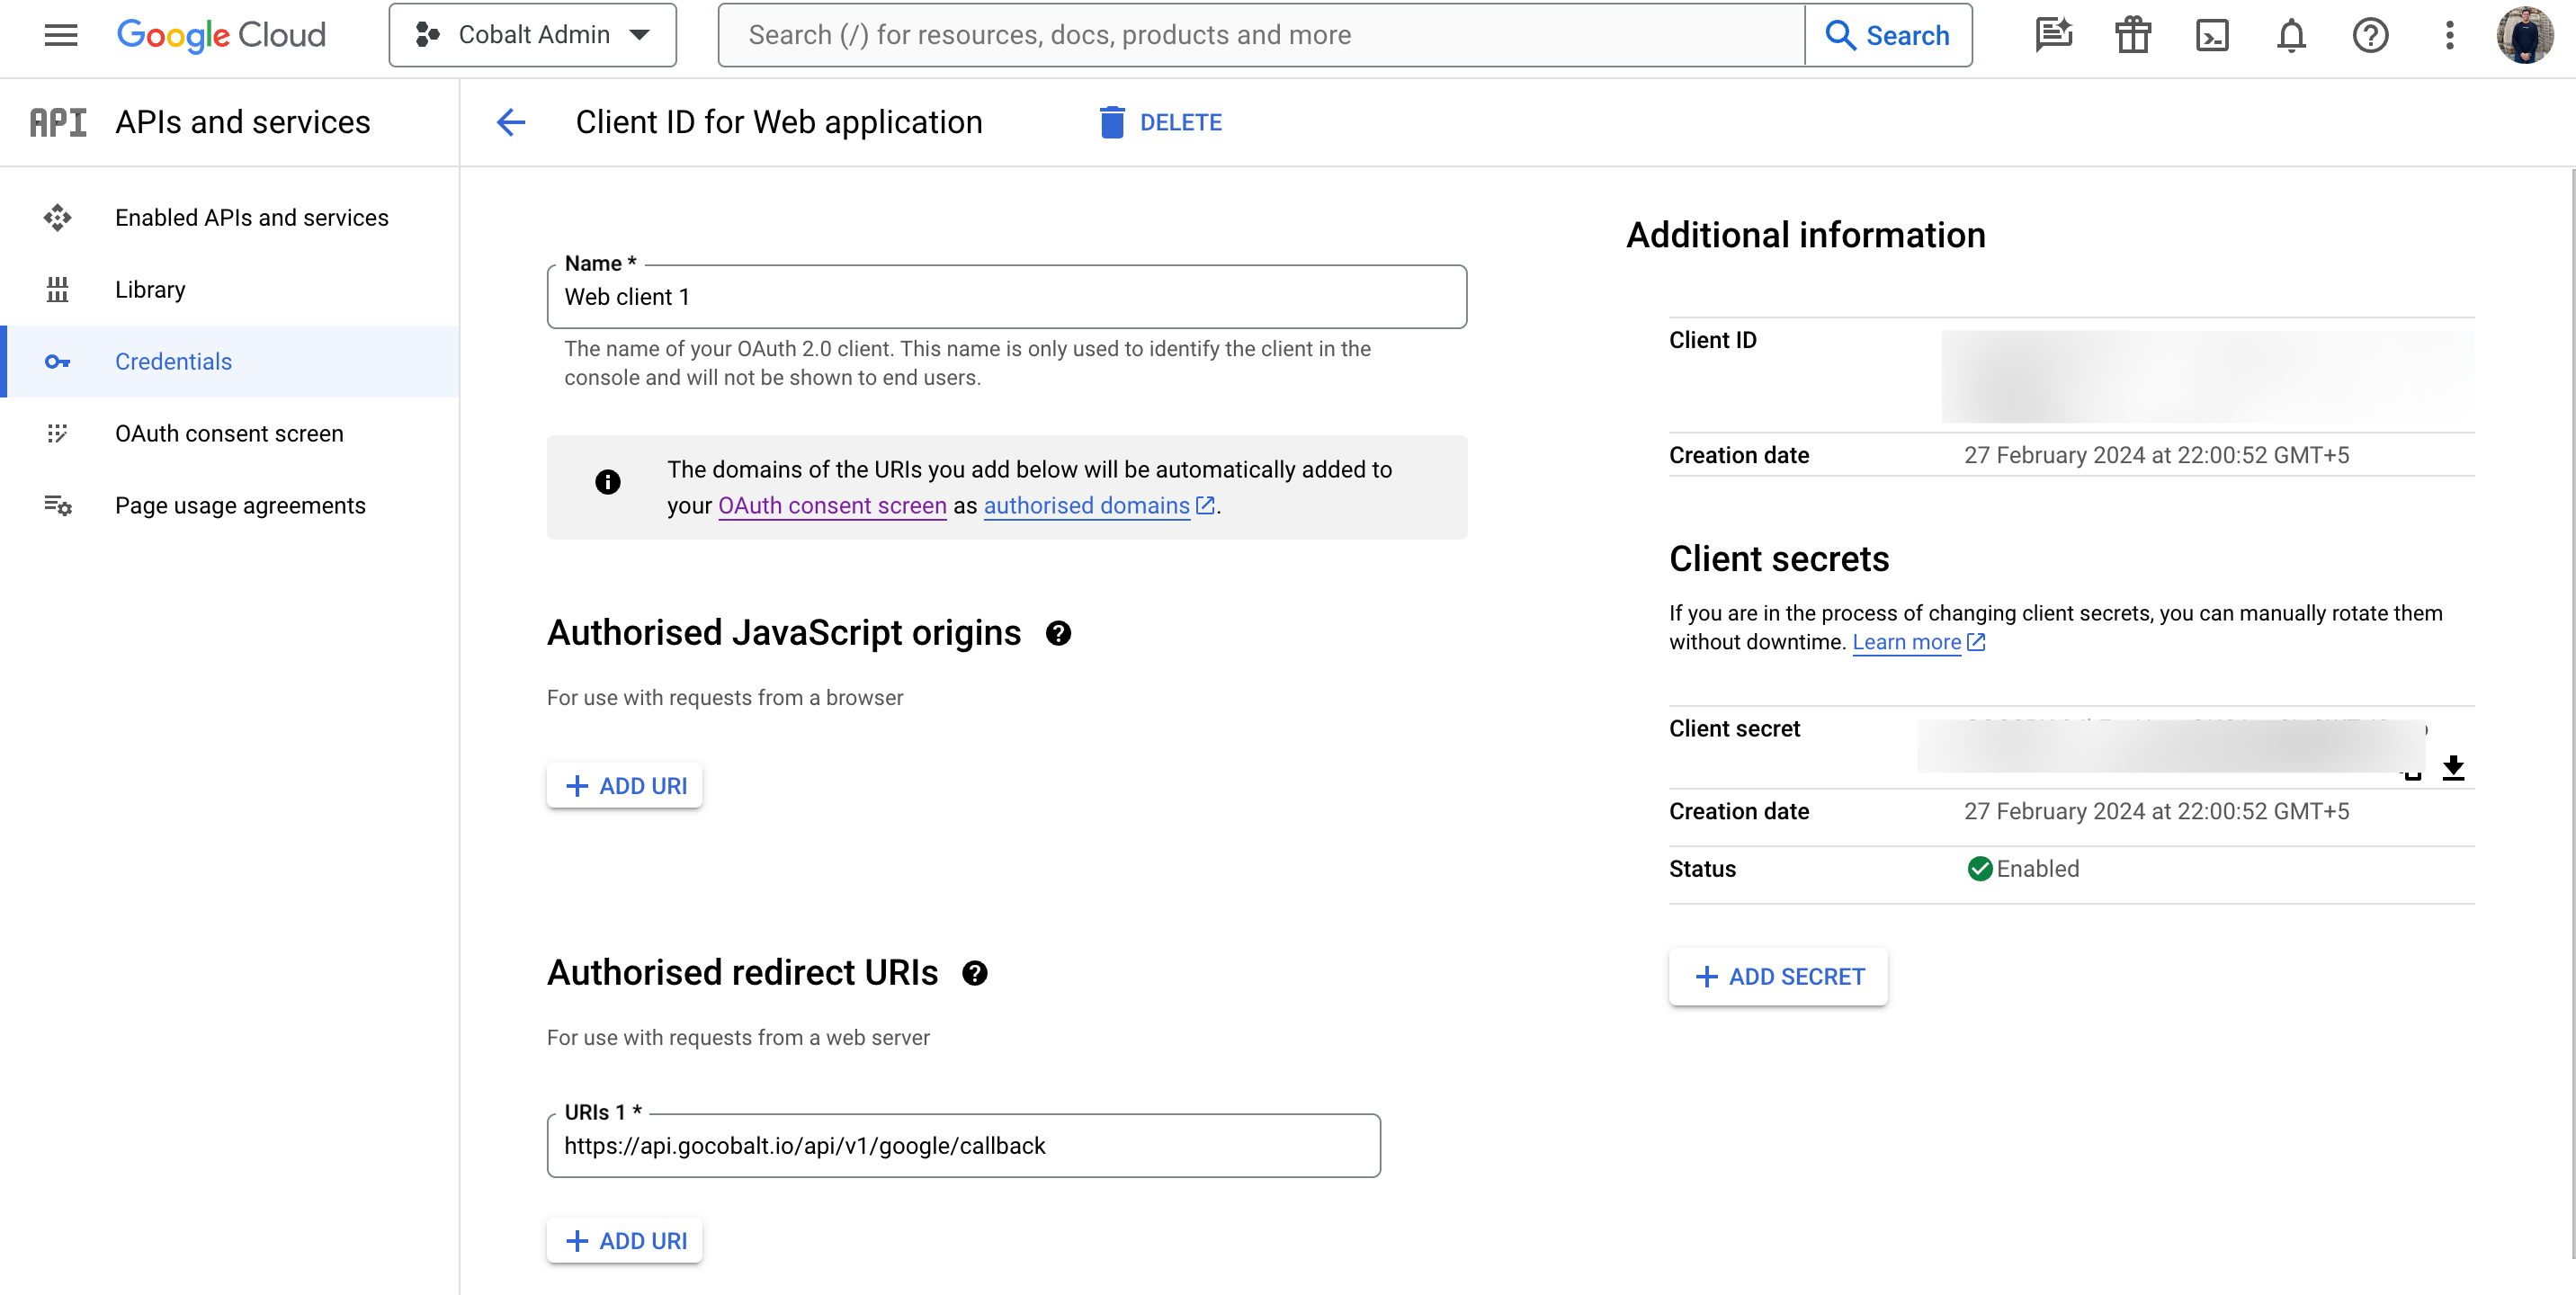
- Navigate to
Credentialsin the left menu underAPIs and servicesand select the Web Client underOAuth 2.0 Client IDs. Copy the Client ID and Client Secret underAdditional informationsection.
Configuring credentials in Cobalt
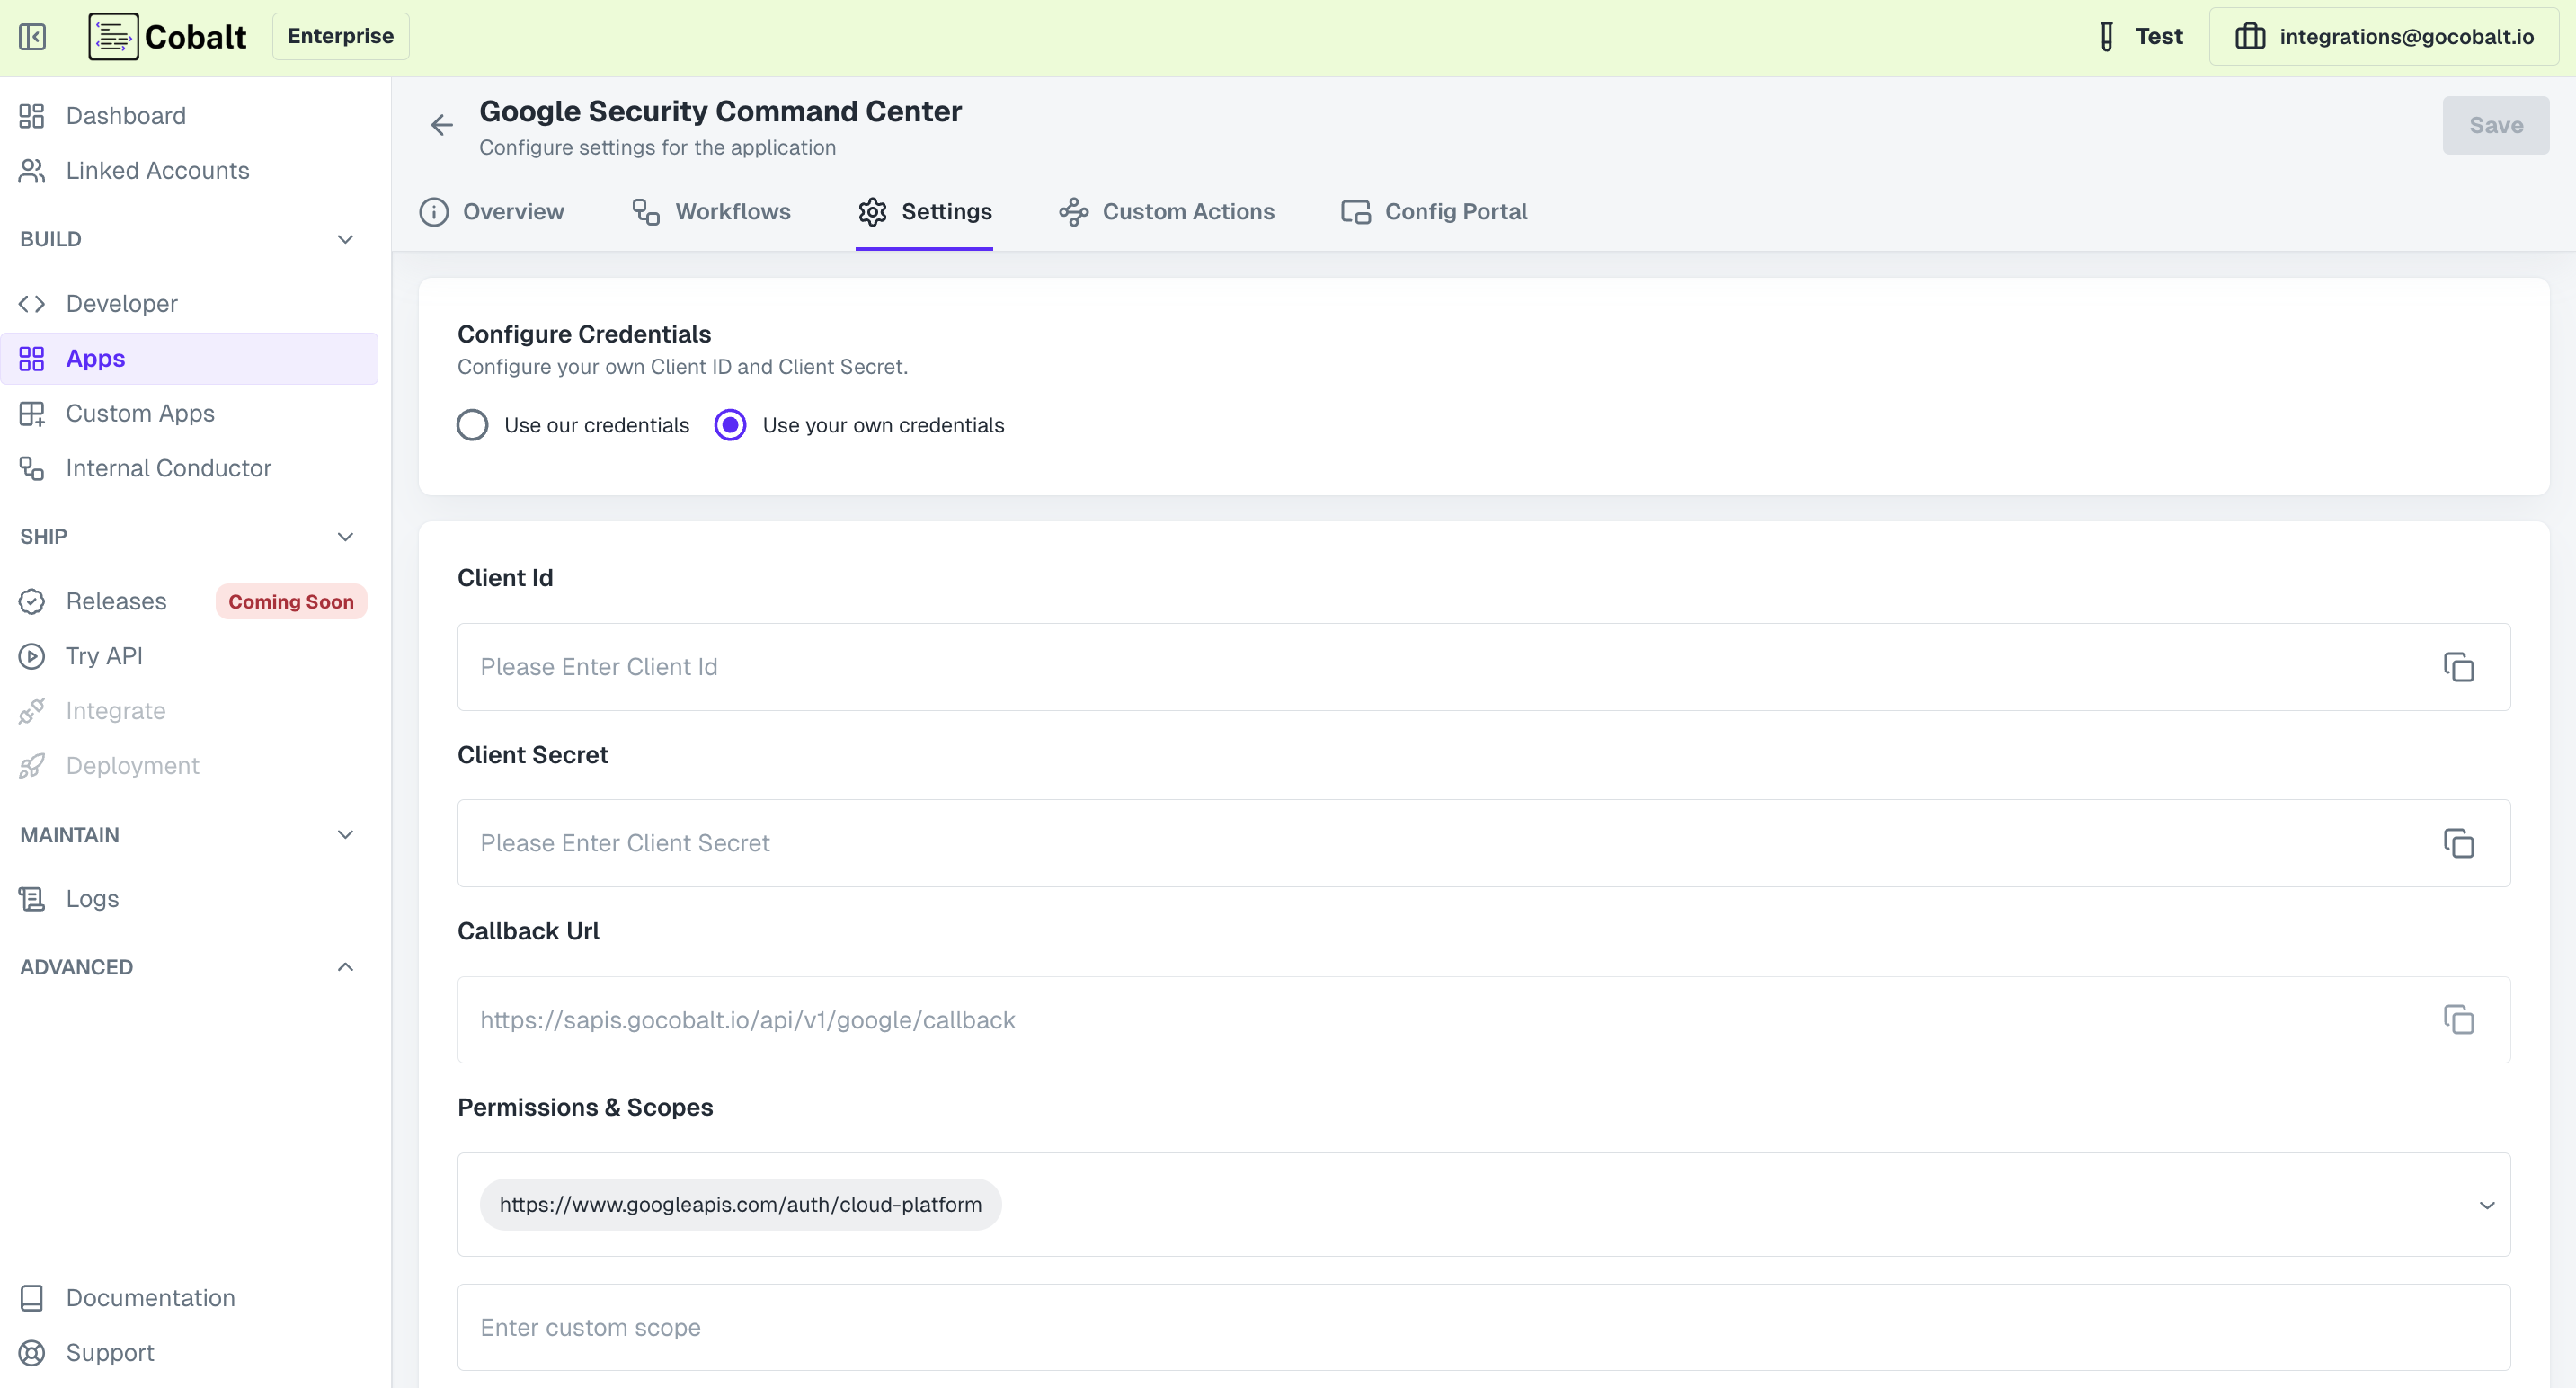
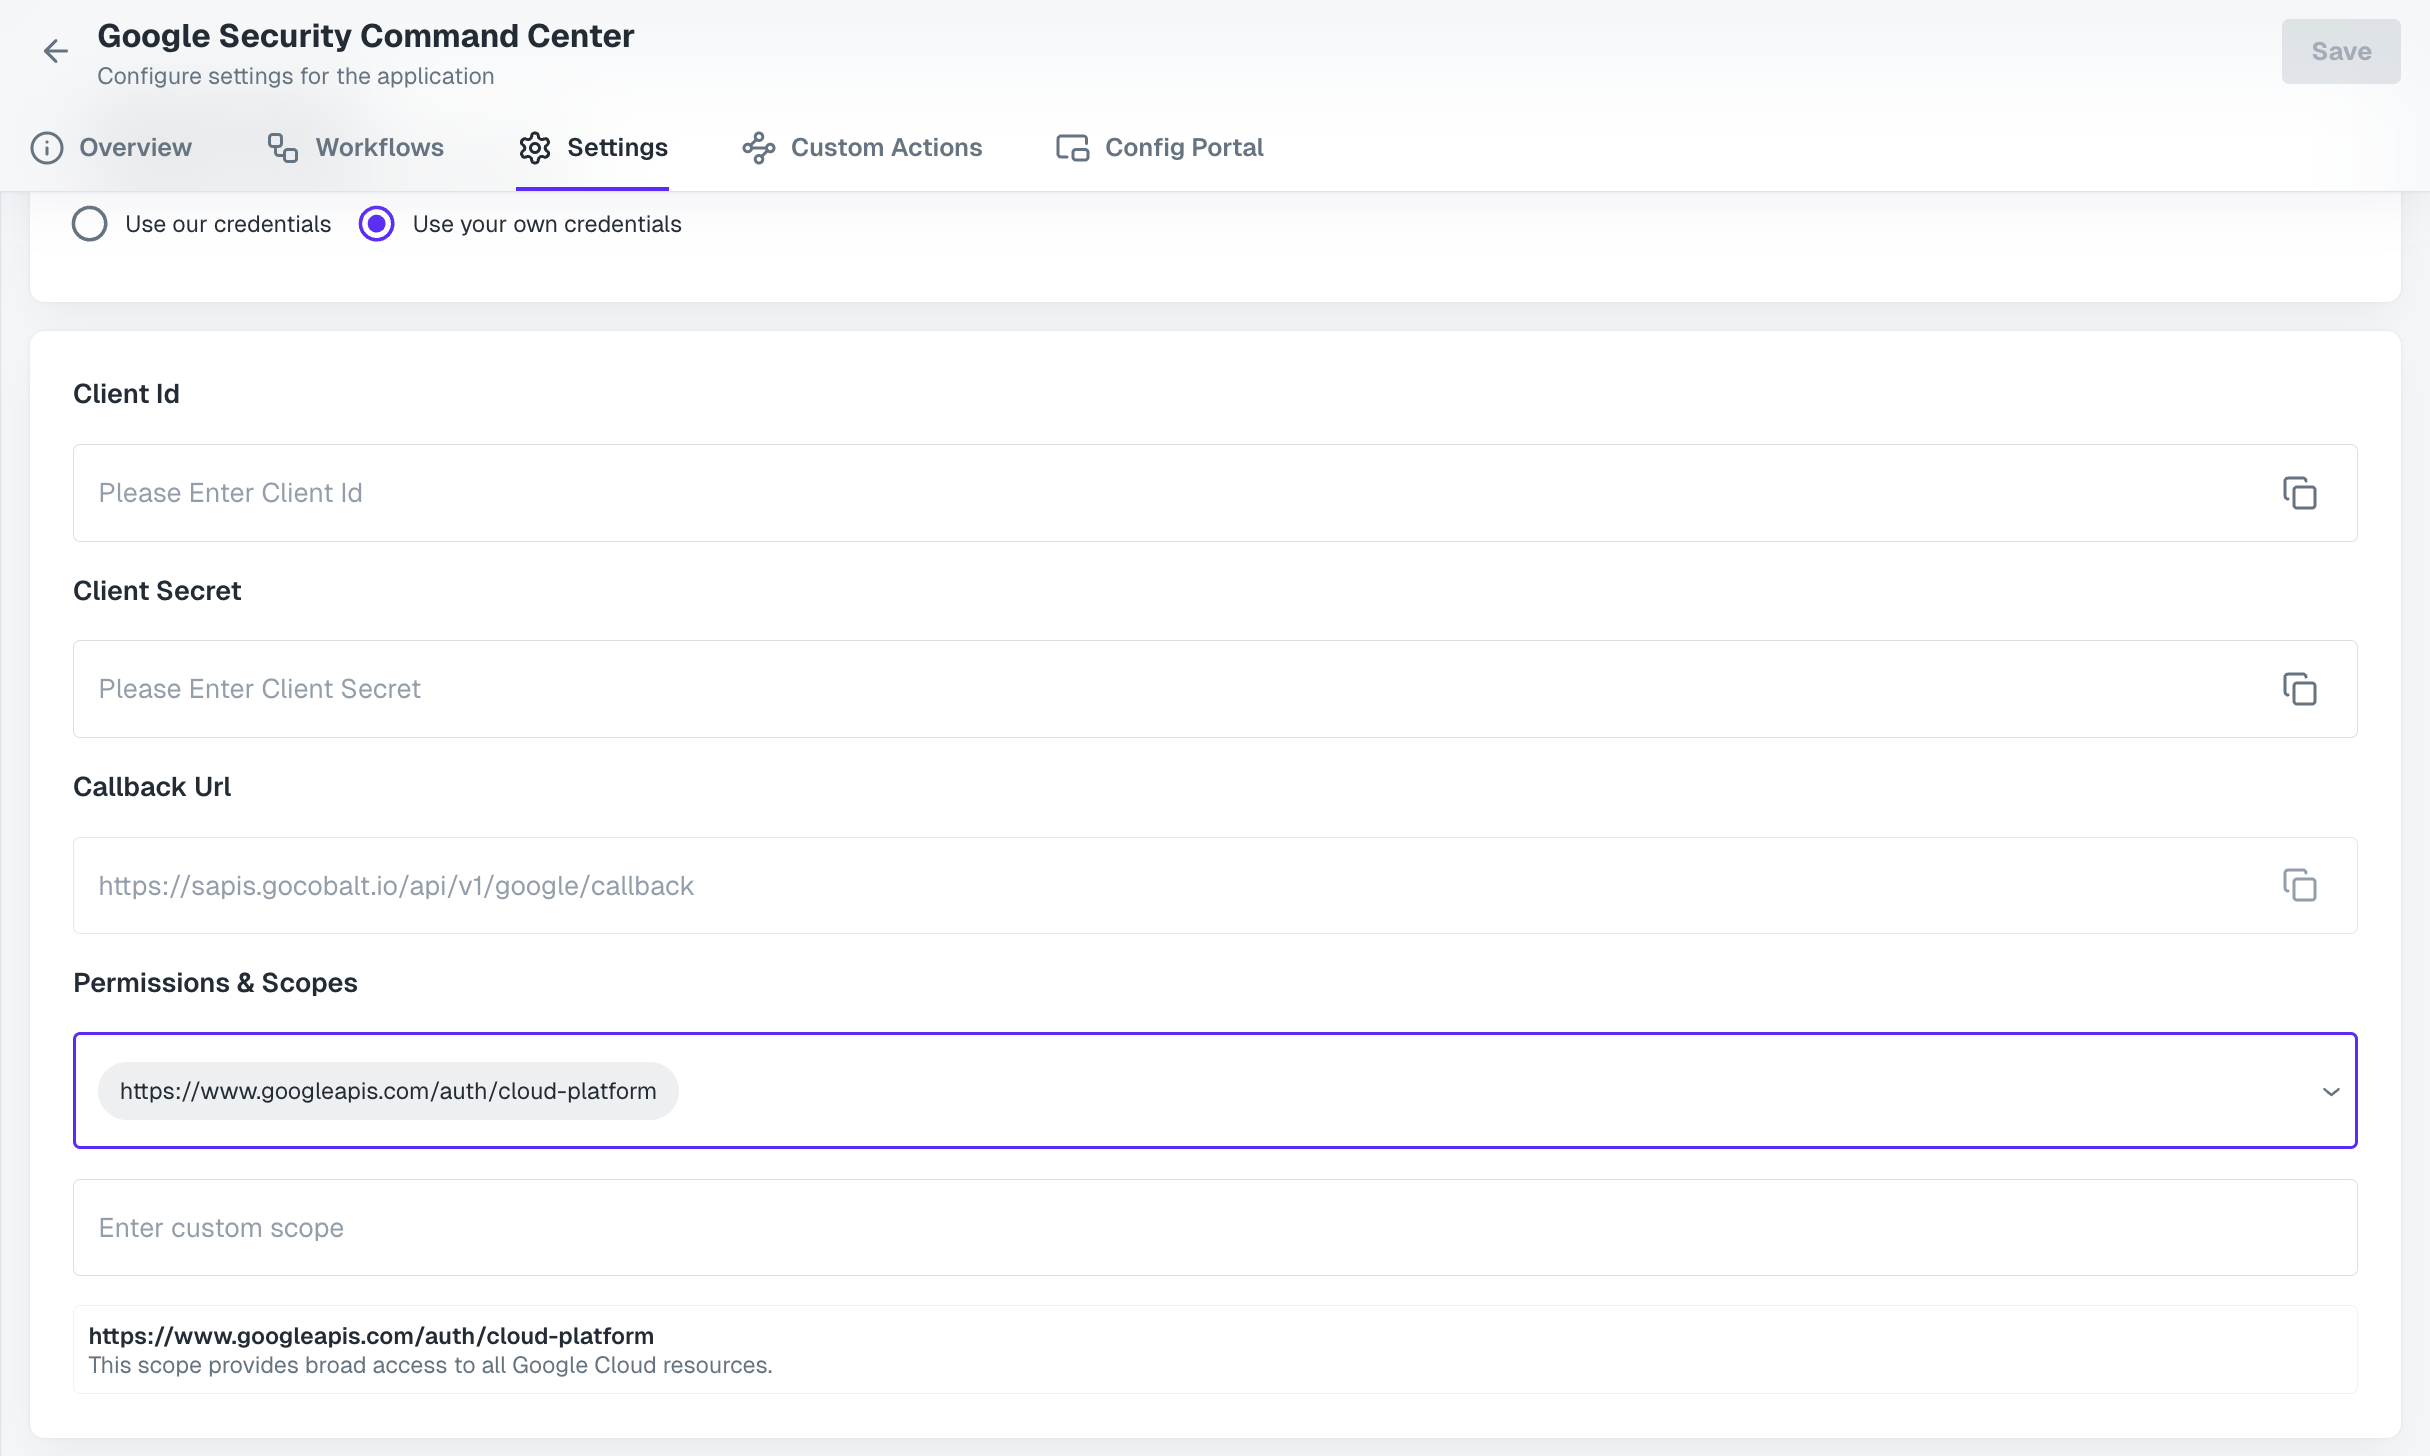
App settings page lets you configure the authentication settings for anOAuth2 based application. For your customers to provide you authorization to access their data,
they would first need to install your application. This page lets you set up your application credentials.
Provide the acquired Client ID and Client Secret under Settings of the app and save it.
Configuring Scopes
Cobalt lets you configure what permissions to ask from your users while they install your application. The scopes can be added or removed from the App settings page, underPermissions & Scopes
section.
For some applications Cobalt sets mandatory scopes which cannot be removed. Additional scopes can be selected from the drop down. Cobalt also has the provision to add any
custom scopes supported by the respective platform.
Once the scopes has been added to the project in Cobalt, go to your Google Cloud Console dashboard and update the scopes as added on Cobalt.
Navigate to Cloud Console dashboard > Select the Project created for Cobalt > Follow the steps 8 and 9 mentioned above for adding scopes.
If you are facing scopes missing or invalid scope error. Make sure you are not passing any custom scope not supported by the platform. And, the scopes selected here are
identical to the ones selected in the platform.
App Review for Google Security Command Center
Projects configured with a publishing status ofIn production are available to any user with a Google Account. Projects configured with a publishing status of In production should complete the verification process, including defining scopes actively requested by your project’s OAuth clients, if it meets one or more of the OAuth verification criteria.
To submit app for review
- In the Project, go to
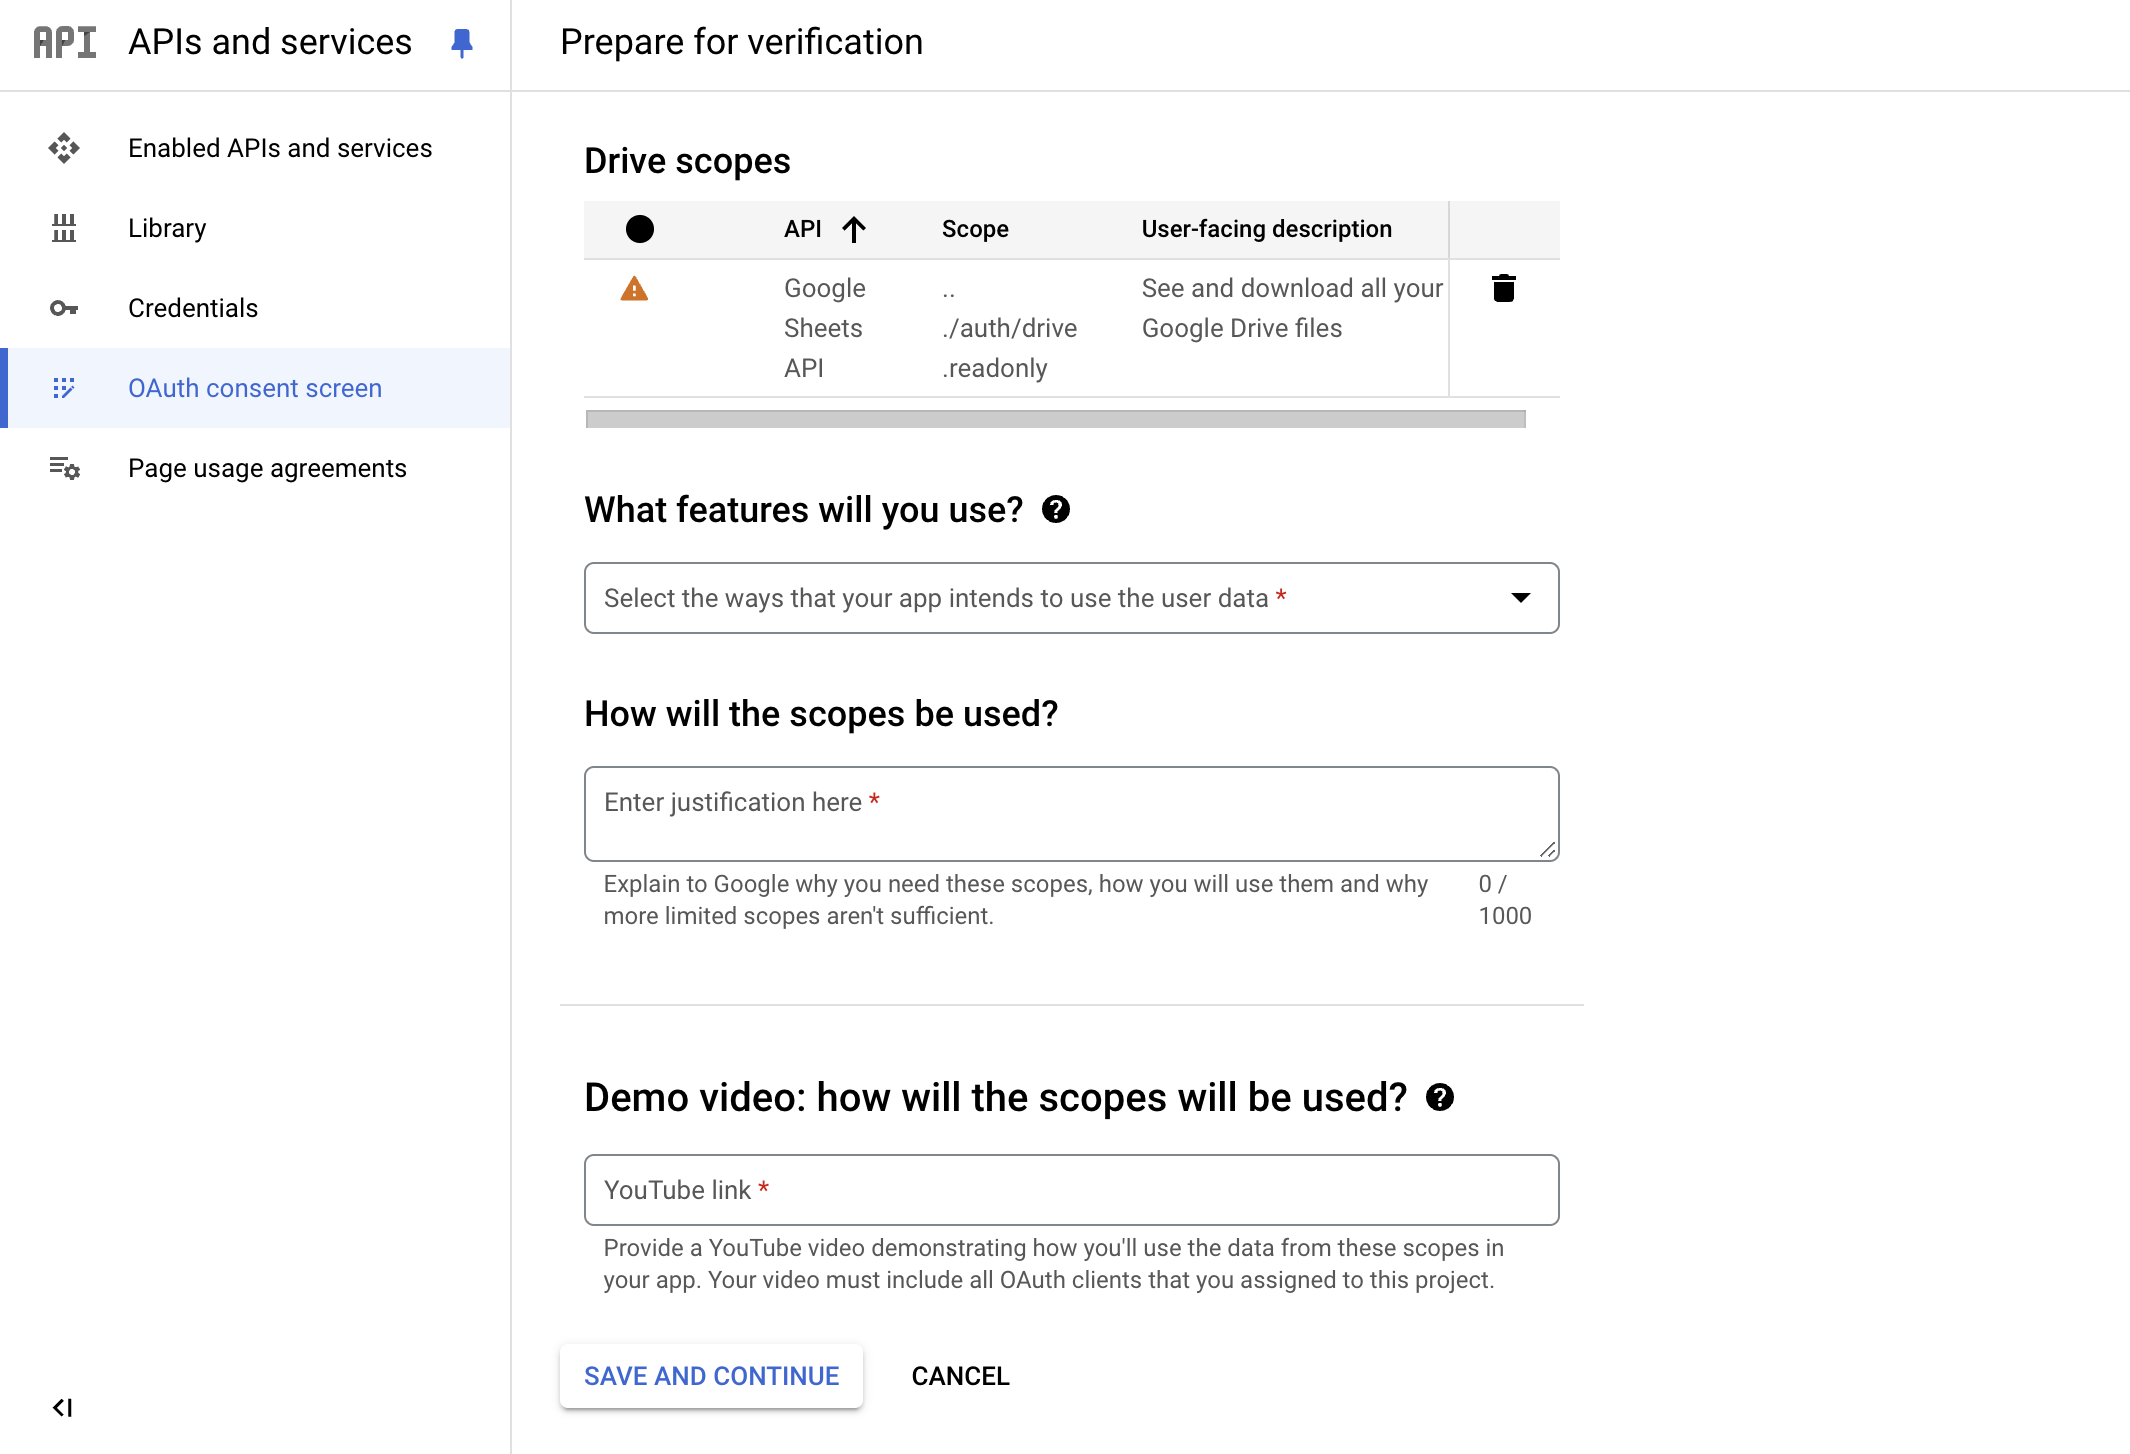
OAuth consent screenin the left menu under APIs and services > Choose the App type asExternaland click onPublish Appbutton. - Click on
Prepare for Verificationand provide the required information. - You will be required to submit justification for the scopes requested and a demo video on YouTube which shows the scopes being used.
Learn more about publishing apps in Google Cloud Console here.
Actions and triggers
Once the above setup is completed, you can create orchestrations of your use-cases using Google Admin actions and triggers. Following are the set of Google Security Command Center actions and triggers supported by Cobalt.Findings
Findings
- List Findings - List Findings under a given ScanRun in Google Security Command Center.
- Get Finding - Get a specific Finding in Google Security Command Center.
- List Source Findings - List findings for a specific source in an organization in Google Security Command Center.
- Create Finding - Create a new finding in a specific source in Google Security Command Center.
- List Location Findings - List findings for a specific source in a specific location in Google Security Command Center.
- Create Location Finding - Create a new finding in a specific source and location in Google Security Command Center.
- Update Finding - Create or update a finding in a specific source in Google Security Command Center.
- Update Location Finding - Create or update a finding in a specific source and location in Google Security Command Center.
Scan Configs
Scan Configs
- List Scan Configs - List ScanConfigs under a project in Google Security Command Center.
- Create Scan Config - Create a new ScanConfig by ID in Google Security Command Center.
- Update Scan Config - Update a ScanConfig in Google Security Command Center.
- Delete Scan Config - Delete a ScanConfig in Google Security Command Center.
Scan Runs
Scan Runs
- List Scan Runs - List ScanRuns under a ScanConfig in Google Security Command Center.
- Get ScanRun - Get a specific ScanRun in Google Security Command Center.
Others
Others
- HTTP Request - Make HTTP API calls to any Google Security Command Center documented REST APIs.