Intercom
Setup
Connect to your Intercom app for OAuth.
To setup your Intercom app in Cobalt for OAuth, you will need the following credentials from your Intercom Developer Hub:
 Provide the acquired Client ID and Client Secret under Settings of the app and save it.
 Once the scopes has been added to the application in Cobalt, go to your Intercom Developer Hub and update the scopes as added on Cobalt.
Select the OAuth App created for Cobalt > Click on
Once the scopes has been added to the application in Cobalt, go to your Intercom Developer Hub and update the scopes as added on Cobalt.
Select the OAuth App created for Cobalt > Click on
- Client ID
- Client Secret
- Scopes
Pre-requisites
- Intercom Developer Hub account.
Required Settings
- Mandatory Scopes
- Read admins
If you haven’t already created an app in Intercom, you’d need to create one.
Creating an app in Intercom
To create a Intercom app and acquire the above mentioned credentials, please follow the steps mentioned below:- Log in to your Intercom Developer Hub.
- Click on the
Your Appsoption in the top navbar.
- Click on
New appbutton, give theApp Name, select theWorkspaceand click on theCreate Appbutton. - Go to your
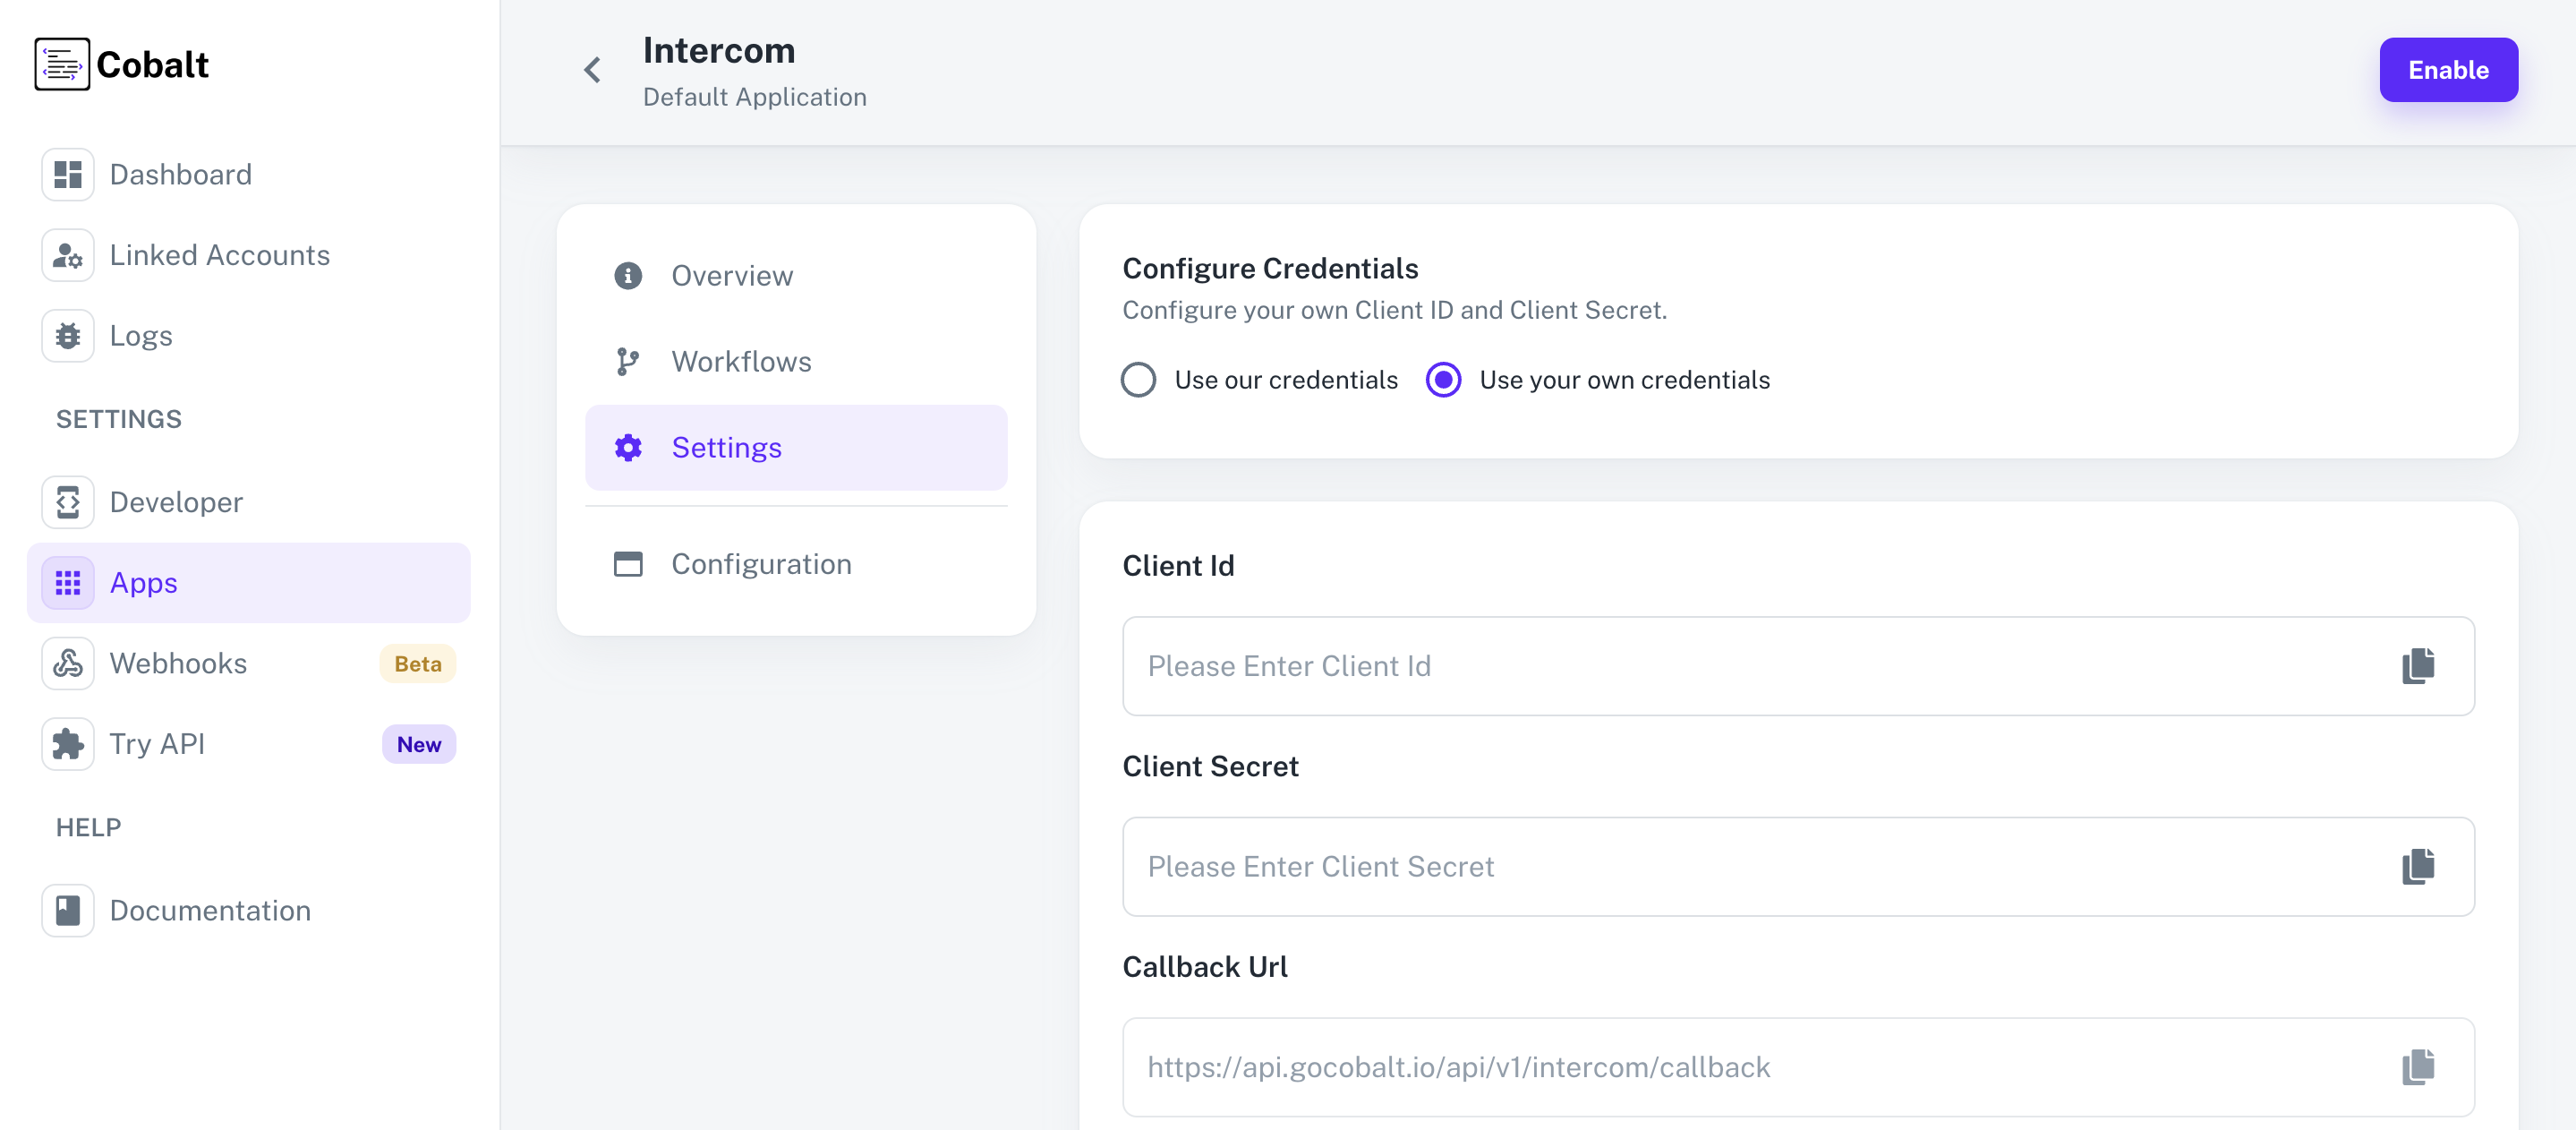
Apps catalogin Cobalt > Search forIntercom>Settings>Use your credentials>Callback Url> Copy it. - Navigate to
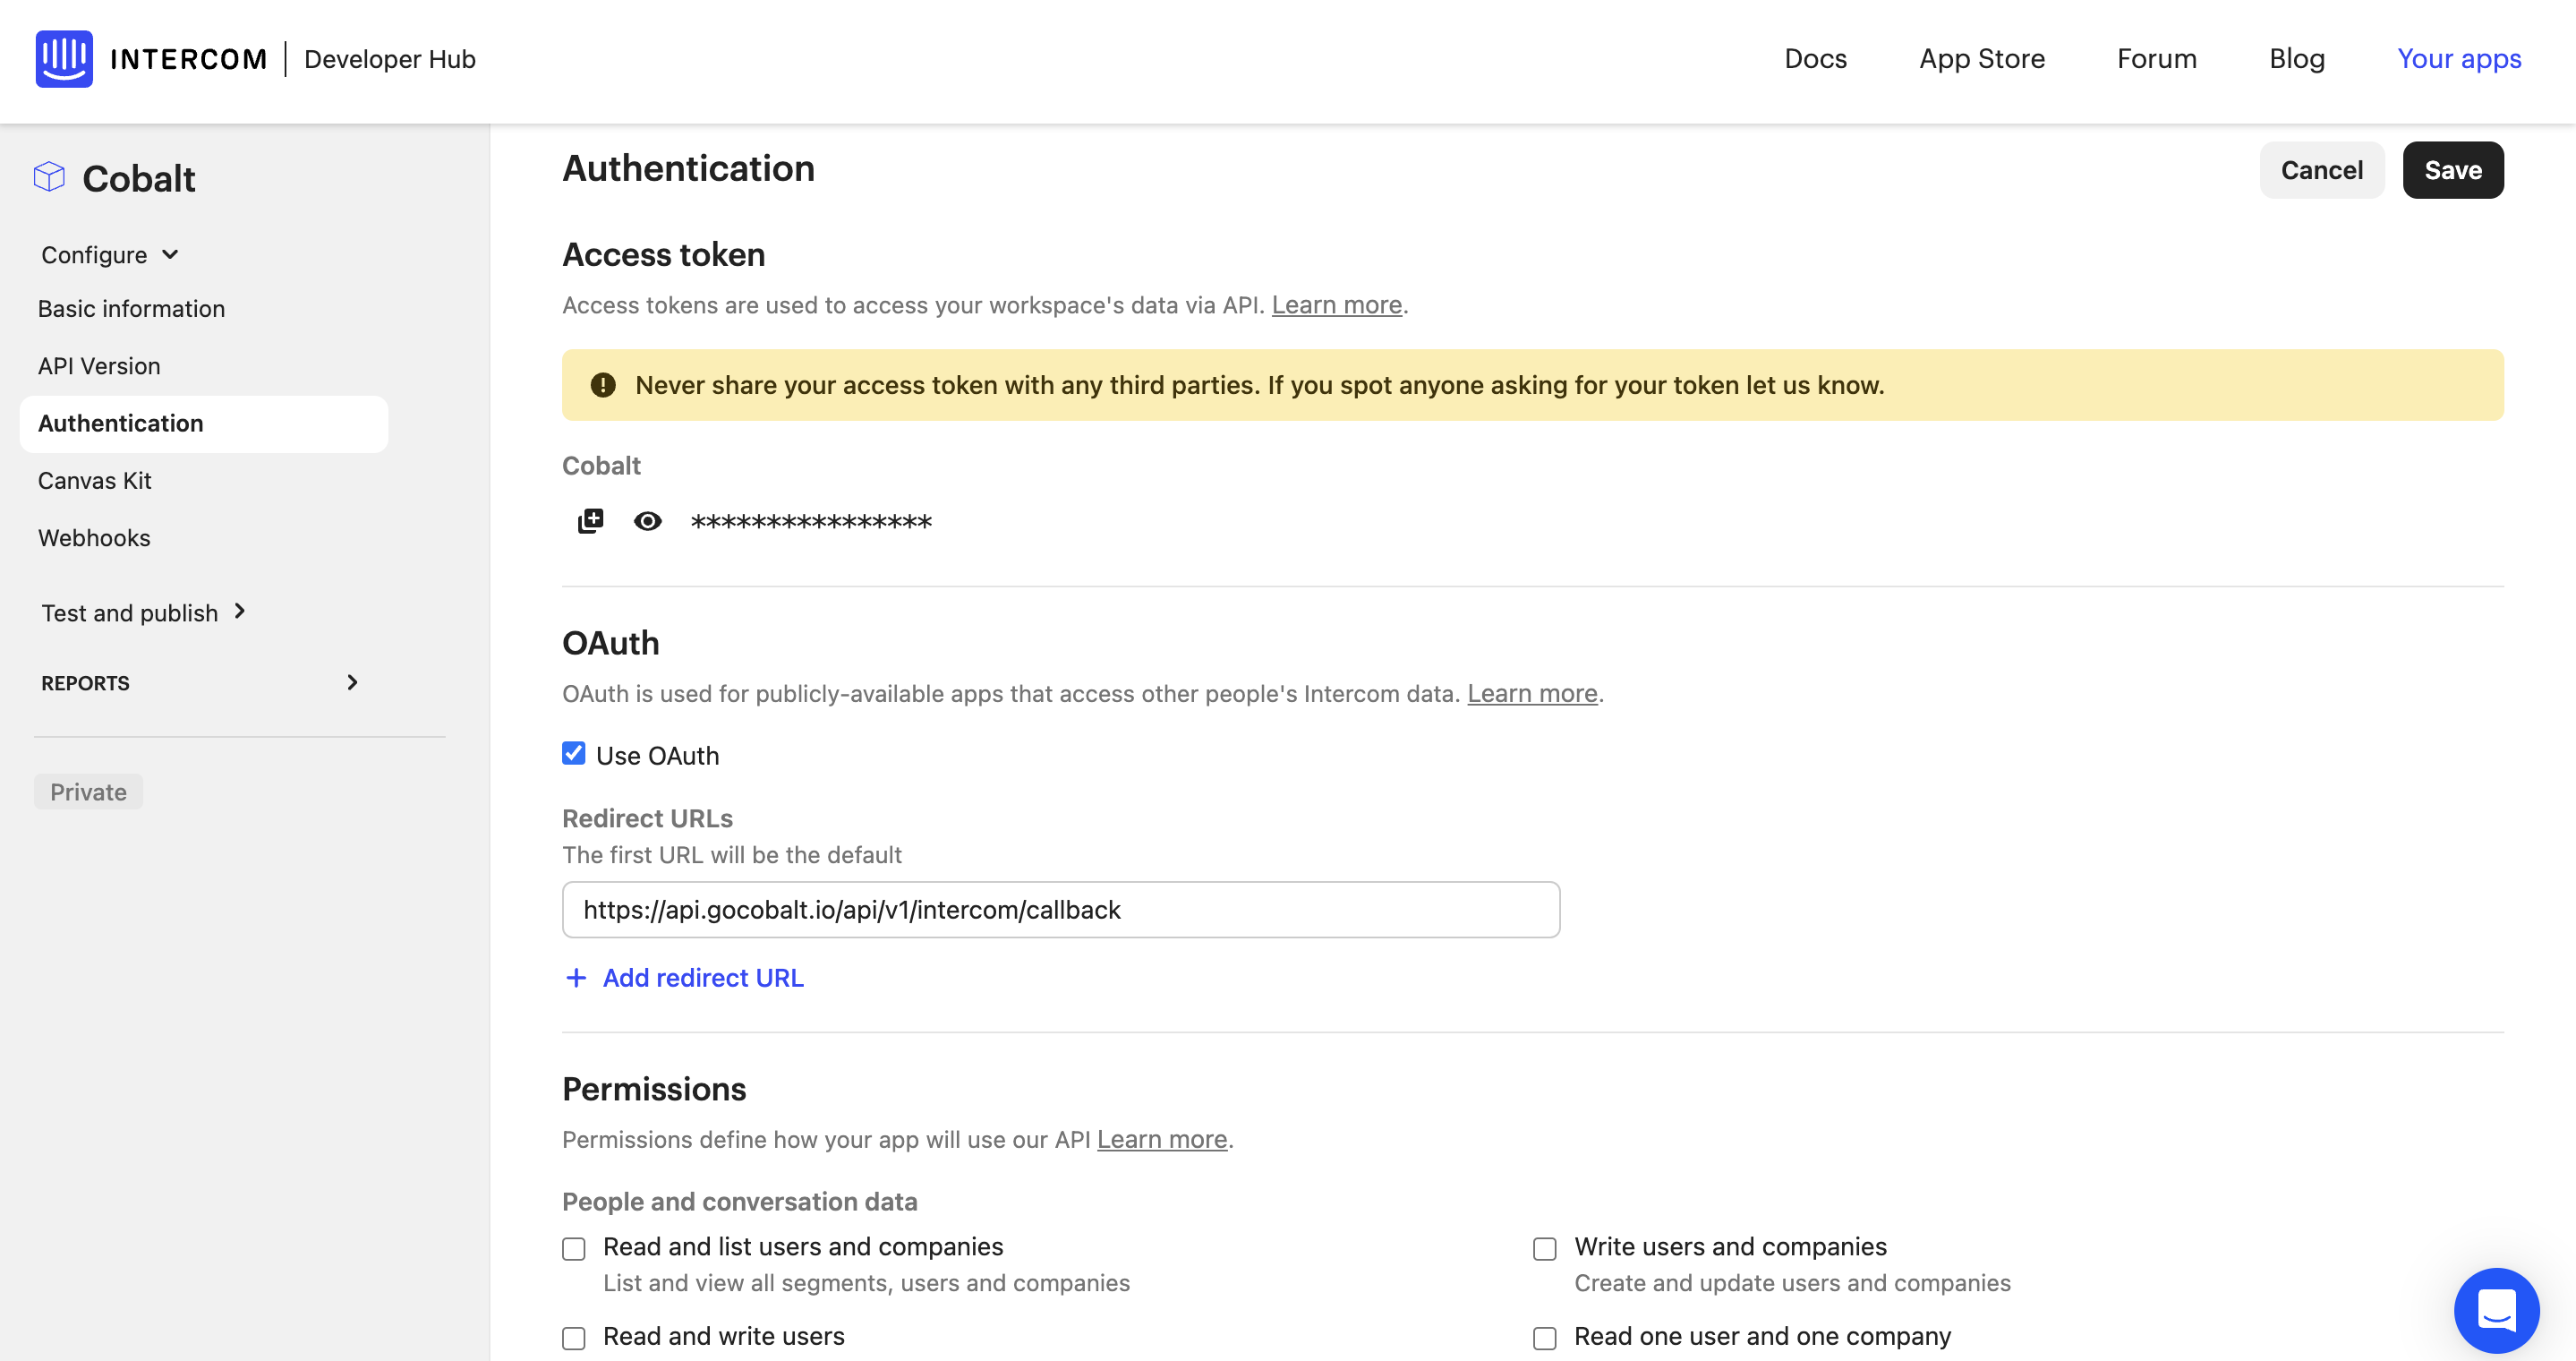
AuthenticationunderConfigurein the side menu > click onEditin the right > Tick theUse OAuthoption > Click on+ Add redirect URL> Paste the Callback Url. - In the same page, select the mandatory scopes in the Permissions section and click on the
Savebutton.
To access your customer’s Intercom data using OAuth, you will need to submit your app for review and make it a public-facing integration. Learn more about App publishing here.
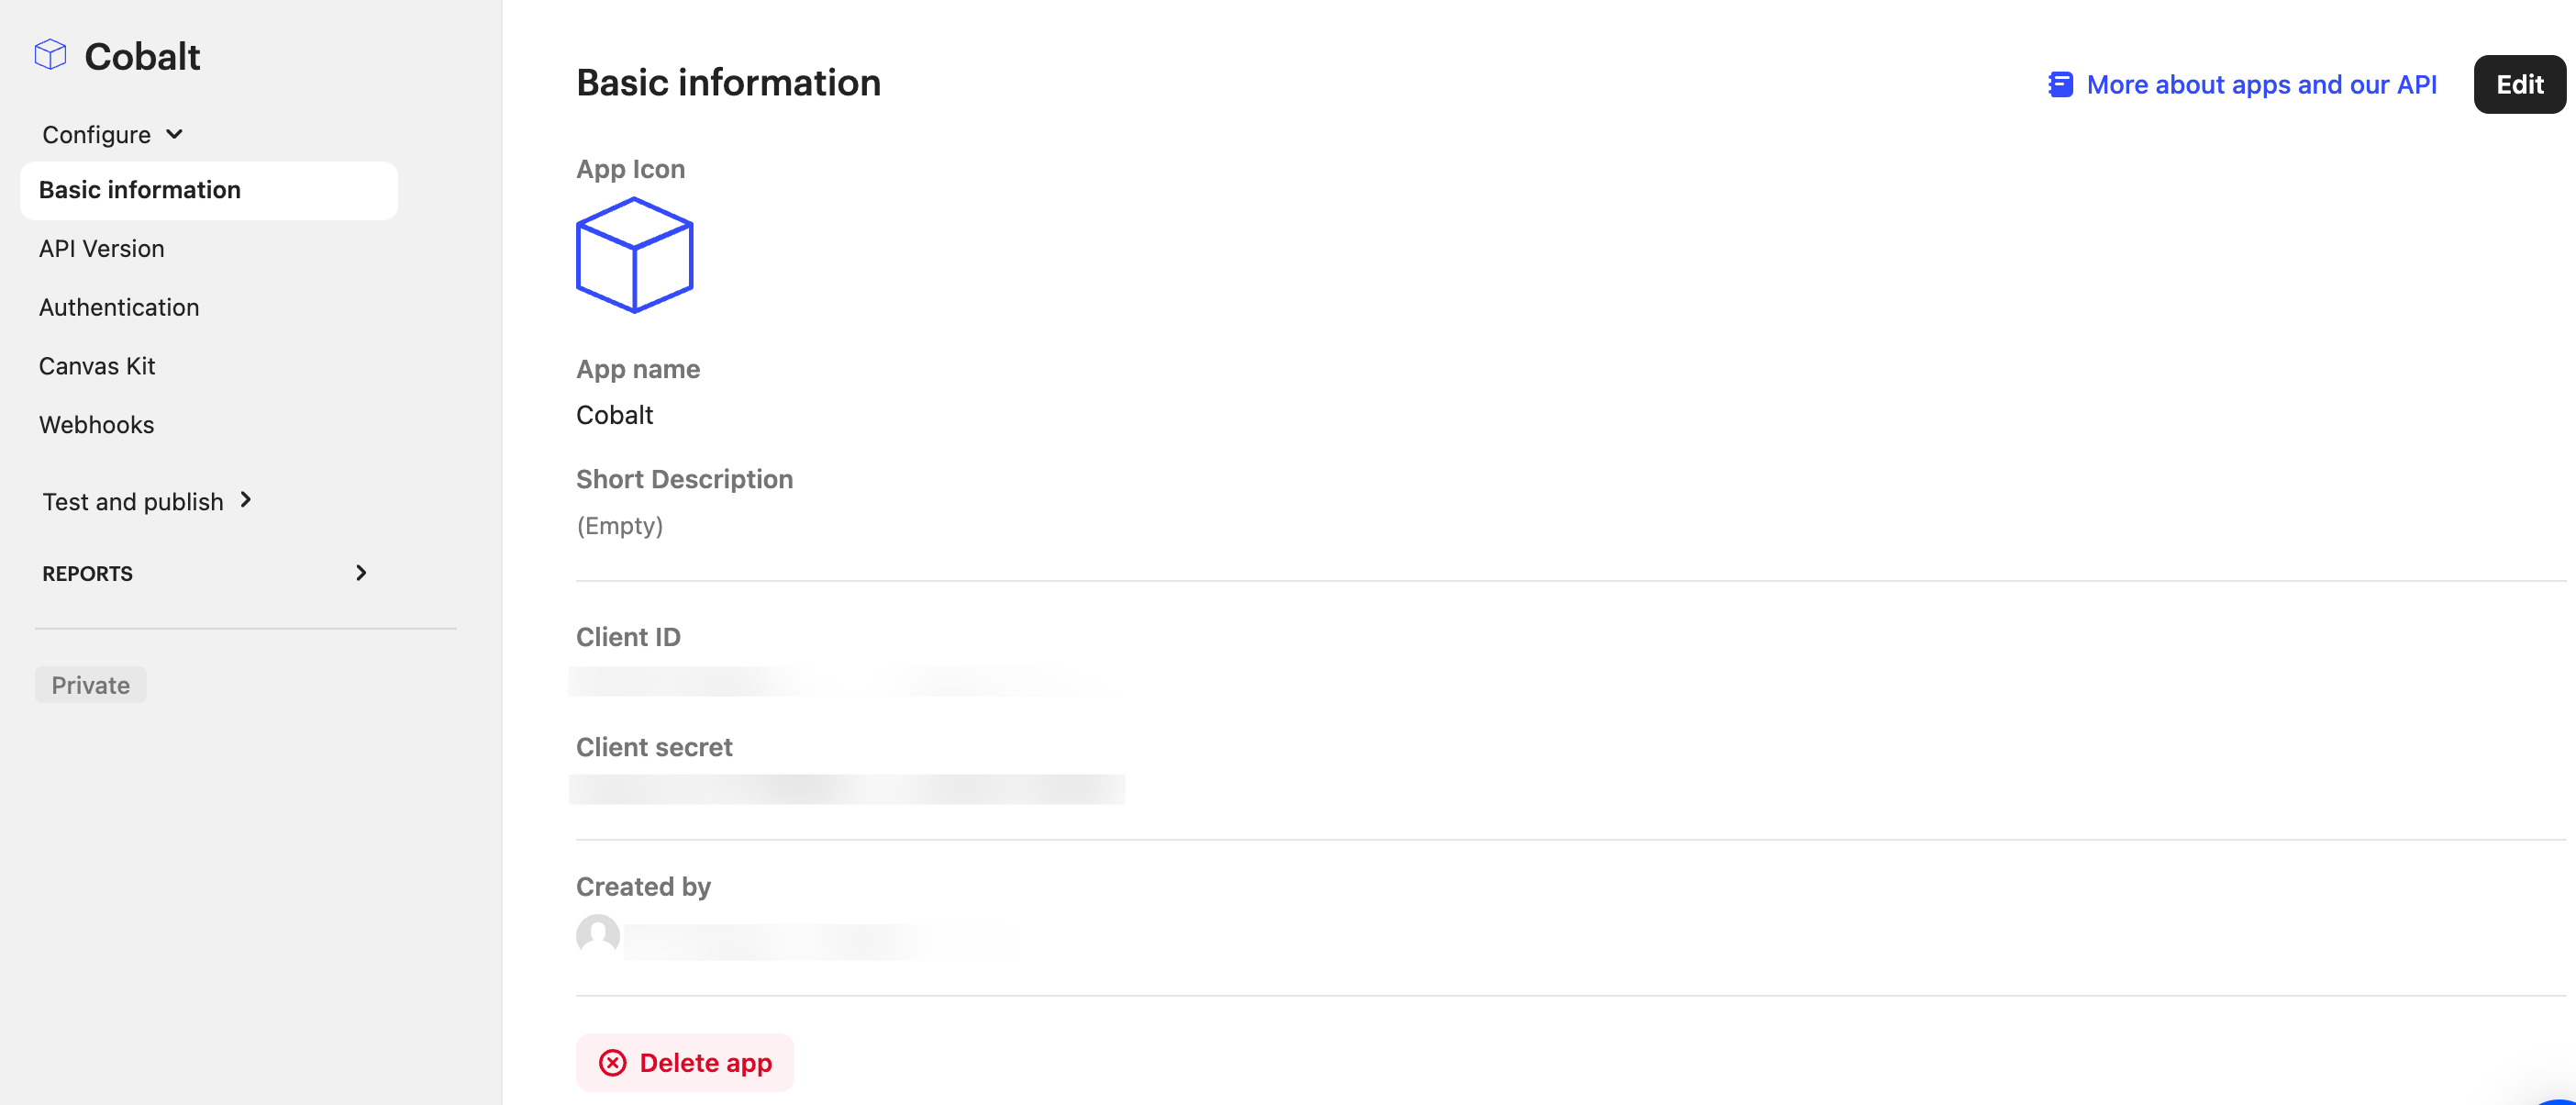
- Navigate to the Basic information option in the side menu and copy the Client ID and Client Secret displayed.
Configuring credentials in Cobalt
App settings page lets you configure the authentication settings for anOAuth2 based application. For your customers to provide you authorization to access their data,
they would first need to install your application. This page lets you set up your application credentials.
Provide the acquired Client ID and Client Secret under Settings of the app and save it.
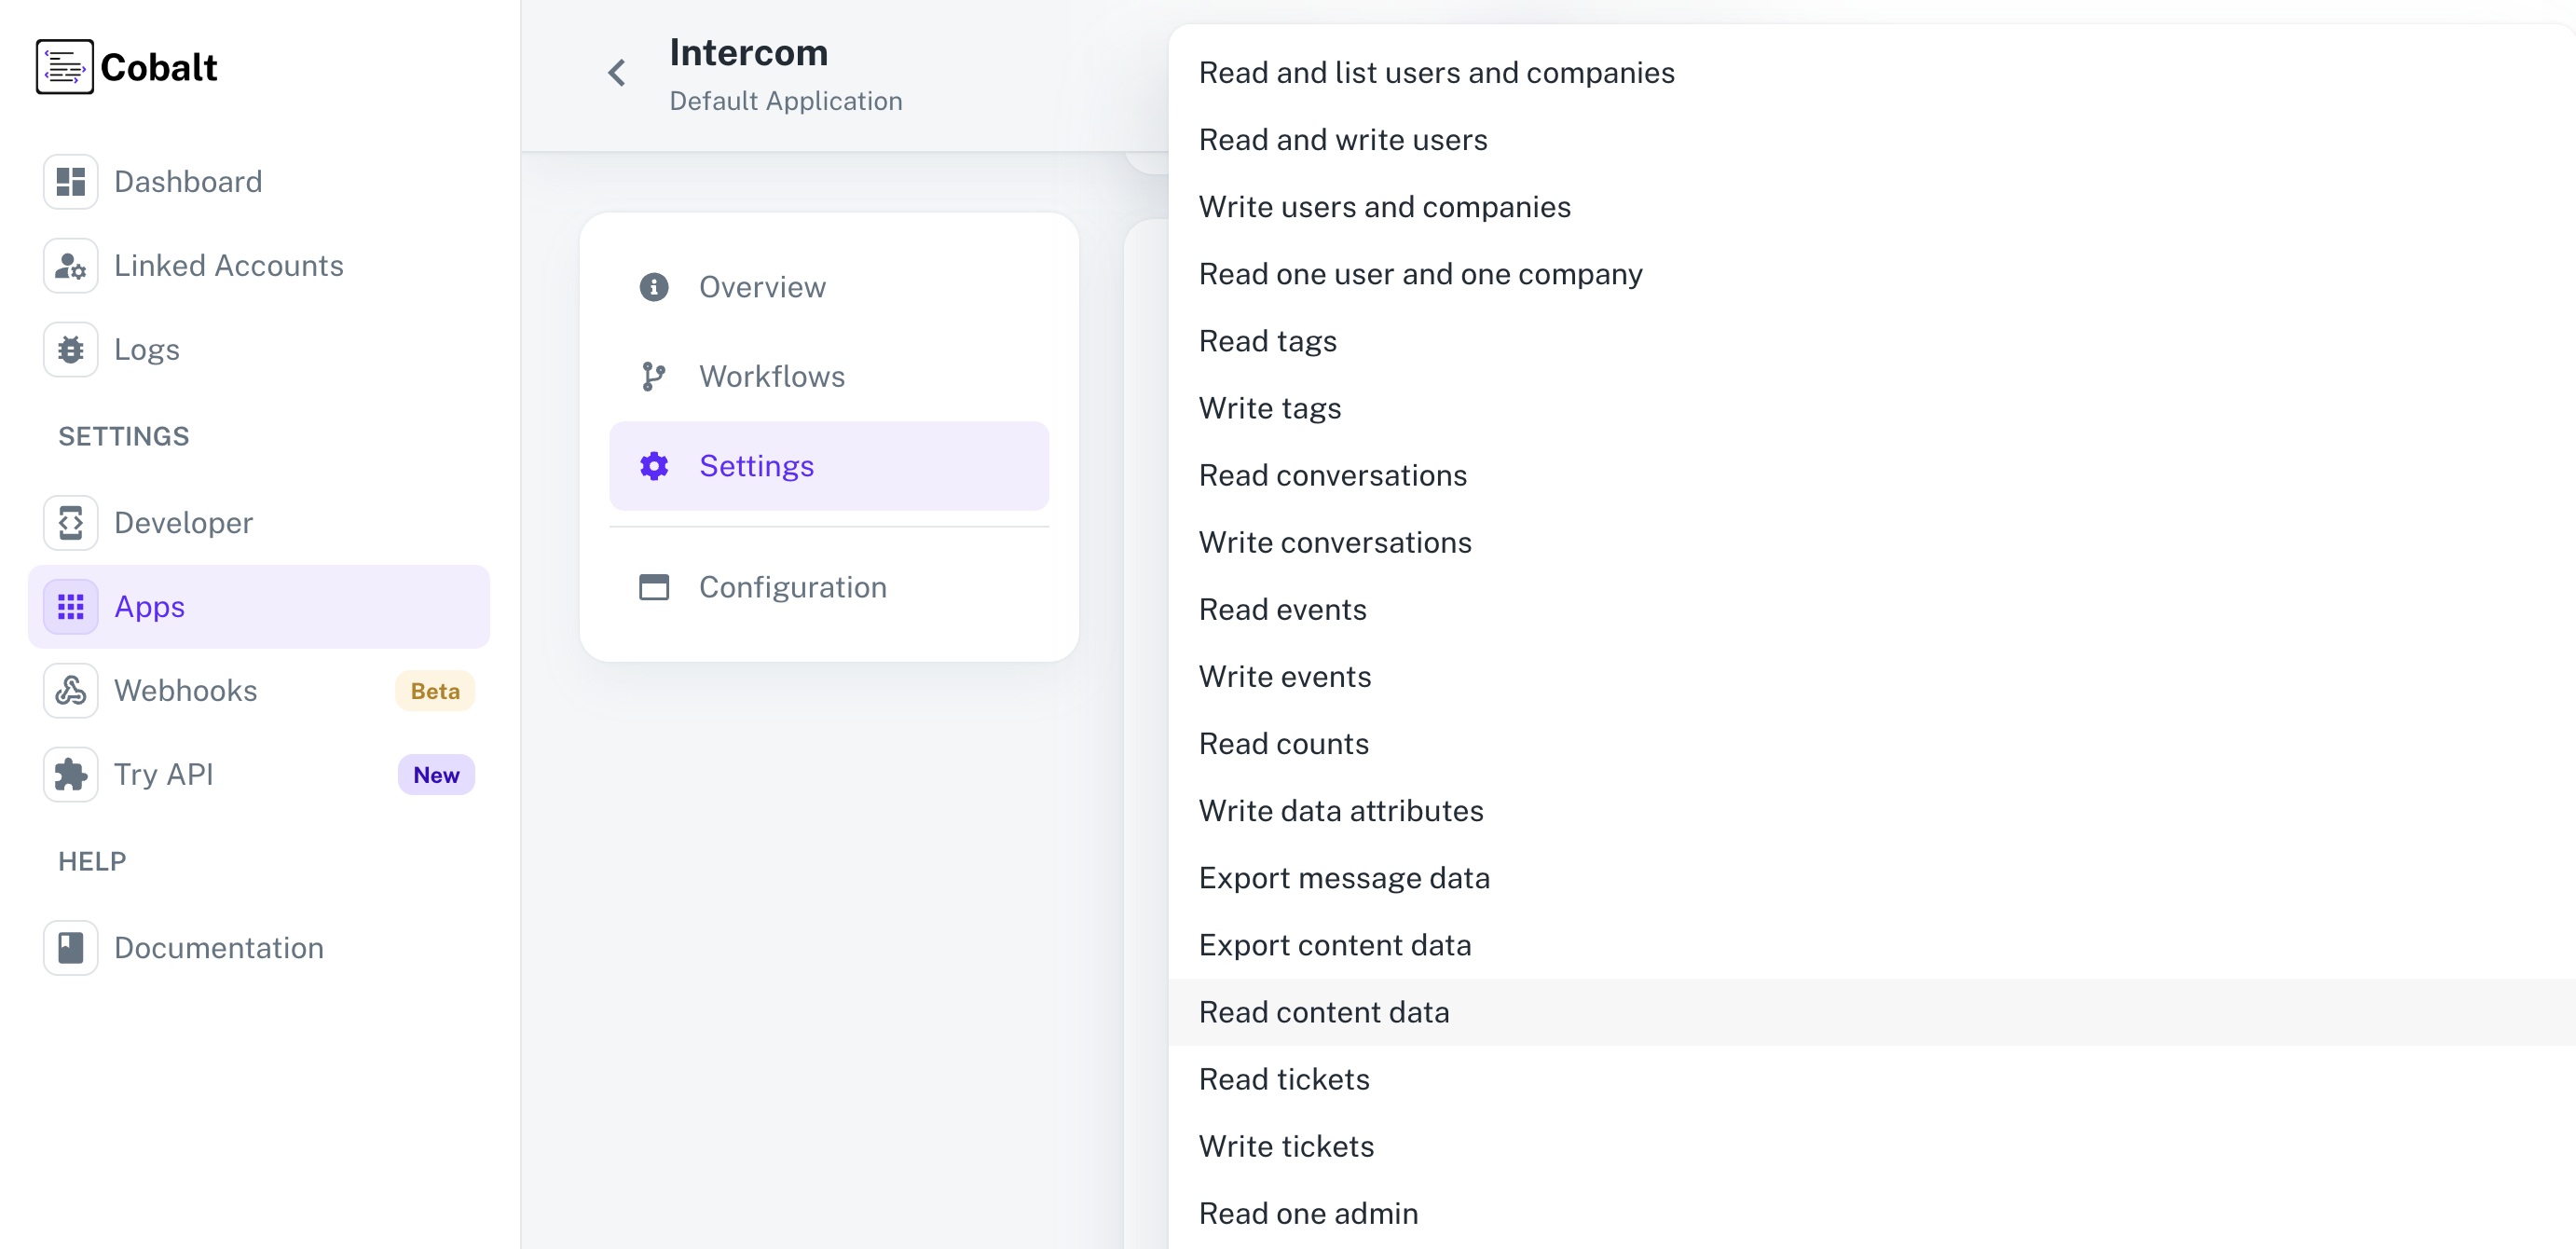
Configuring Scopes
Cobalt lets you configure what permissions to ask from your users while they install your application. The scopes can be added or removed from the App settings page, underPermissions & Scopes
section.
For some applications Cobalt sets mandatory scopes which cannot be removed. Additional scopes can be selected from the drop down. Cobalt also has the provision to add any
custom scopes supported by the respective platform.
Once the scopes has been added to the application in Cobalt, go to your Intercom Developer Hub and update the scopes as added on Cobalt.
Select the OAuth App created for Cobalt > Click on Authentication under Configure > Click on Edit > Add the scopes as added in Cobalt > Click on Save.
If you are facing scopes missing or invalid scope error. Make sure you are not passing any custom scope not supported by the platform. And, the scopes selected here are
identical to the ones selected in the platform.
Actions and triggers
Once the above setup is completed, you can create orchestrations of your use-cases using Intercom actions and triggers. Following are the set of Intercom actions and triggers supported by Cobalt.Companies
Companies
- List Companies - Get all companies in Intercom.
- Create Company - Creates a company in Intercom.
- Update Company - Updates a company in Intercom.
Conversations
Conversations
- List Conversations - Gets a list of conversations in Intercom.
- Create Conversation - Creates a conversation in Intercom.
- Update Conversation - Updates a conversation in Intercom.
- Reply Conversation - Replies to a conversation in Intercom.
Tags
Tags
Tickets
Tickets
- Create Ticket - Creates a ticket in Intercom.
- Update Ticket - Updates a ticket in Intercom.
- Search Ticket - Searches a ticket based on the search parameter in Intercom.
Others
Others
- HTTP Request - Make HTTP API calls to any Intercom documented REST APIs.