Microsoft Teams
Setup
Connect to your Microsoft Teams app for OAuth.
To setup your Microsoft Teams app in Cobalt for OAuth, you will need the following credentials from your Microsoft Azure account:
 Provide the acquired Client ID and Client Secret under Settings of the app and save it.
 Once the scopes has been added to the application in Cobalt, go to your Microsoft Azure account and update the scopes as added on Cobalt.
Select the OAuth App created for Cobalt and follow Step 6 and 7 above.
Once the scopes has been added to the application in Cobalt, go to your Microsoft Azure account and update the scopes as added on Cobalt.
Select the OAuth App created for Cobalt and follow Step 6 and 7 above.
- Bot Client ID
- Bot Client Secret
- App ID
- Tenant ID
- Scopes
Pre-requisites
- Microsoft Azure Account. You can create one here.
- A bot registered in the Microsoft Developer Portal for Teams (See Creating a Teams bot for setup instructions).
- Microsoft Teams license
- Office 365 license with Admin permissions. You can get the License here.
Required Settings
- Mandatory Scopes
- openid
- offline_access
If you haven’t already created an app in Microsoft Azure, you’d need to create one.
Creating a Teams bot
New Bot creation steps
To create a Microsoft Teams bot, please follow the steps mentioned below:- Log in to your Microsoft Developer Portal for Teams.
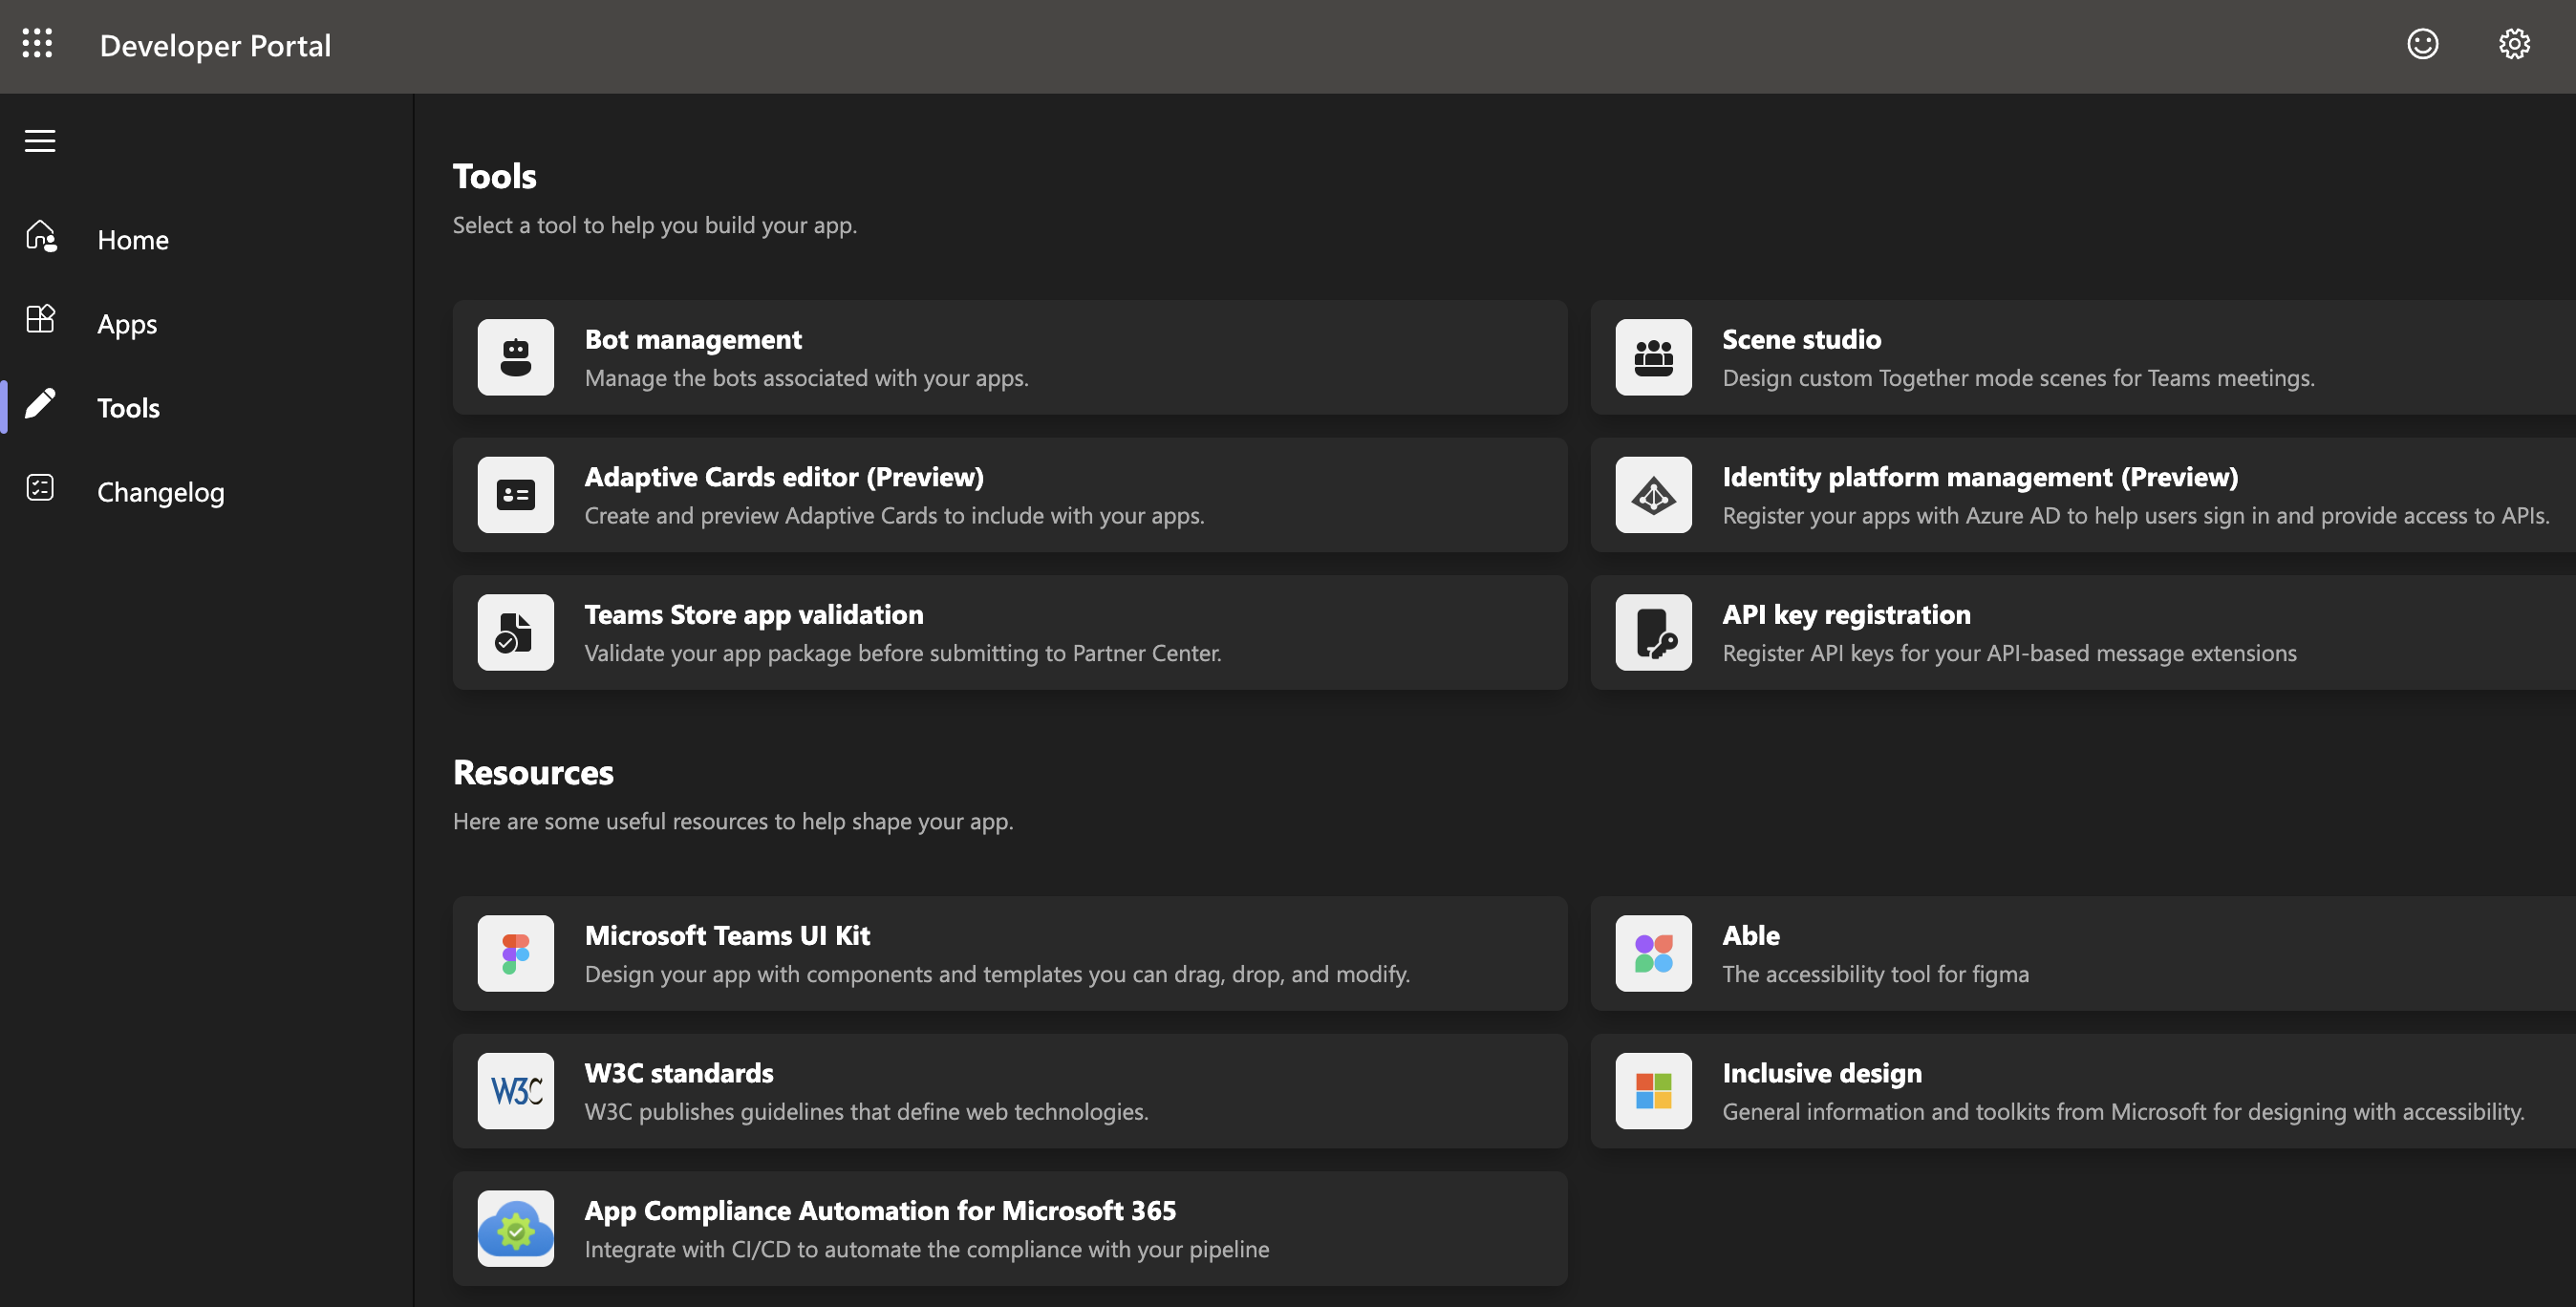
- Navigate to
Toolsin the side menu and selectBot Management.
- Click on
+ New Bot> provide a Name and click onAdd. It’s recommended to append a word likeBotso that it’s easy to identify this later on.
Associate Teams bot to application
Now, you need to associate this bot with your Teams application.-
In the Teams Developer Portal, navigate to
Appsin the side menu. -
If you do not have a Teams app yet, click New app and provide a name. This name will be the one displayed in the Microsoft Teams store and to your users.
-
In
Basic information, you need to provide a short description and URLs for your application’s website, Privacy Policy, and Terms of Use. -
Click
Savebelow.
Ensure that all the fields for App inBasic informationare provided, otherwise it gives error while uploading the app in Teams for testing. -
In
-
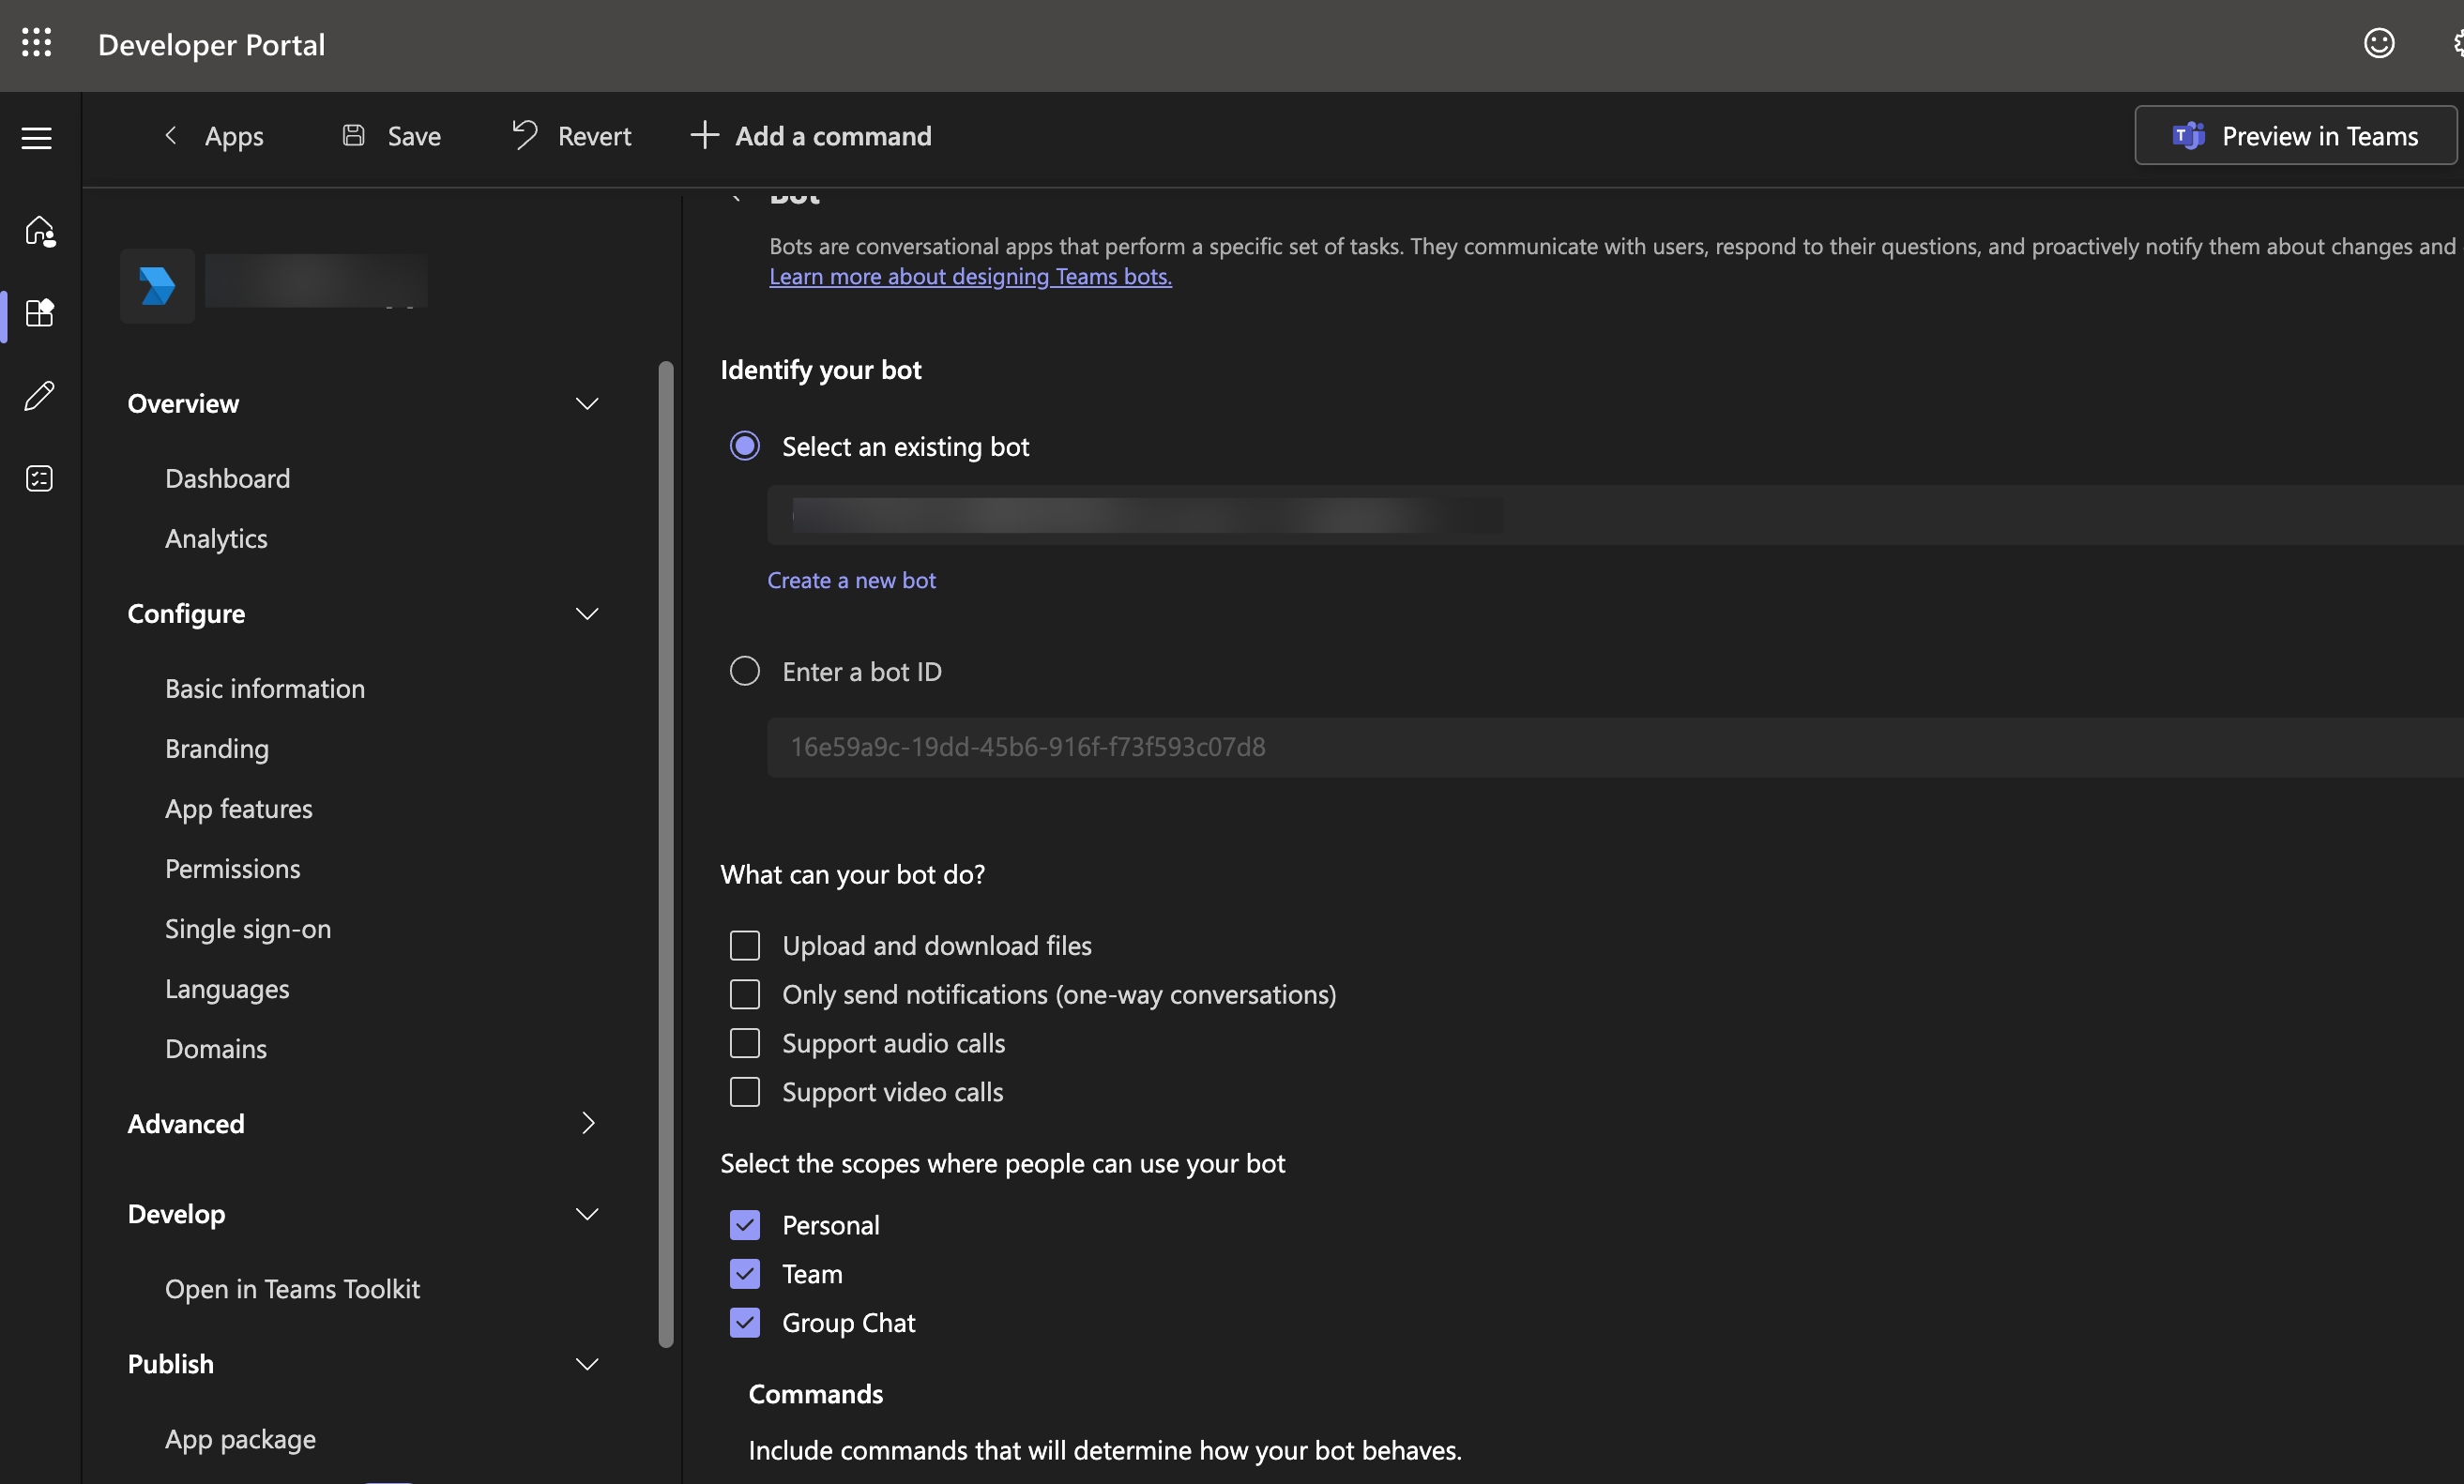
Under
Configurein the side menu of the app, click onApp features. -
Select
Botand choose the Bot that you created above inSelect an existing bot, choose capabilities as applicable and click onSavebelow.
Testing Microsoft Teams Bot
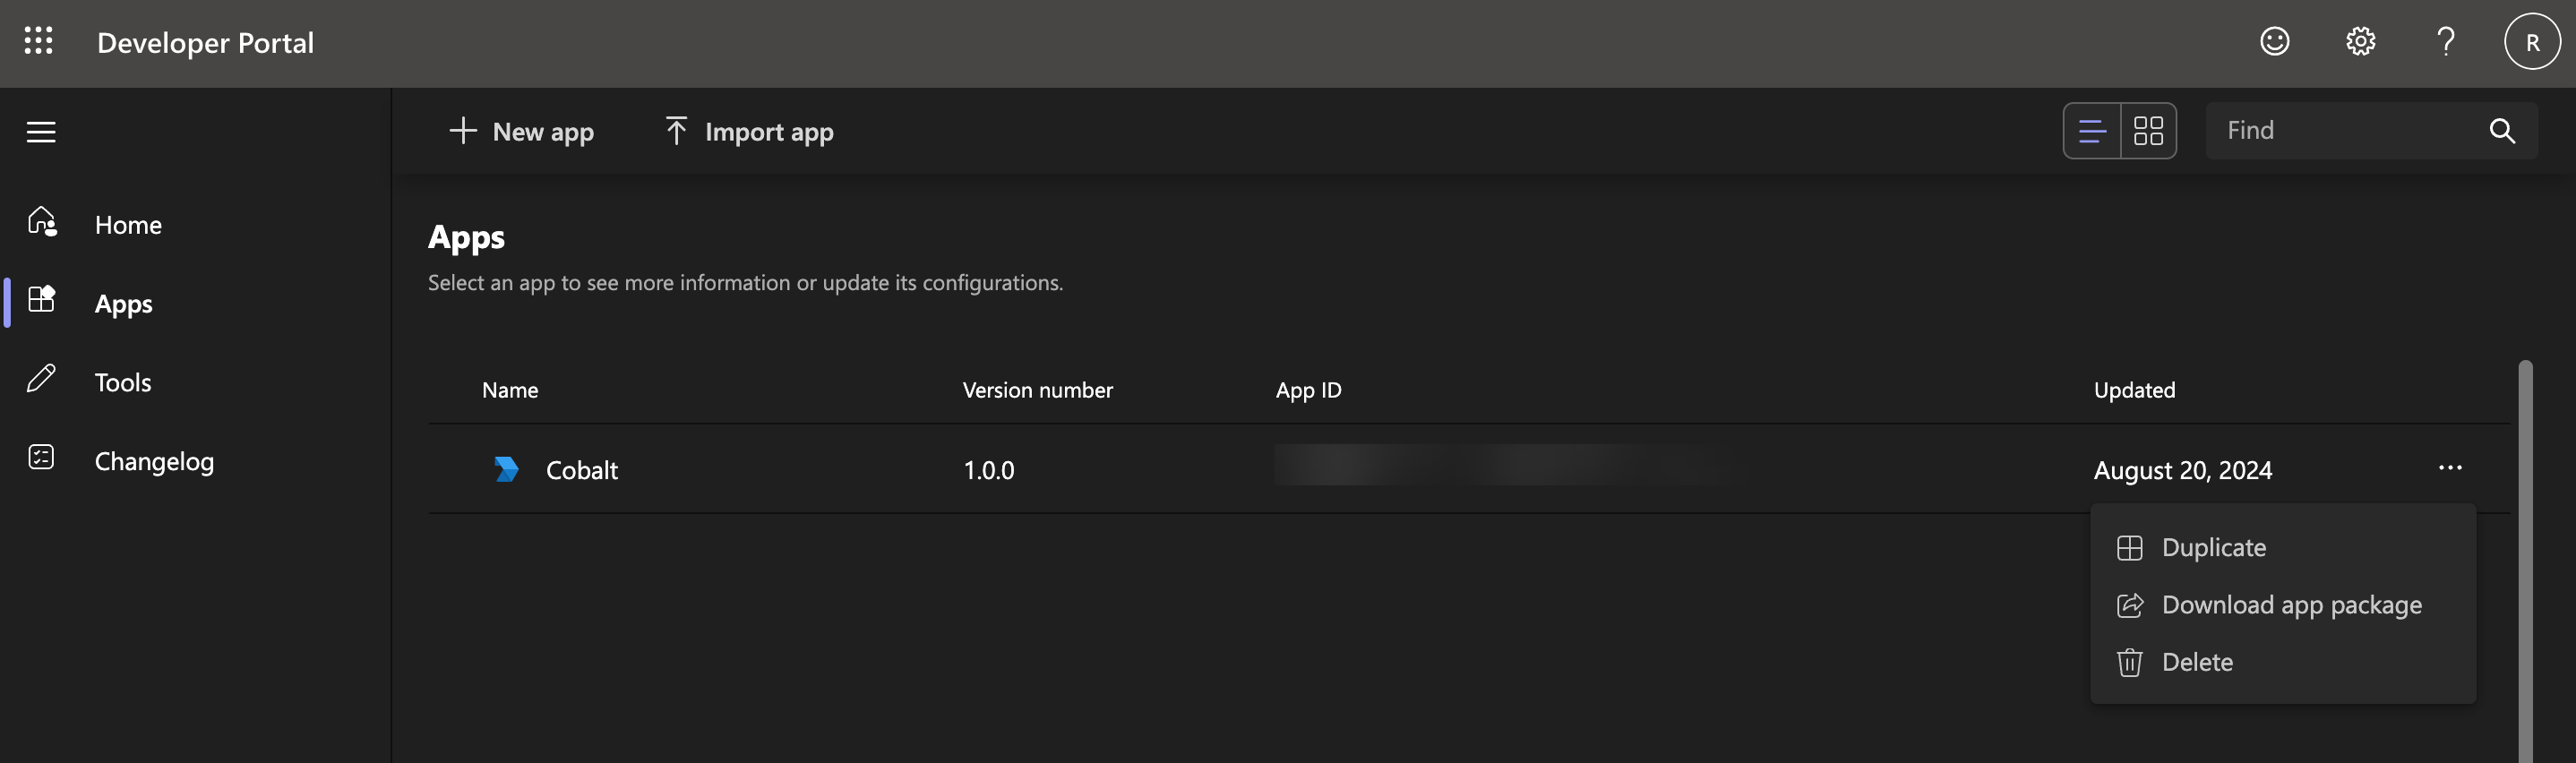
If your app is not published on the Microsoft Teams App Store, then follow the steps given to test your app in Teams:- In your Teams Developer Portal, go to the
Appcreated for testing. - Click on the triple-dot menu of the app and choose
Download app packageoption. The package will get downloaded as a .zip file.
- Go to the Microsoft Teams account in which you would like to test the app and it’s authentication.
You will not be able to login into the platform correctly if appropriate license or permissions are missing.
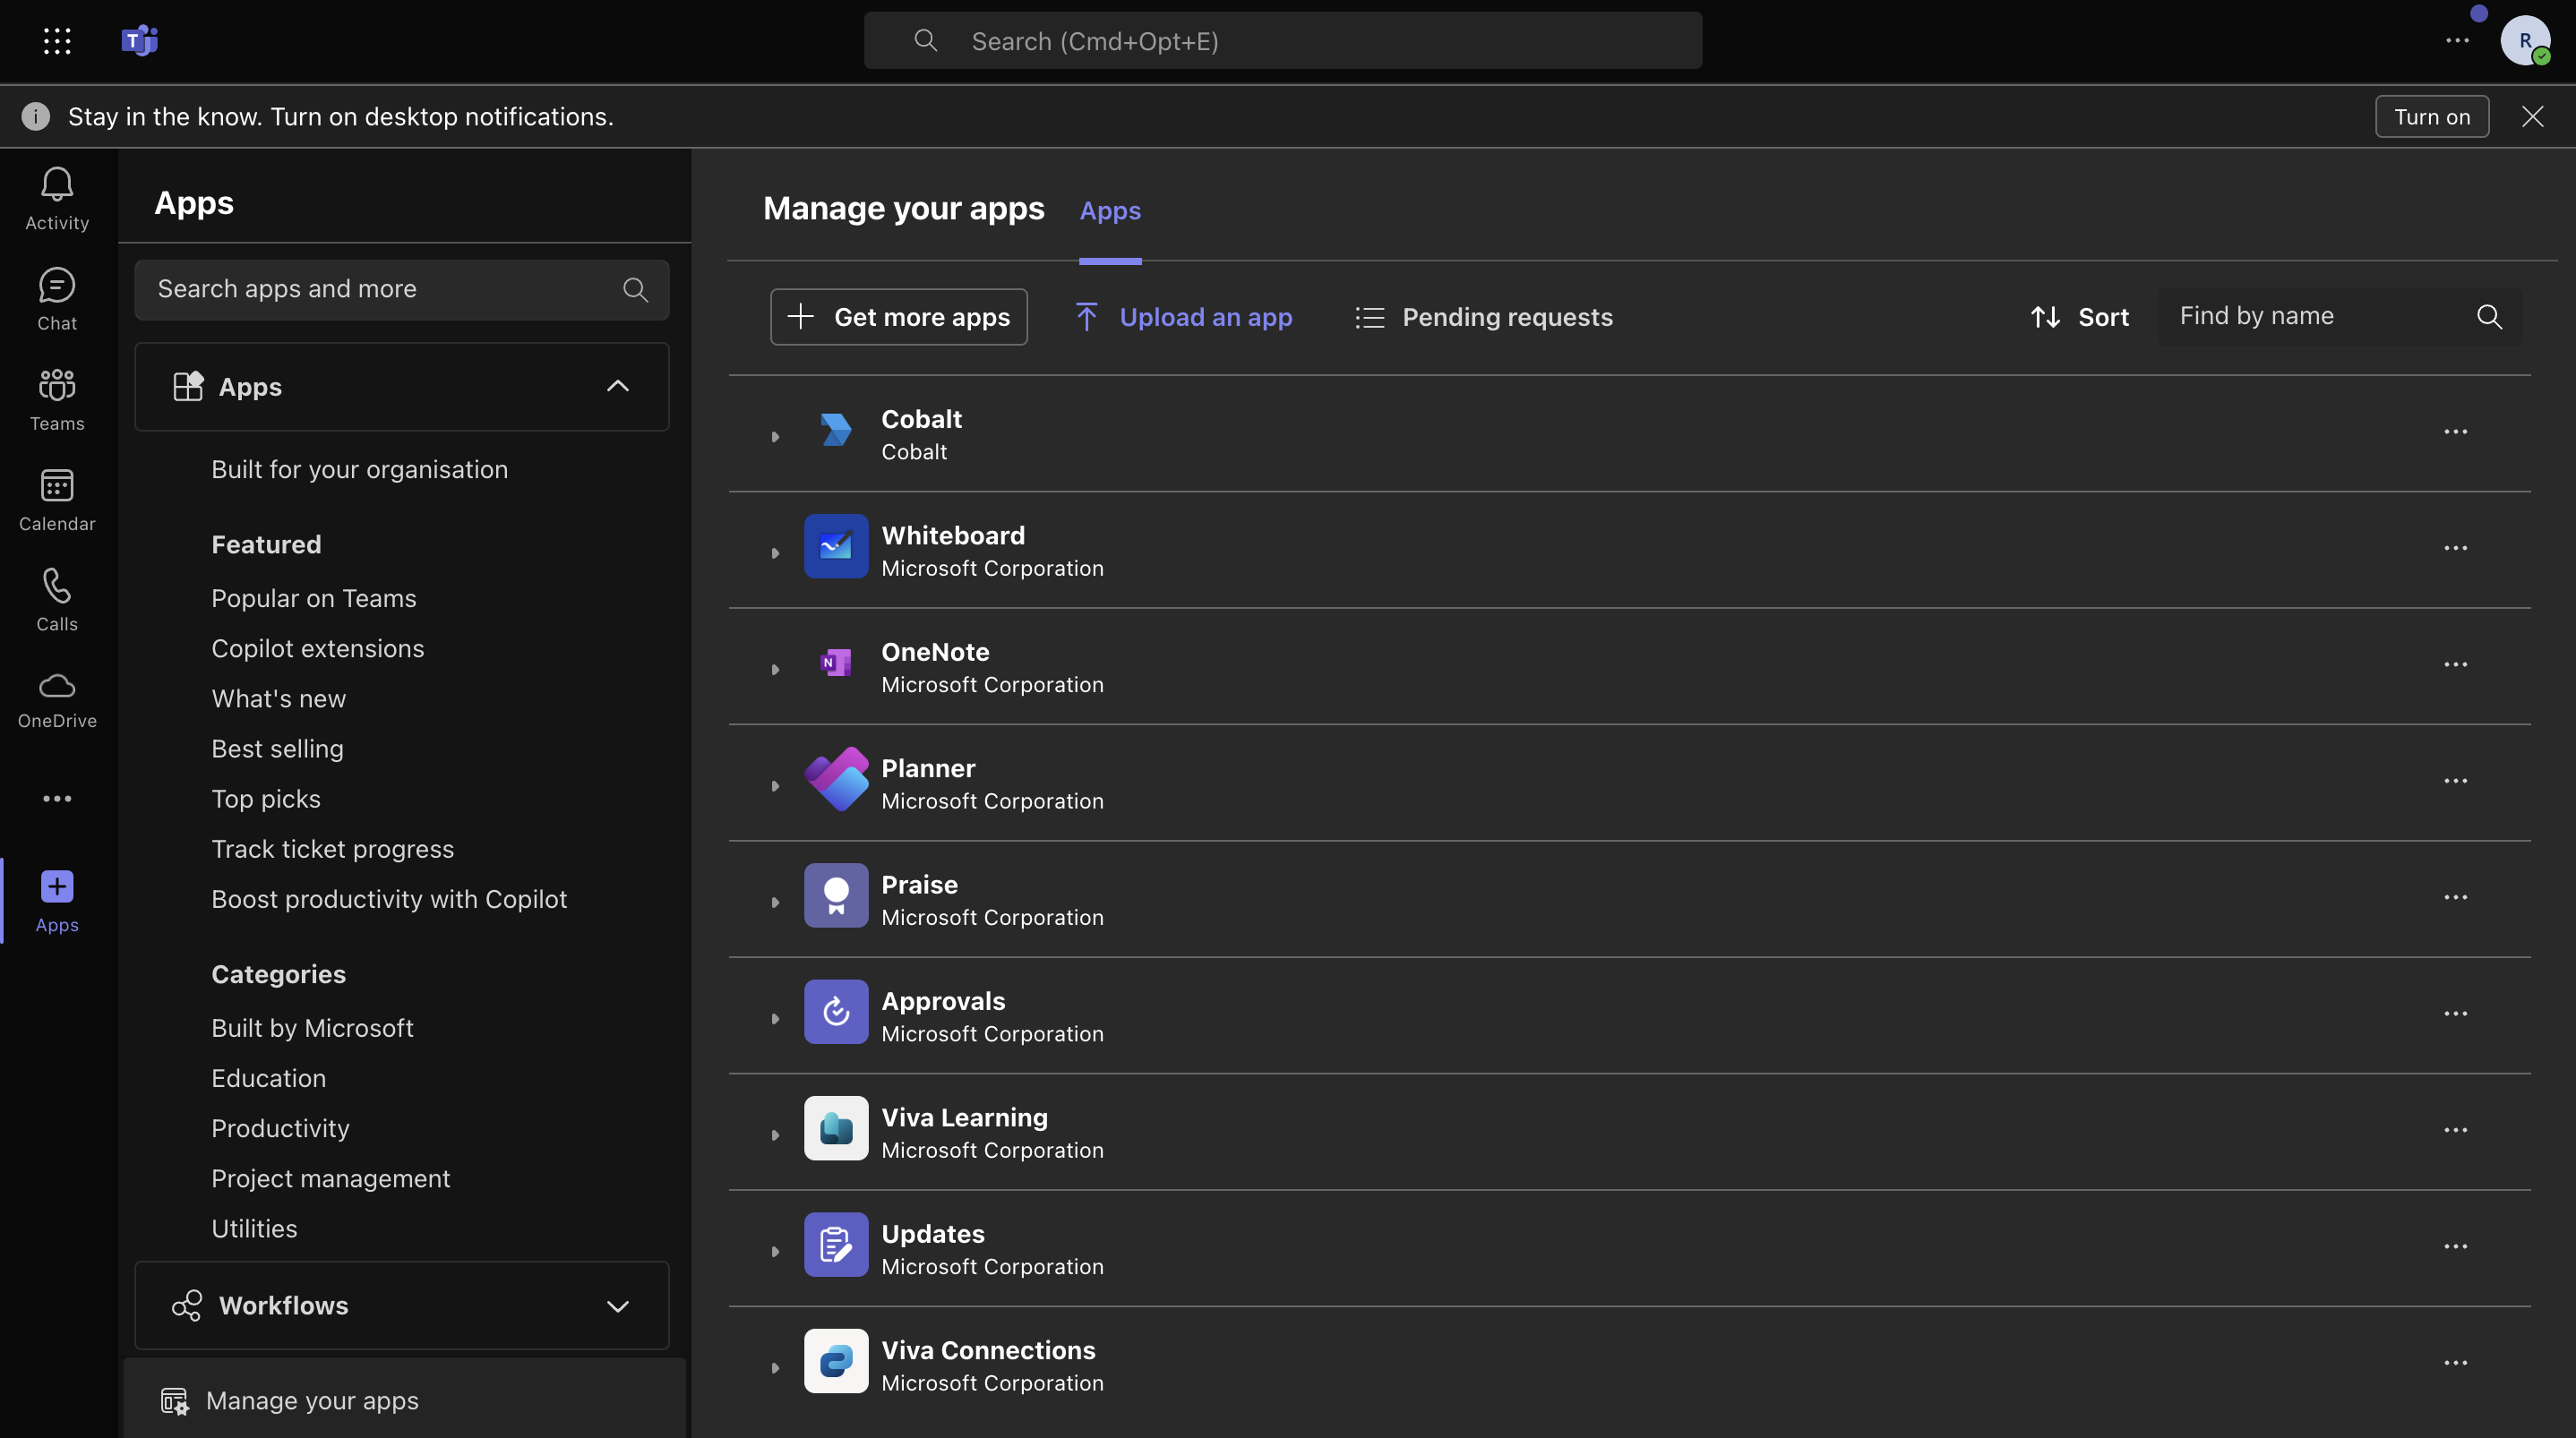
- Click
Appsoption in the side menu and click onManage your appsoption at the bottom. - Click on
Upload An AppandUpload your app to your org's app catalogand select the .zip file that you downloaded and you will be navigated to theBuilt for your orgpage.
If you uploaded the app through
Submit an app to your org option, then the admin can approve it by going to Teams Admin Centre > Teams Apps > Manage Apps > Search for the app that you submitted > Click on the app name to open its app details page and change the status to Allowed.Refer here.- After a successfull upload, select your app. Click on
AddandAdd to a teamand add the bot to a team and a channel.
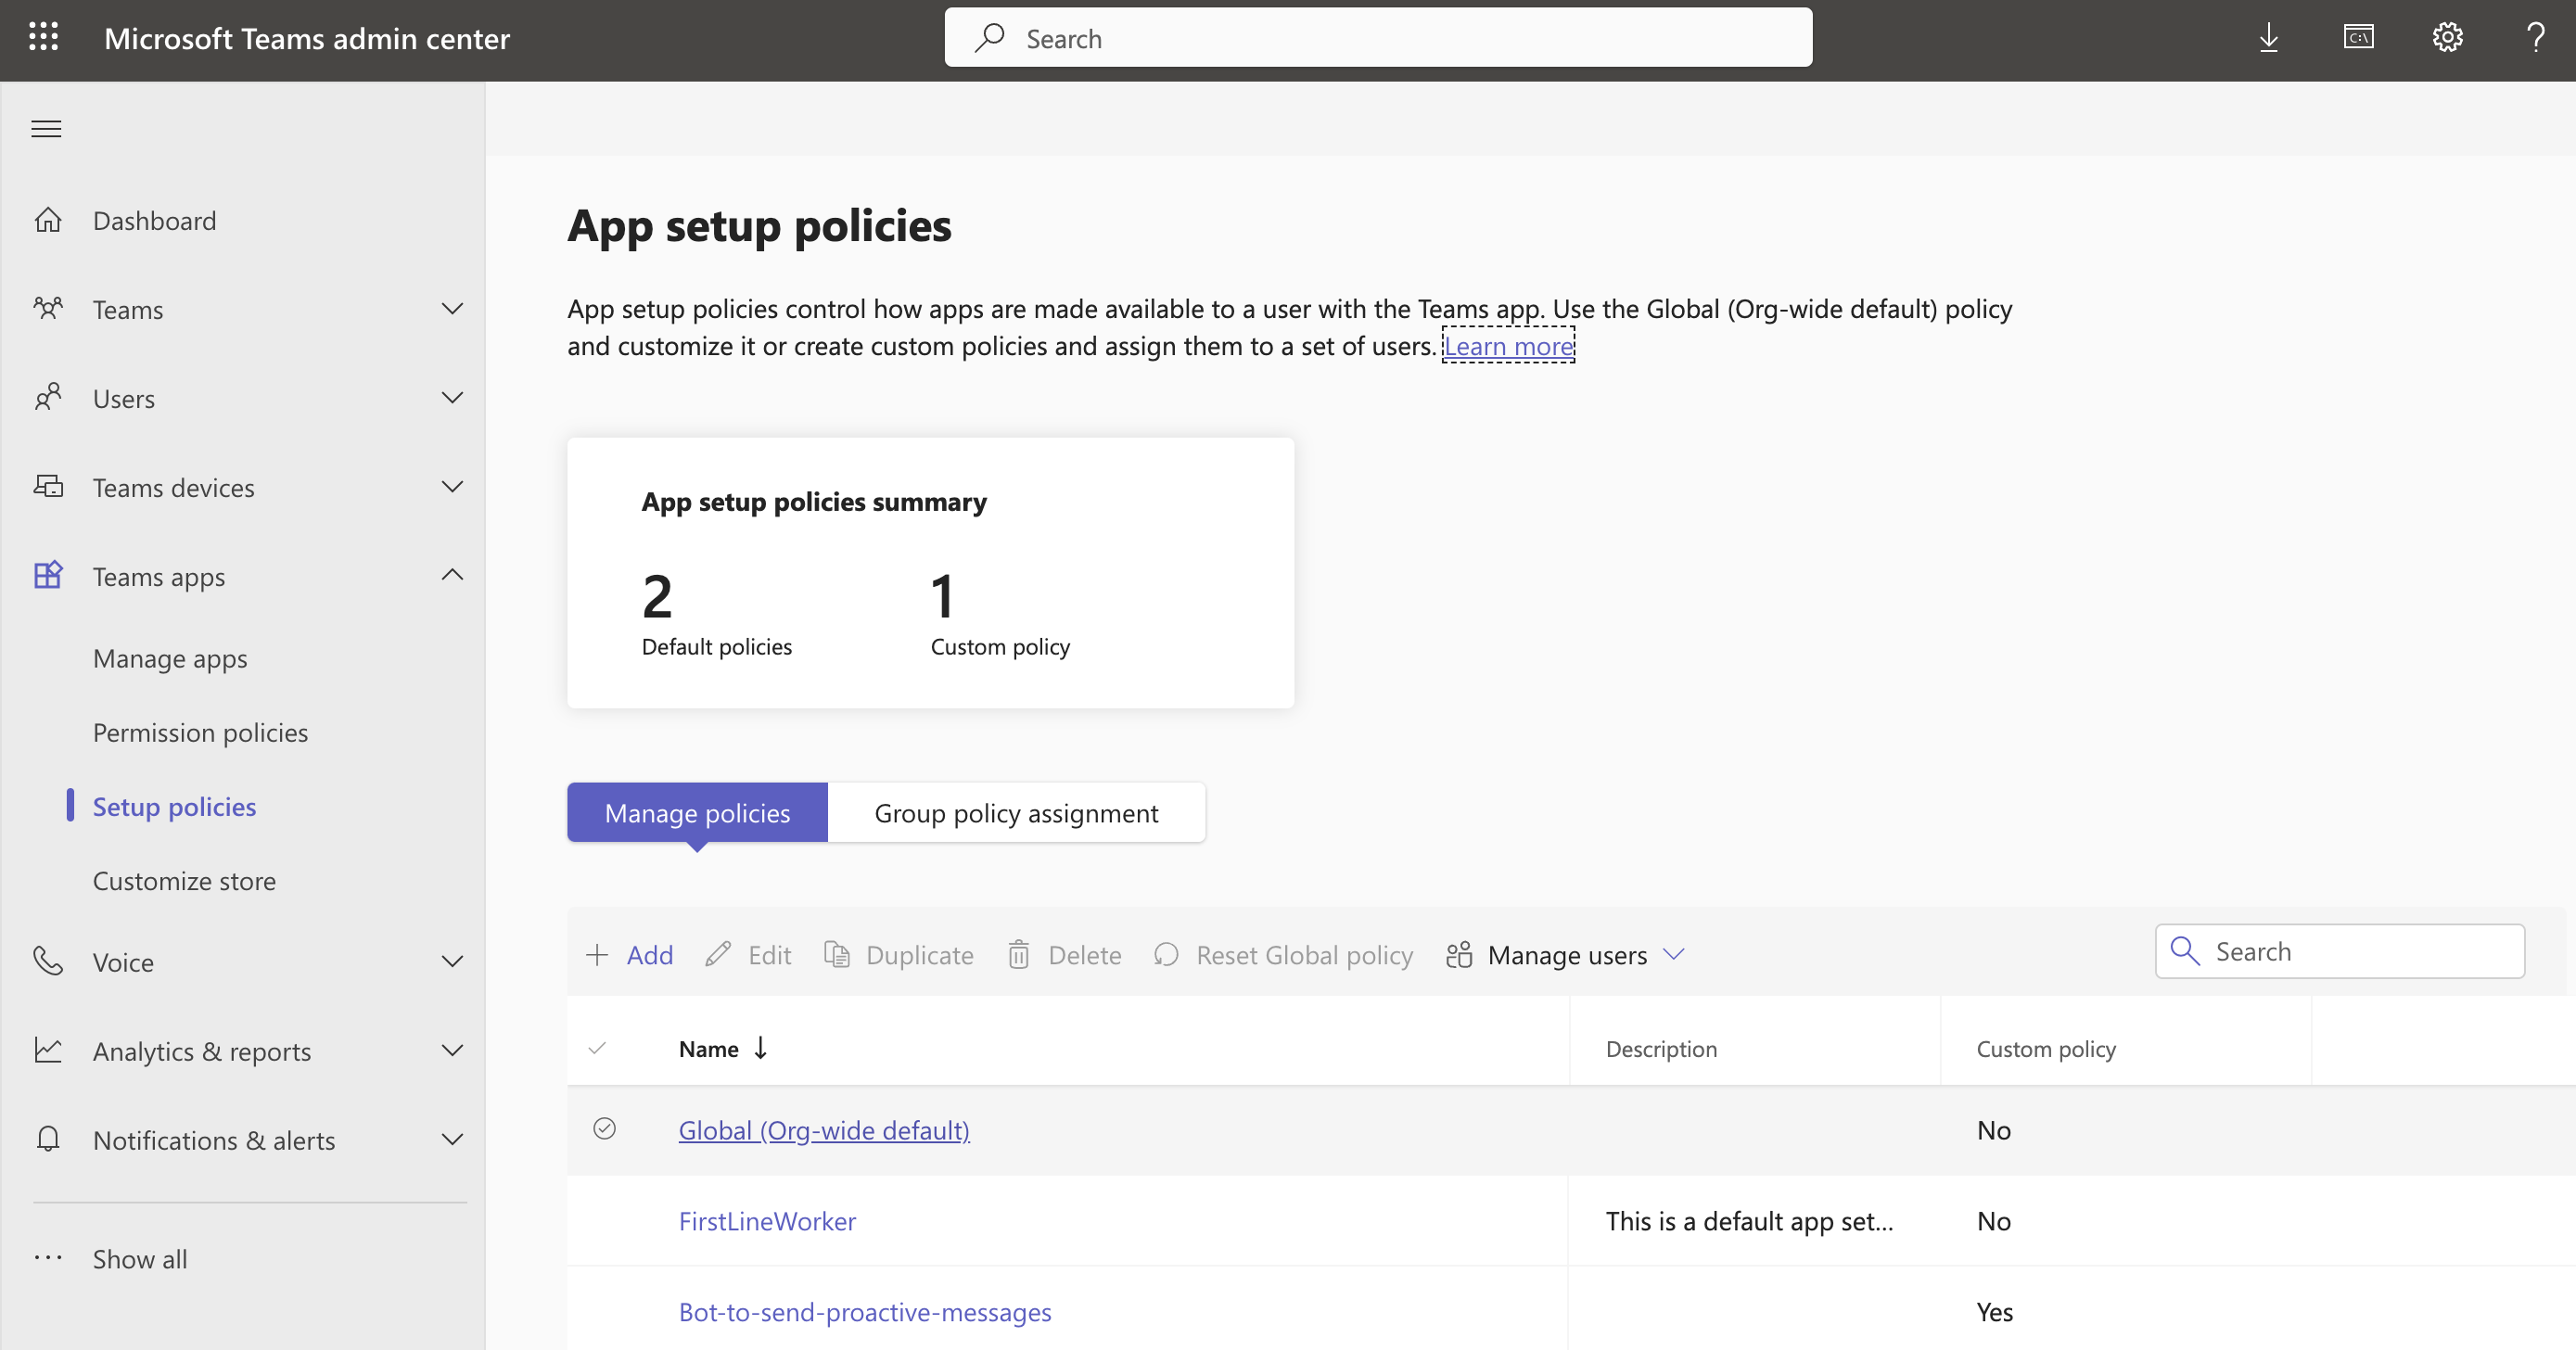
Enable Microsoft Teams Bot for all users in an org
If you want to use the Proactive Messaging action i.e. Post notification to a user as a bot, then Teams require you to have the Bot installed in Teams account of all the users of the org who can receive message from the bot. If you do not want to inform all the users to install the bot fromApps in Teams, you can also ask the Teams Admin to install the app by default for all the users. Follow the steps below to do this:
- Sign in to Teams Admin Centre > Navigate to
Teams apps> SelectSetup policiesin the side menu. - Select
Global (Org-wide default)under Manage Policies.
- Under Installed Apps > Click on
Add Apps> Search for your Bot by its name > Select it > click onAddand finally click onSave.
Creating an app in Microsoft Azure
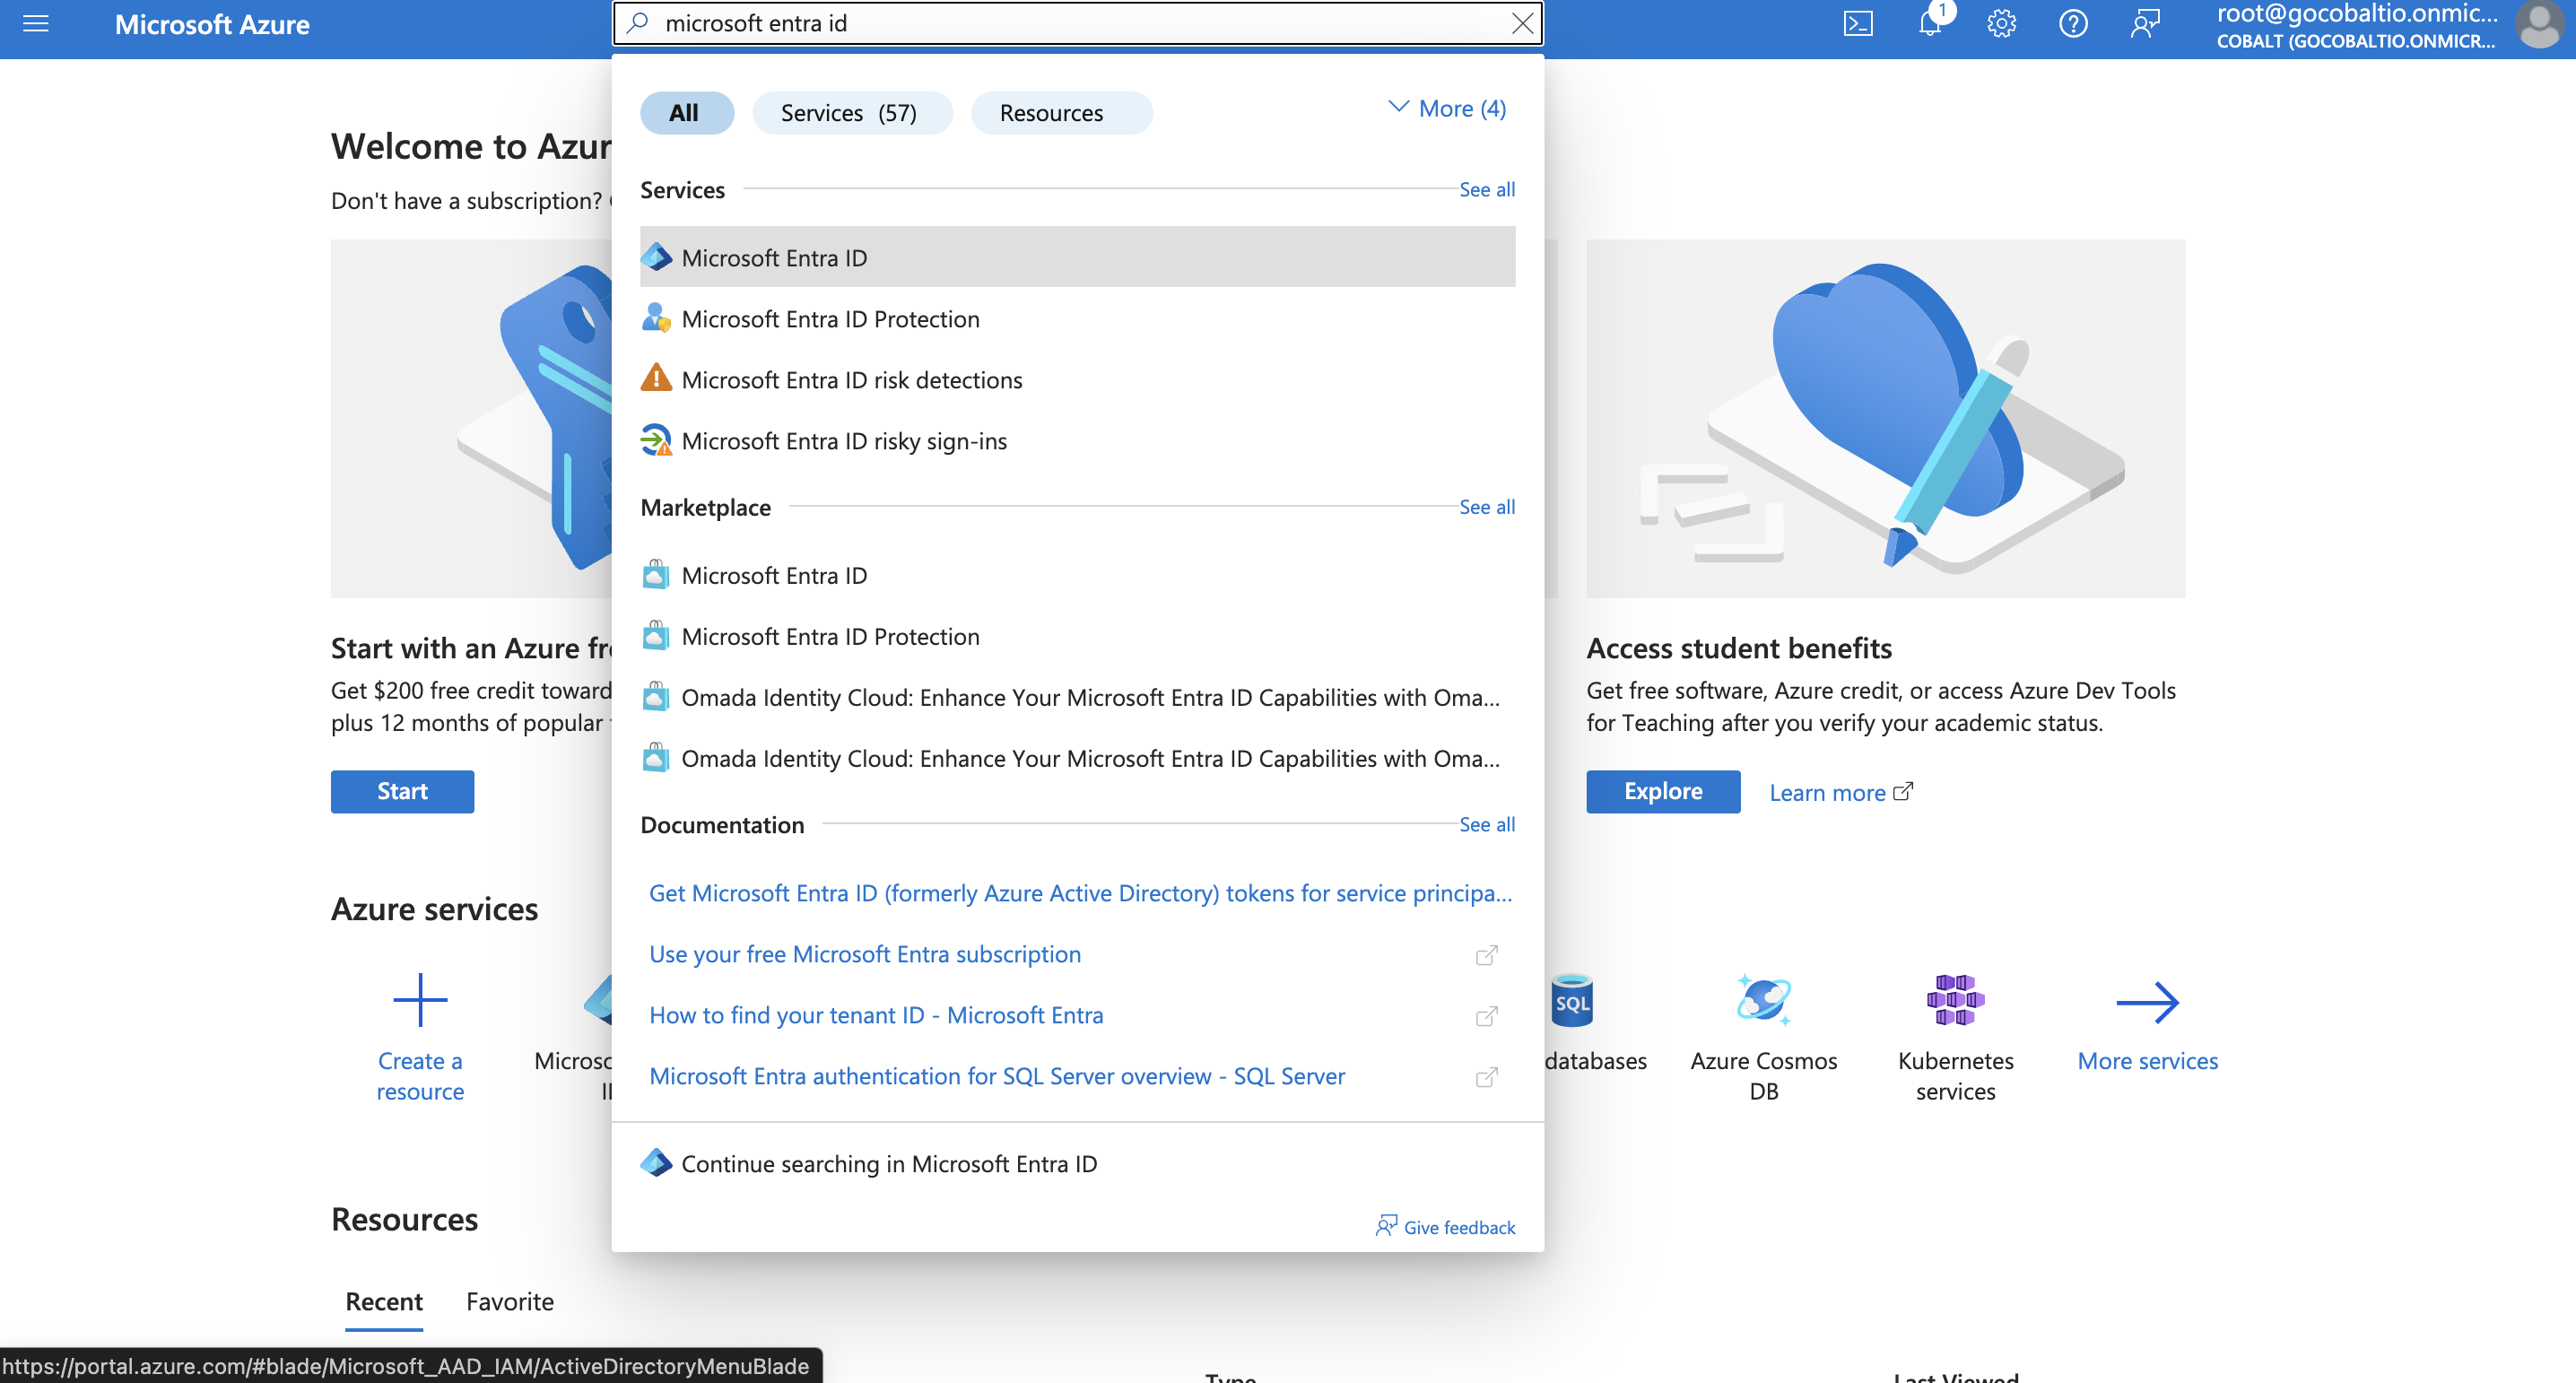
To create a Microsoft Teams app and acquire the above mentioned credentials, please follow the steps mentioned below:- Log in to your Microsoft Azure account.
- Search for Microsoft Entra ID and select it from Services in the top search bar.
- Navigate to
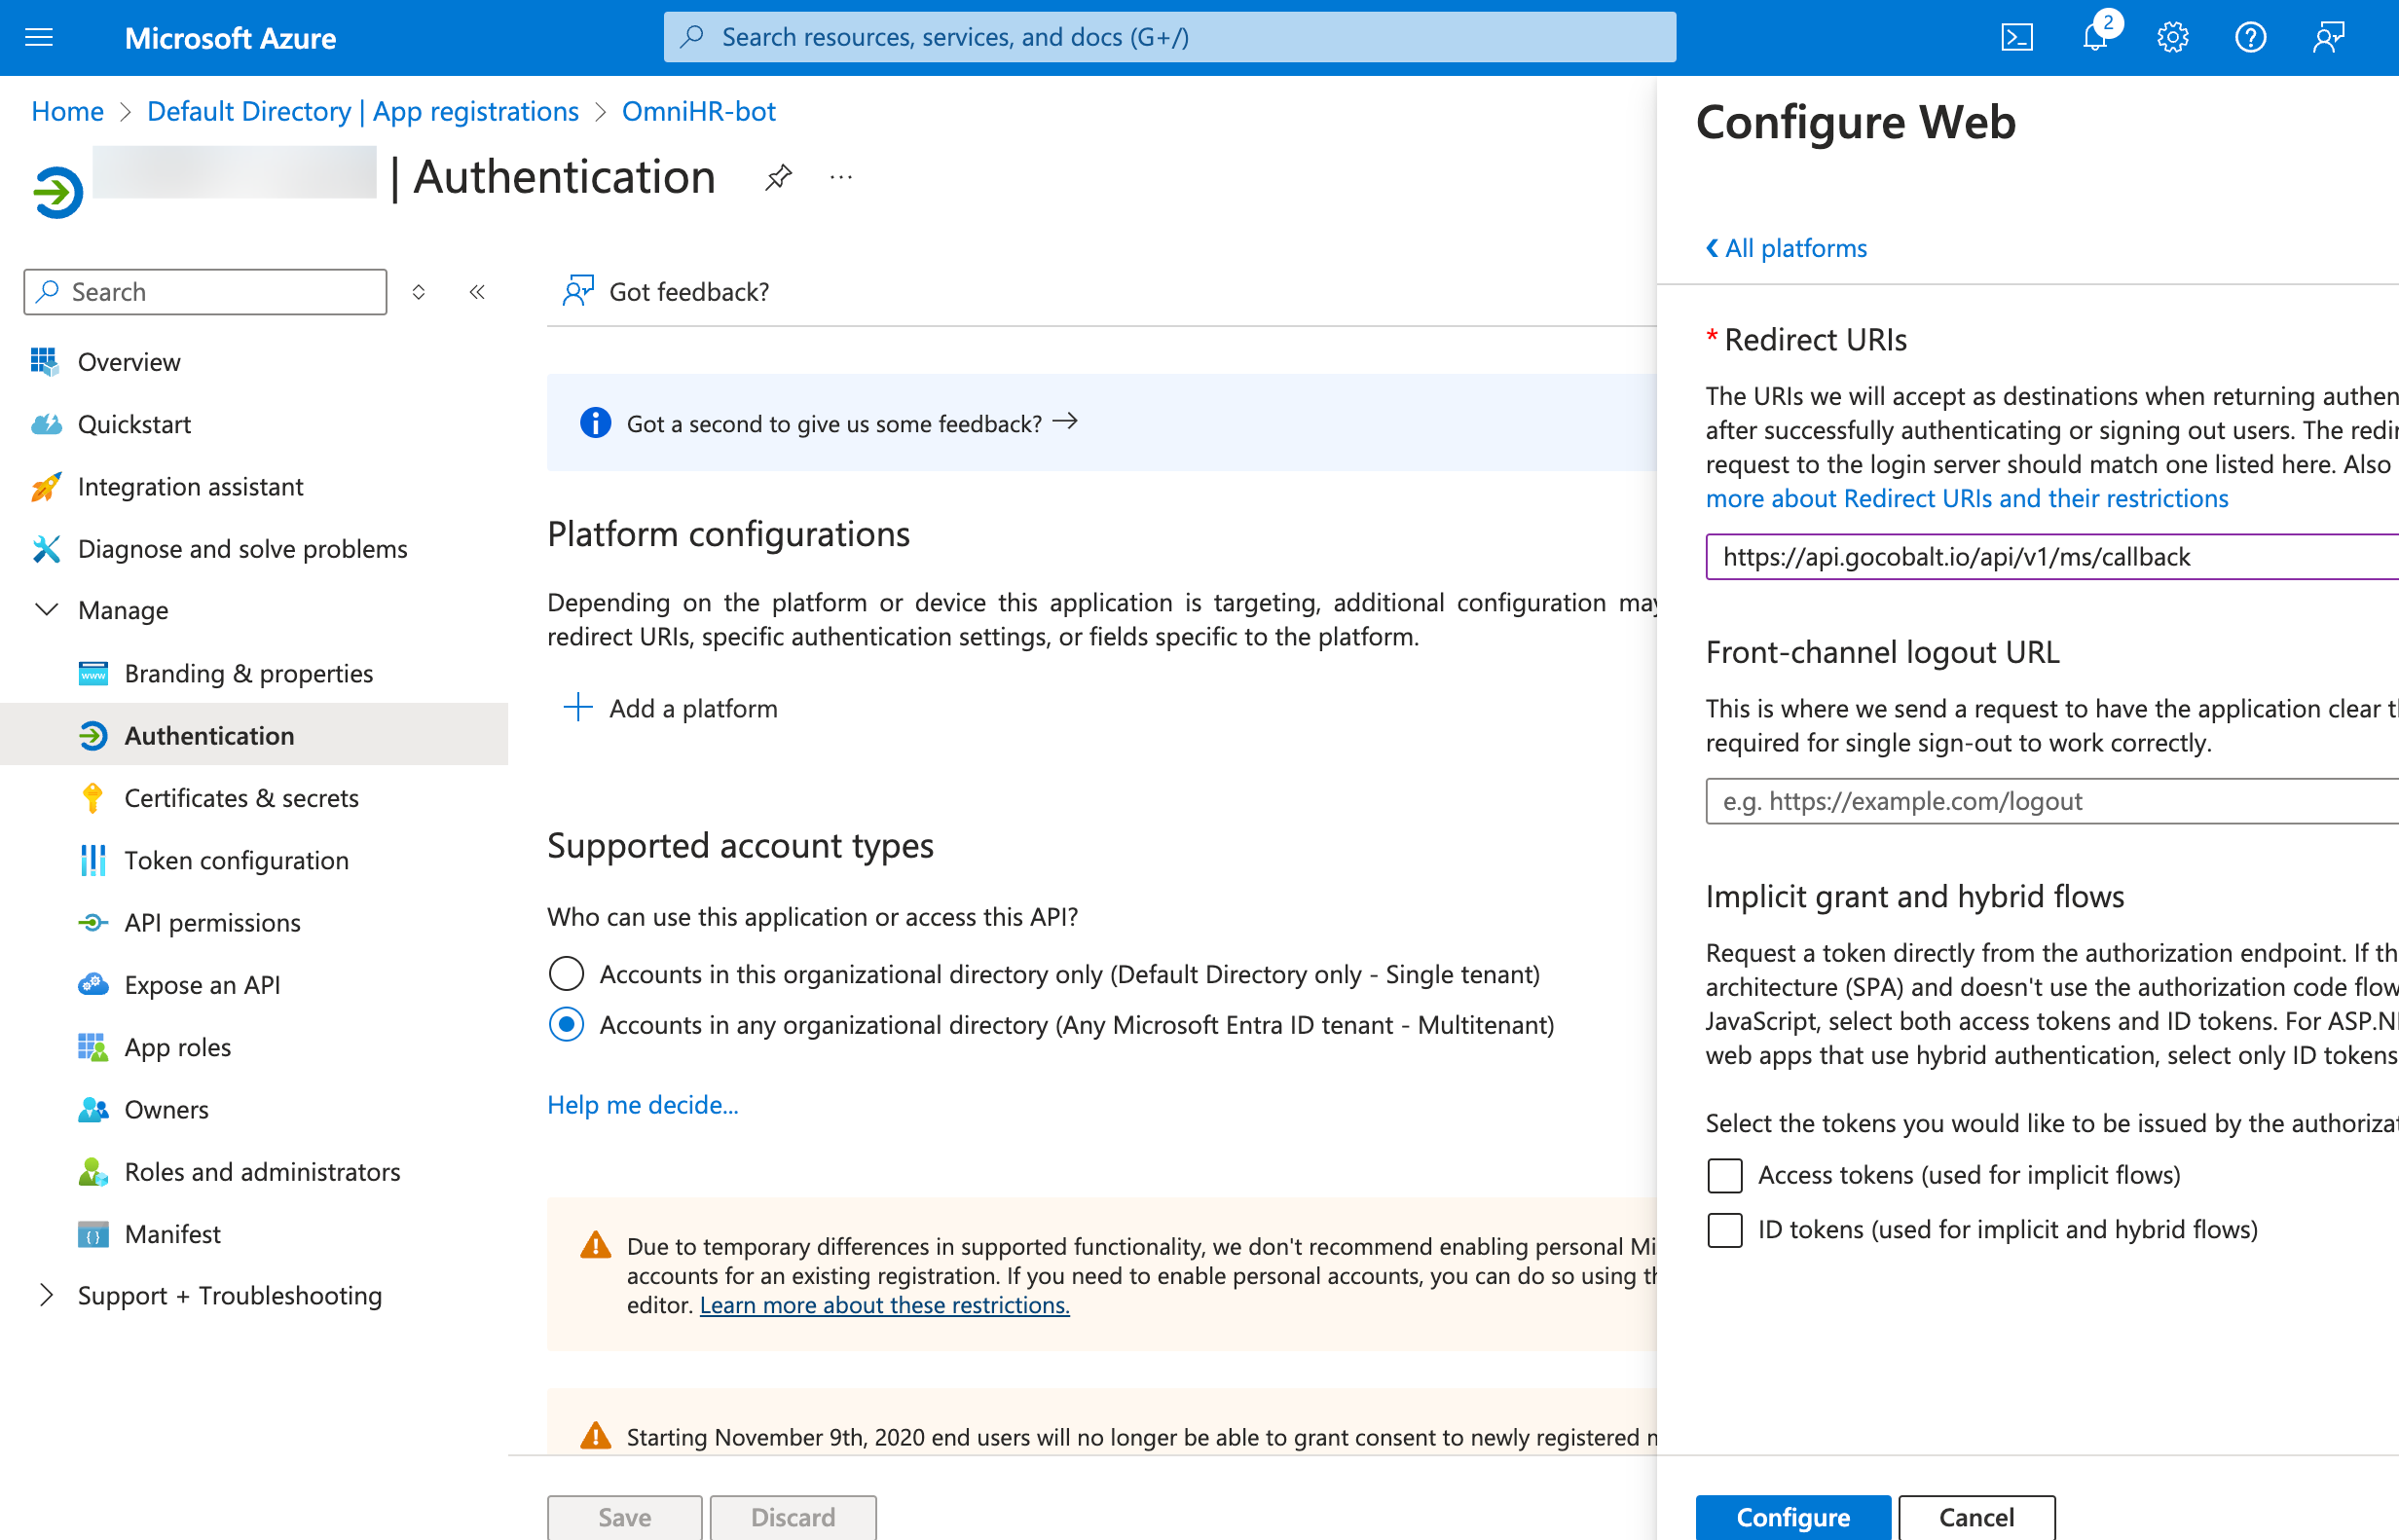
App RegistrationsunderManagein the side menu and select the app representing your bot, not your Microsoft Teams app. - Go to your
Apps catalogin Cobalt > Search forMicrosoft Teams>Settings>Use your credentials>Callback Url> Copy it. - Select Authentication in side menu under
Manage> Under Platform configurations, press the Add a platform button > Select Web > Paste the Callback Url > Click on Configure > Click Save button at the bottom.
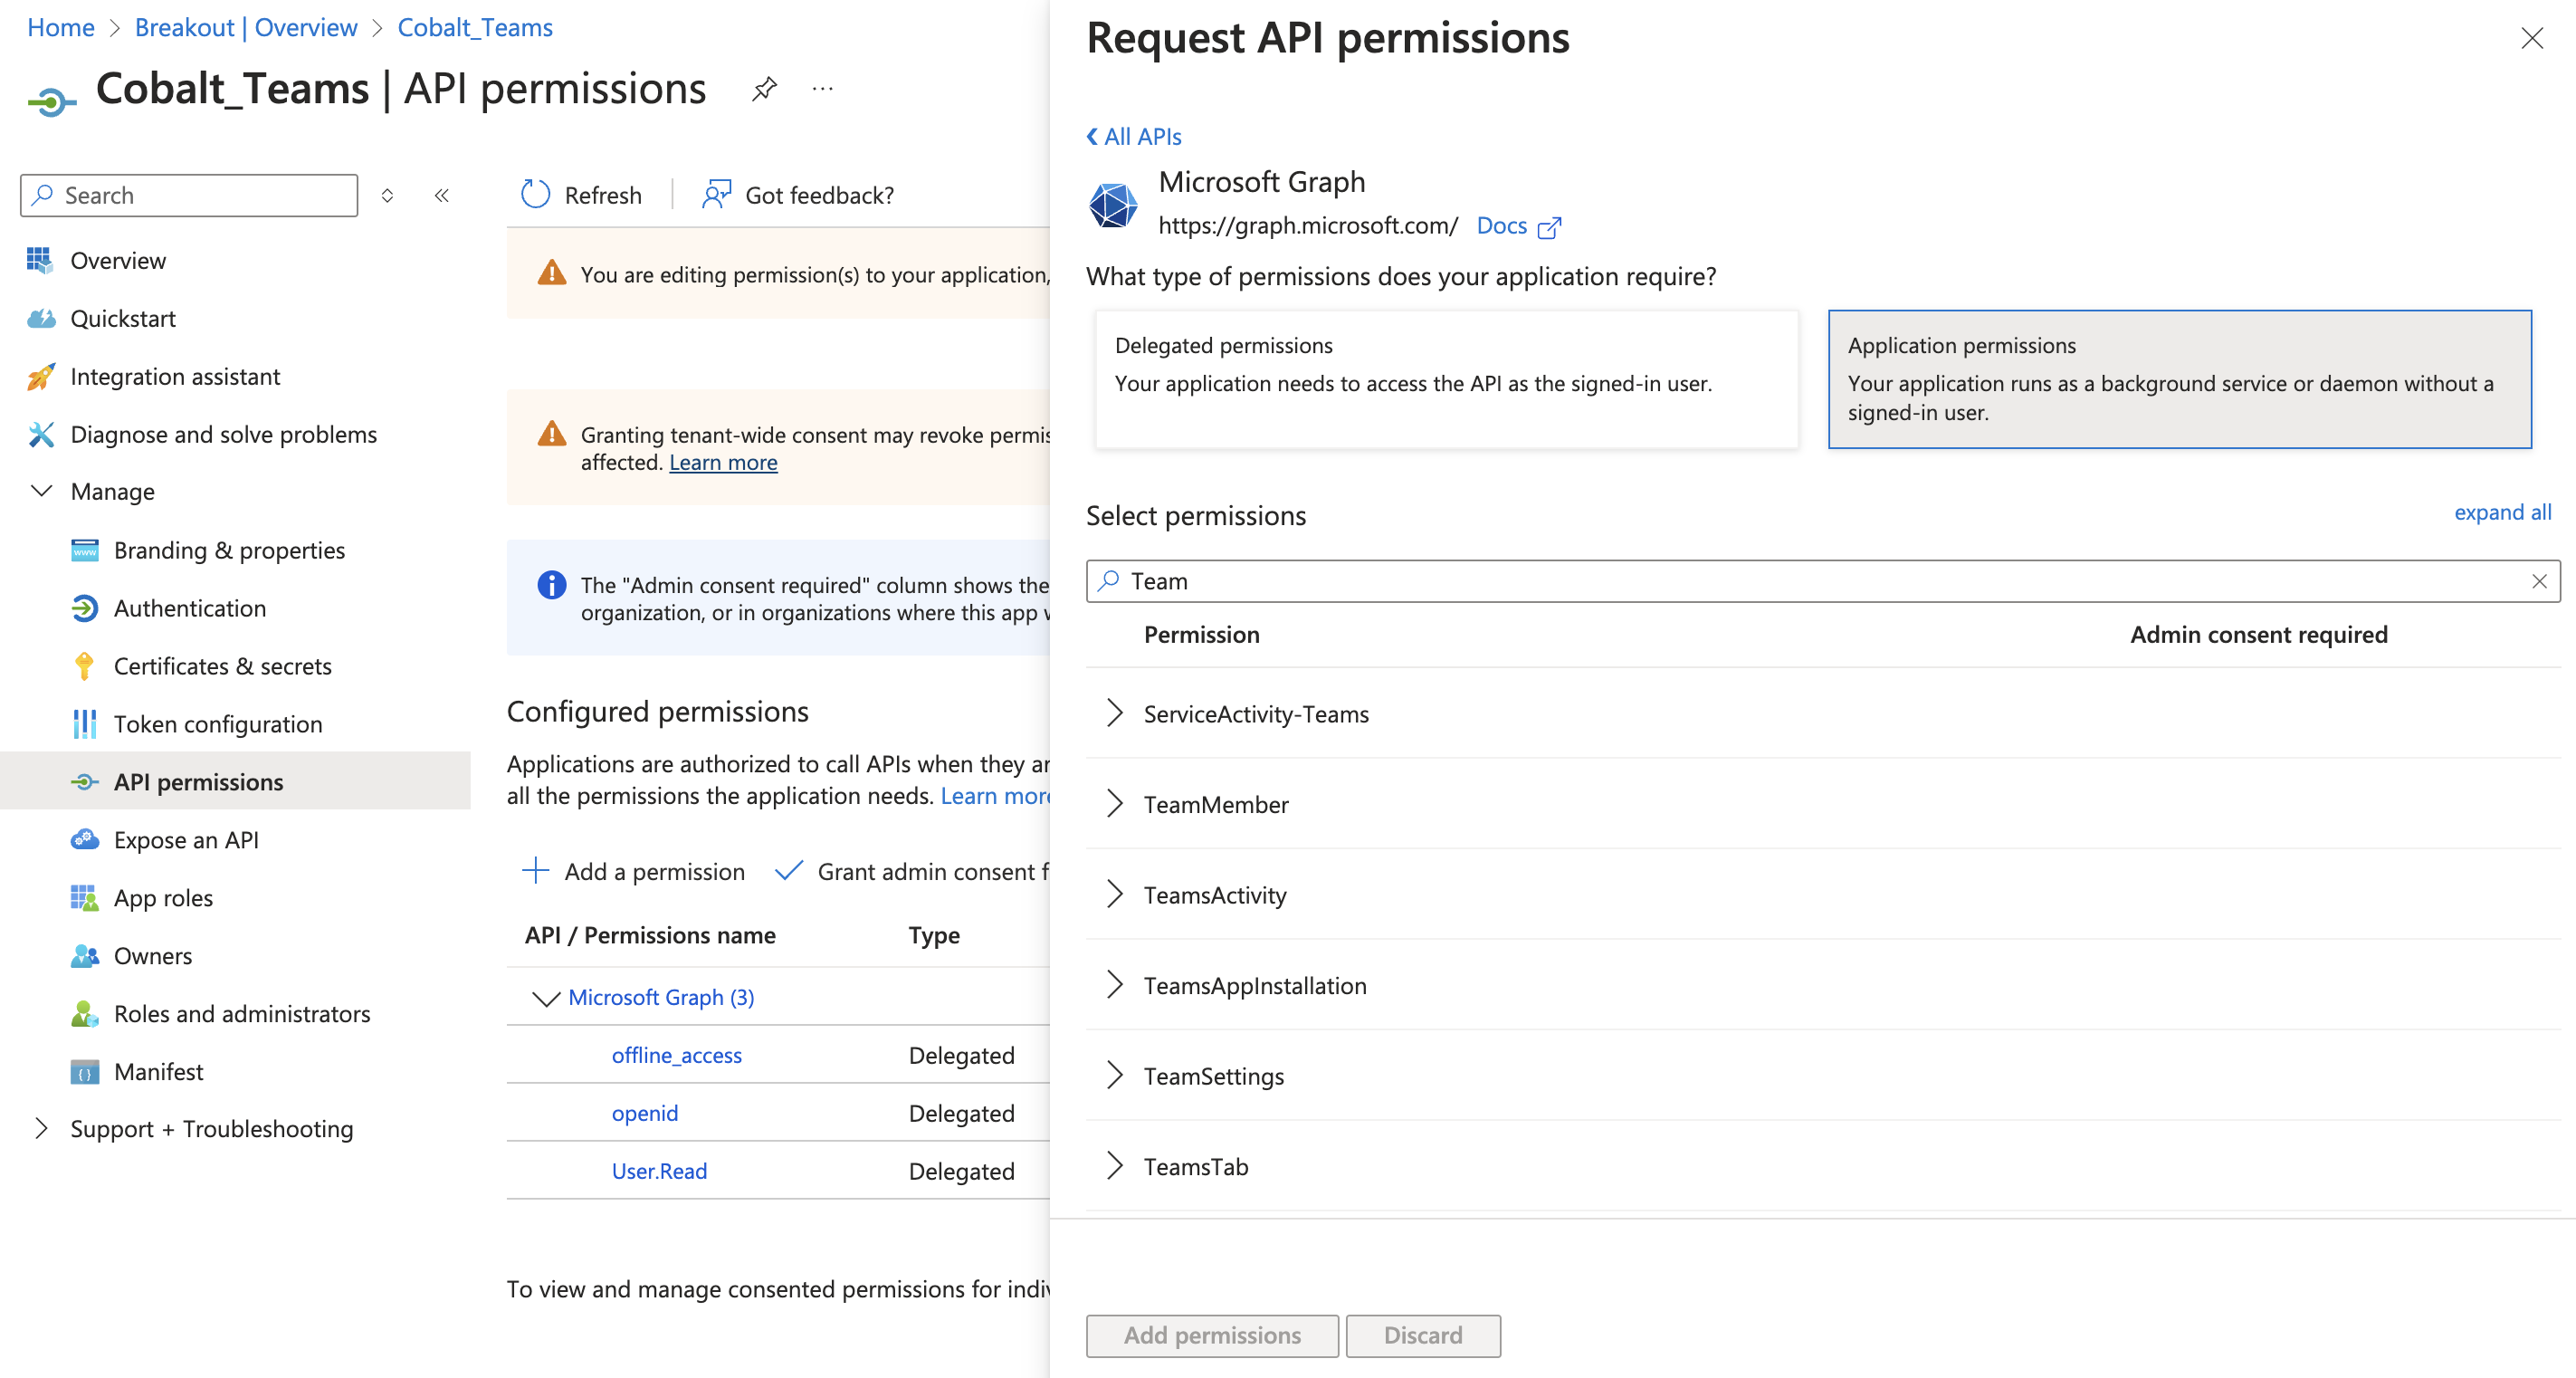
- Navigate to
Manage>API permissionsin the side menu > Click on+ Add a permission. - Choose the
Microsoft Graphcard under Microsoft APIs > ChooseApplication permissions> Select the mandatory scopes > click on theAdd Permissionsbutton.
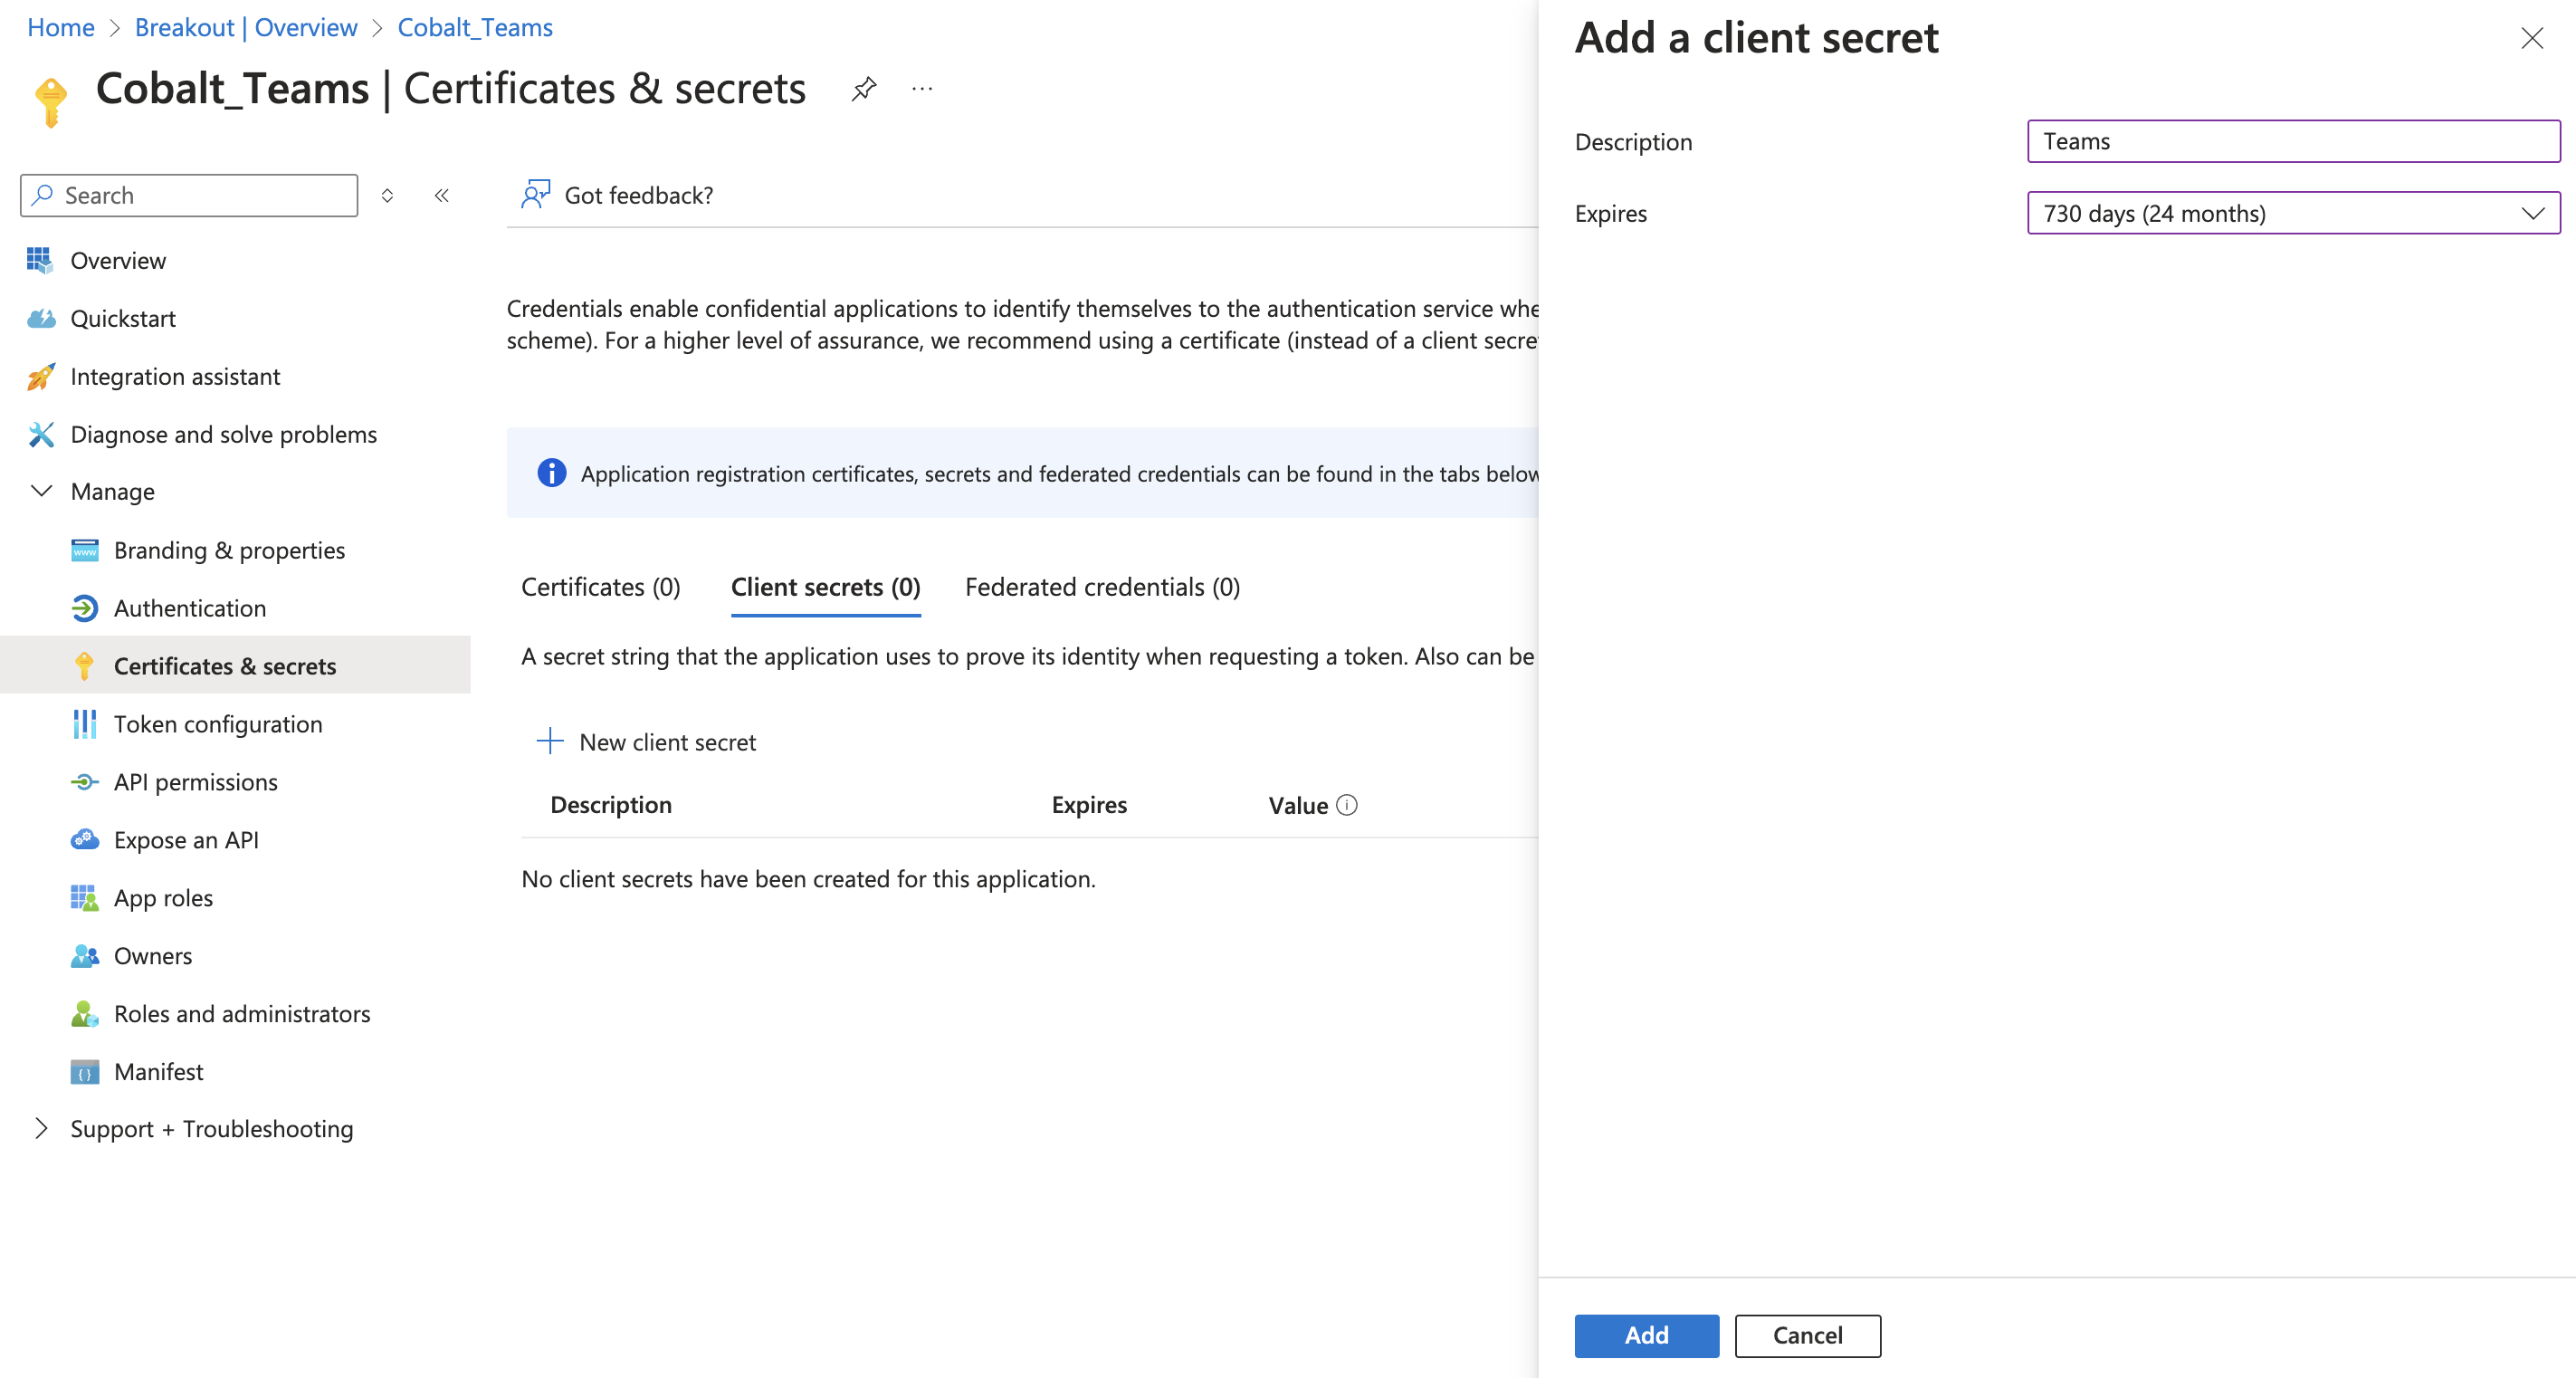
- Navigate to
Certificates and Secretsin the side menu and under Client Secrets tab, press the+ New client secretbutton. Give a Description, select the best expiry for your application and clickAddto create your credentials. - Copy the displayed Client Secret under the
Valuecolumn.
Ensure that the Client Secret Value is saved as it will be shown only once.
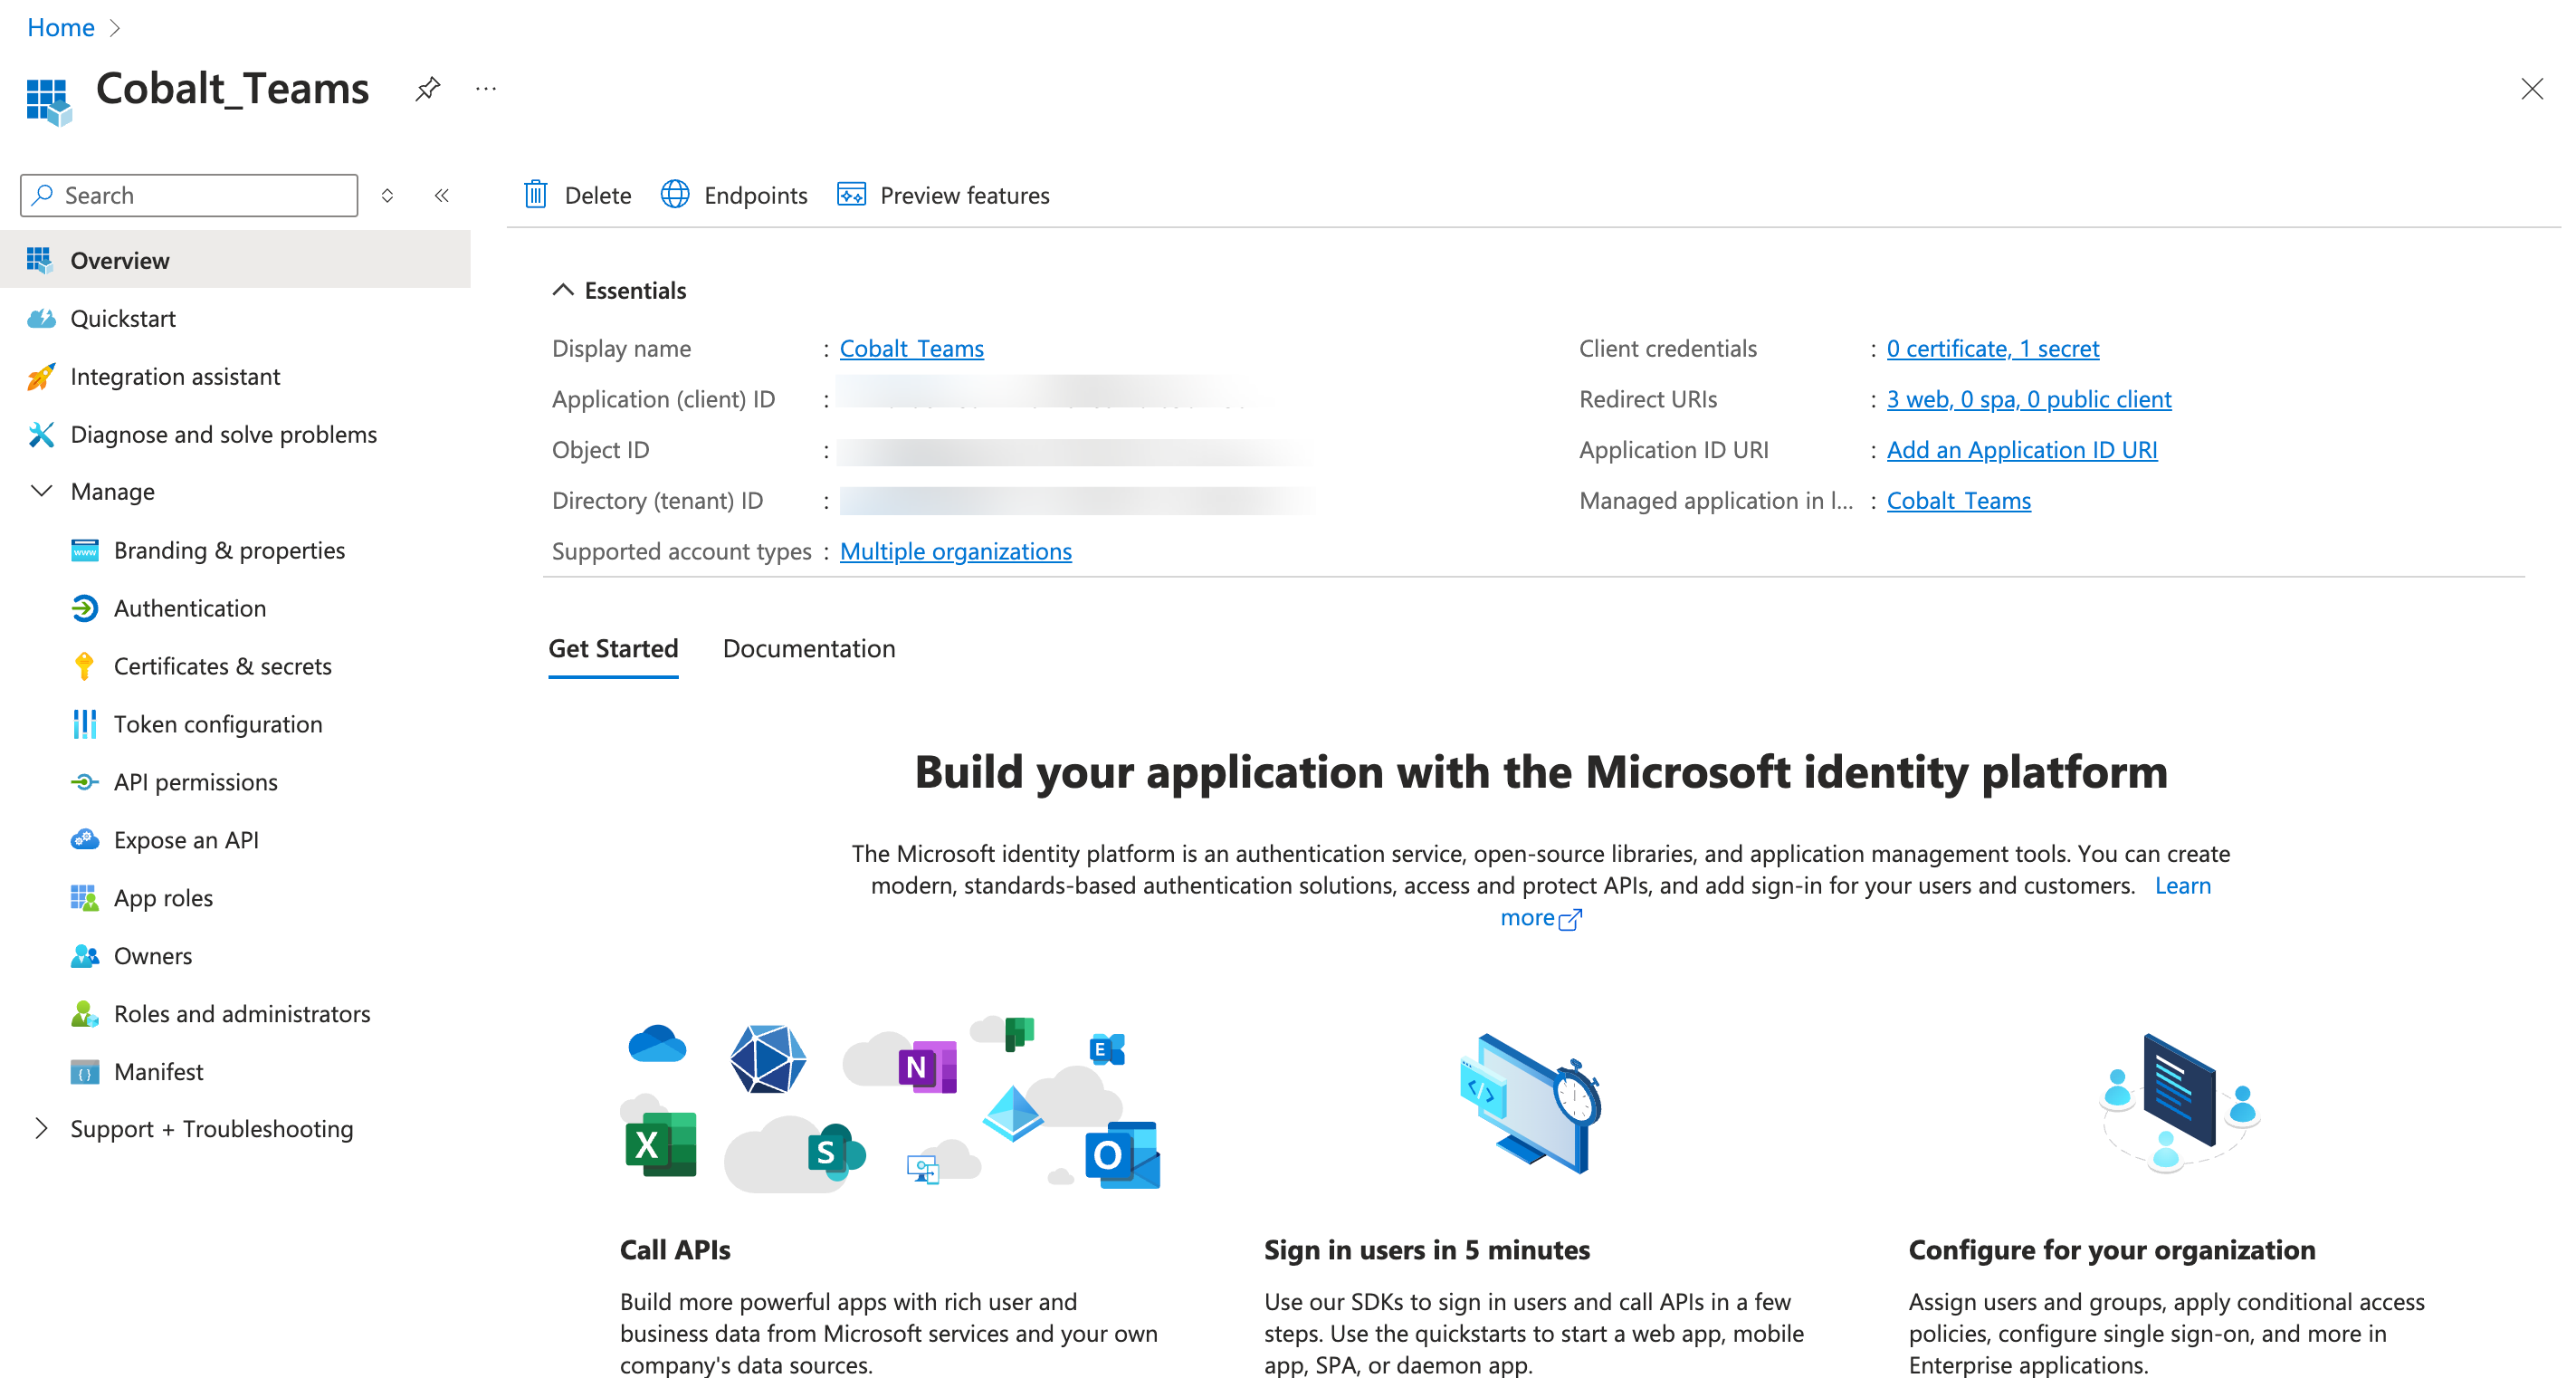
- Navigate to
Overviewin the side menu >Essentialstab > Copy the Client ID underApplication (client) IDand Tenant ID underDirectory (tenant) ID.
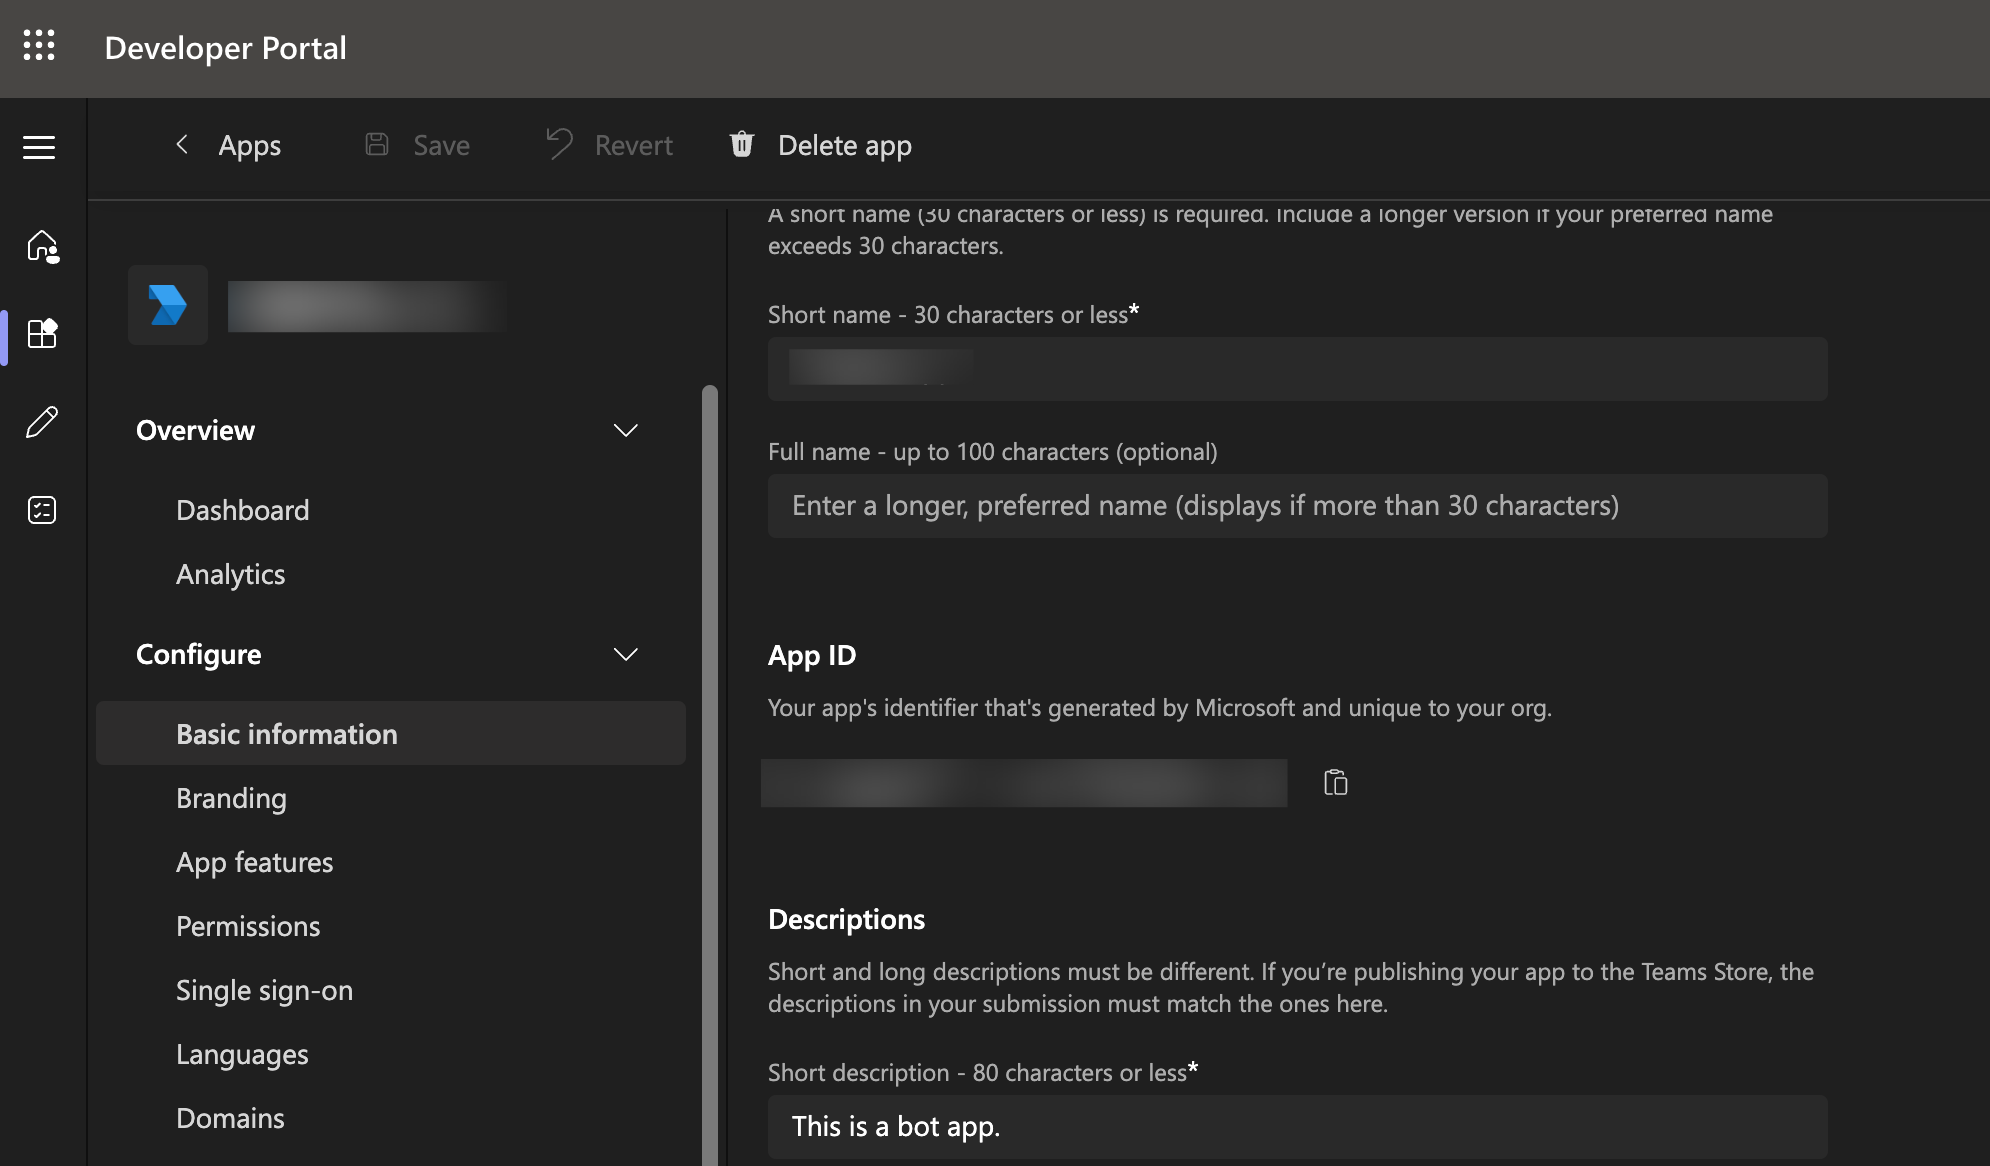
- For your App ID or Bot External ID, go to
Appsin Teams Developer Portal, select your App which was created earlier and copy theApp IDpresent under Basic Information of the app.
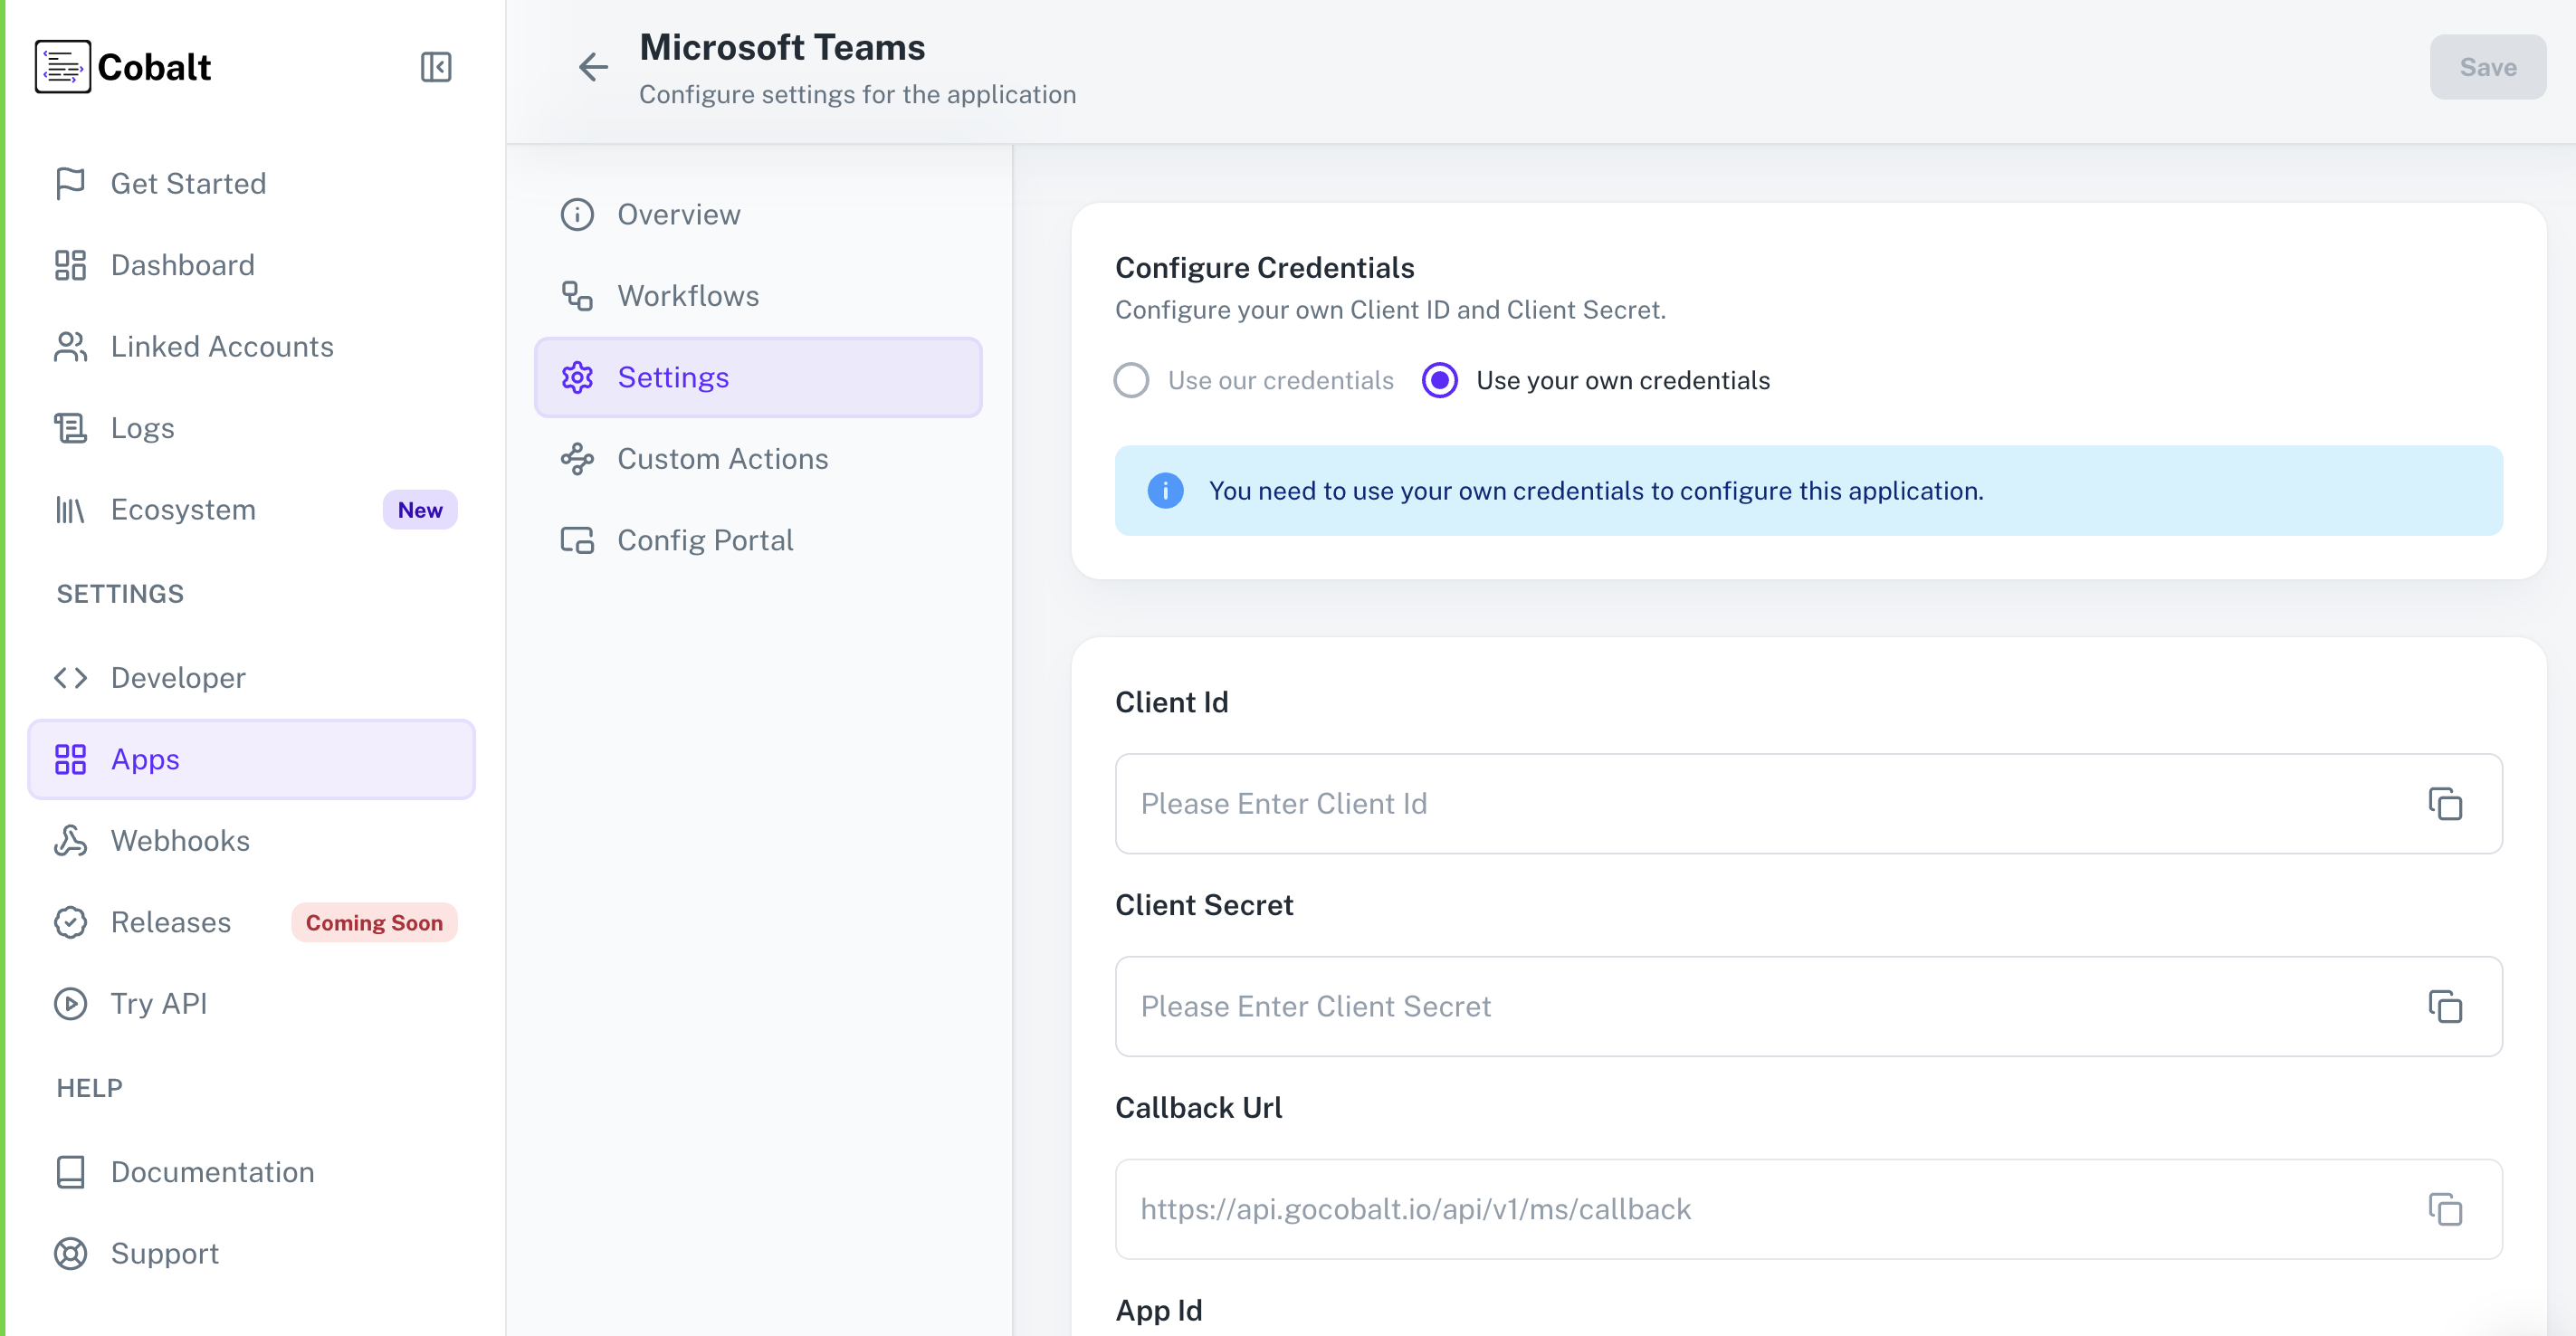
Configuring credentials in Cobalt
App settings page lets you configure the authentication settings for anOAuth 2.0 based application. For your customers to provide you authorization to access their data,
they would first need to install your application. This page lets you set up your application credentials.
Provide the acquired Client ID and Client Secret under Settings of the app and save it.
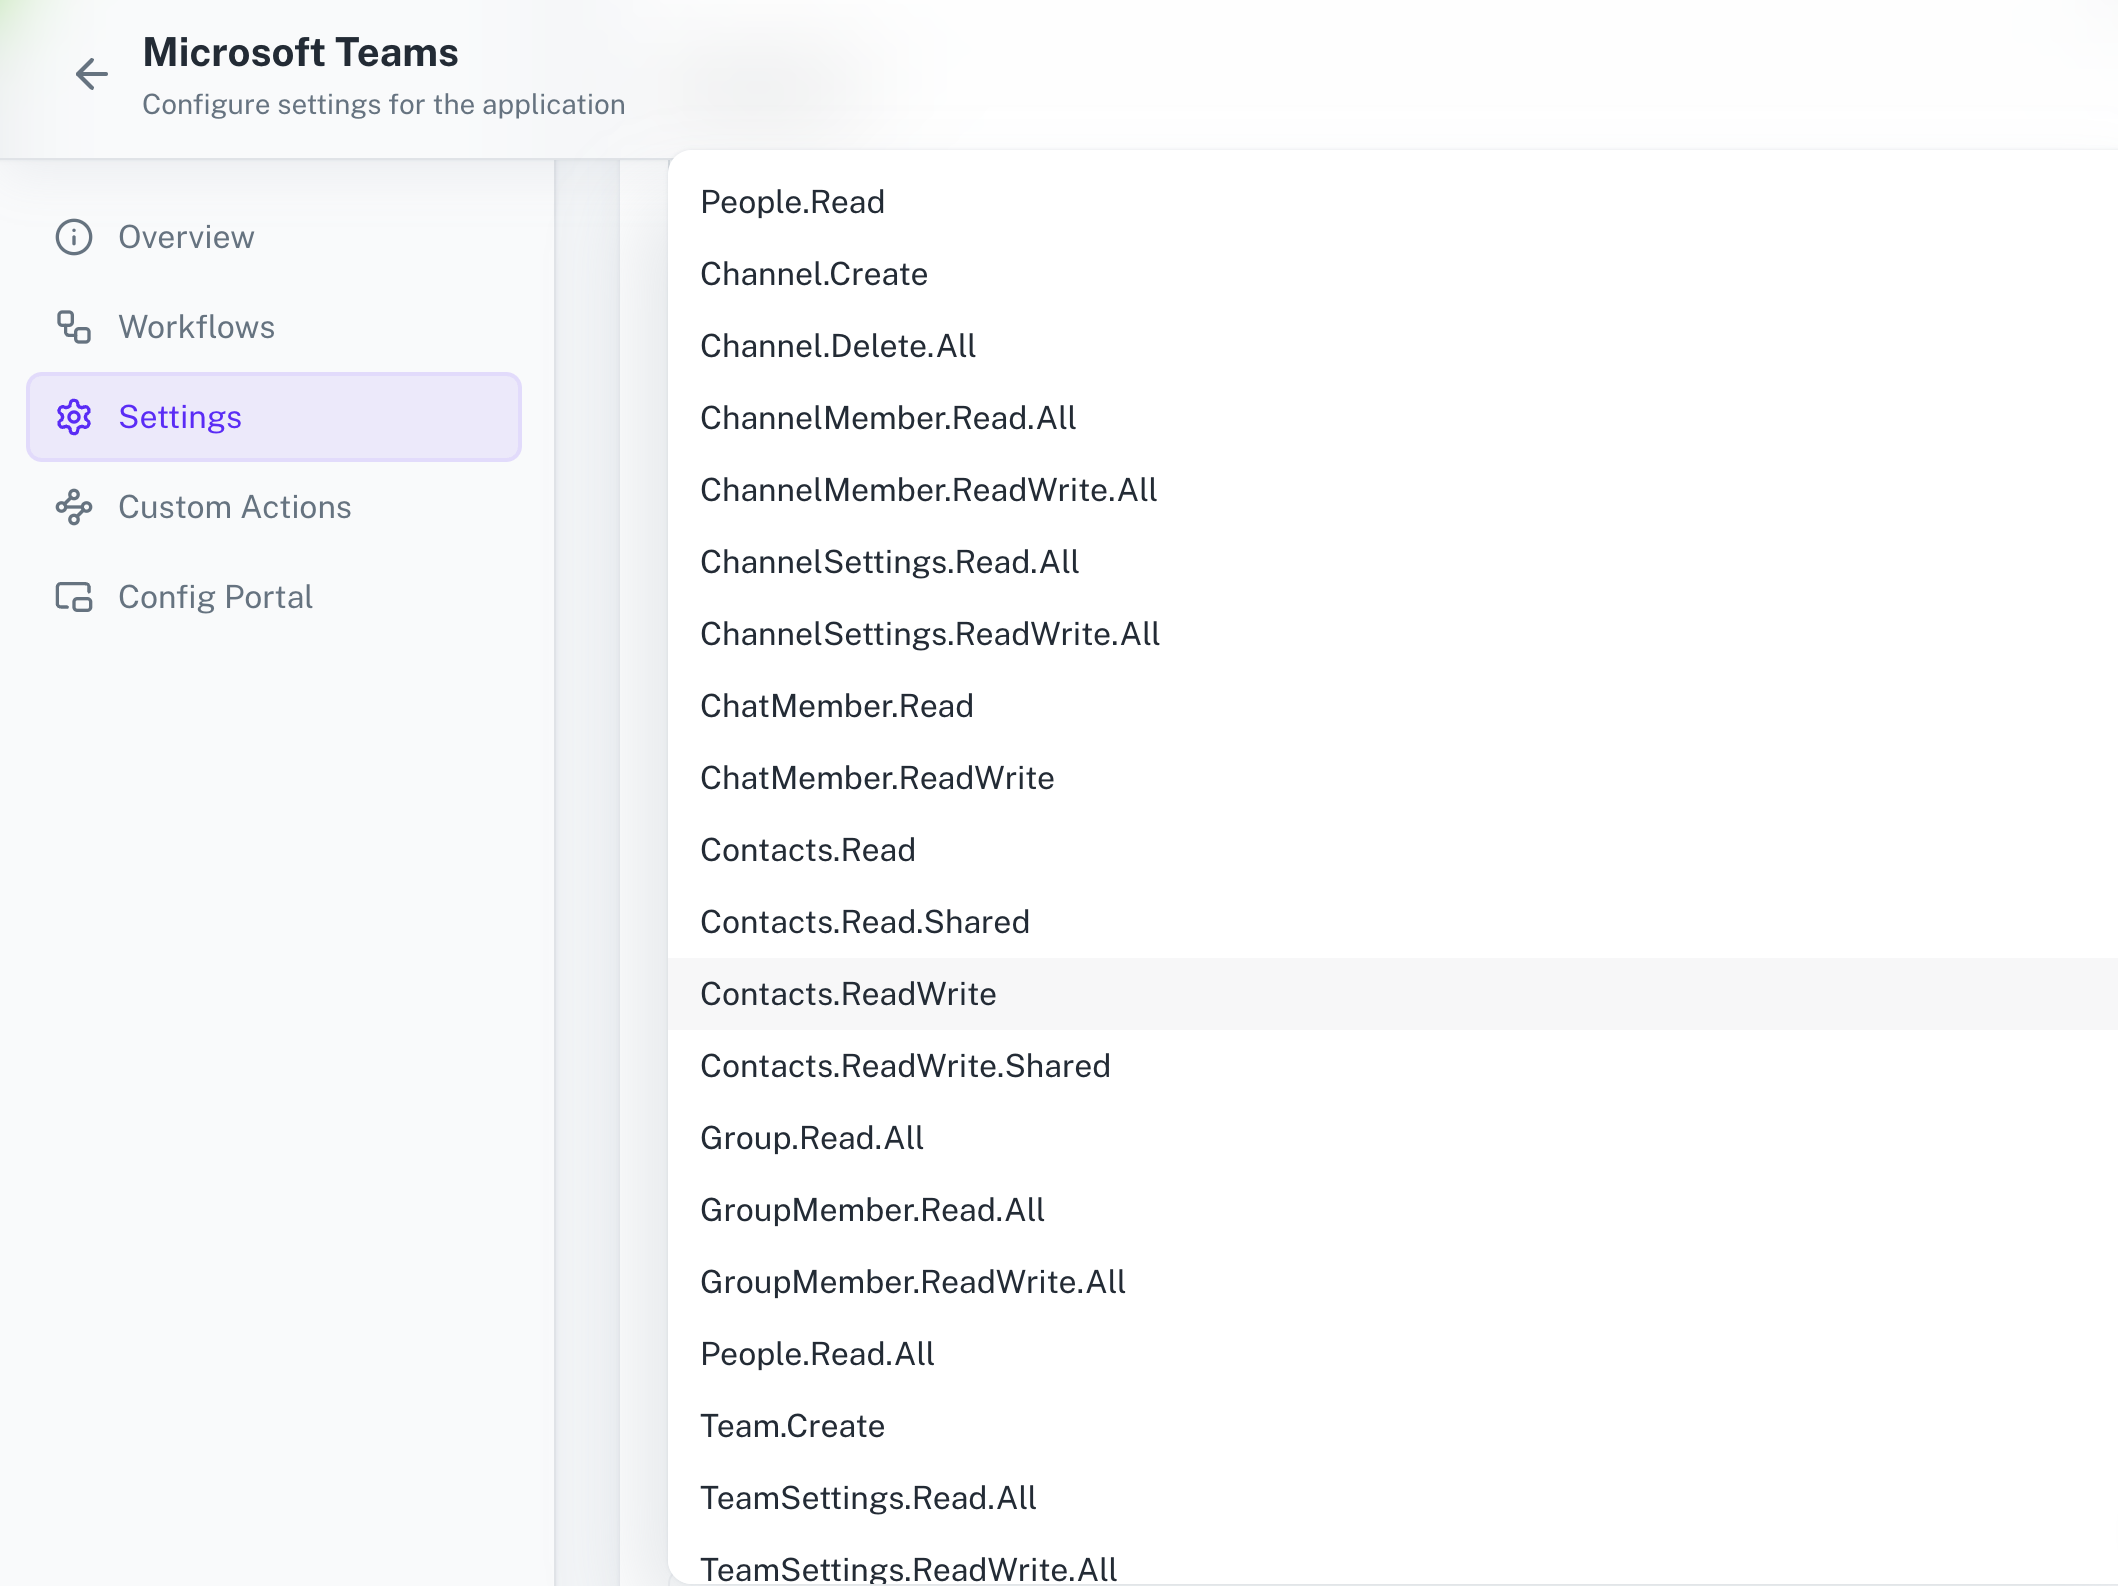
Configuring Scopes
Cobalt lets you configure what permissions to ask from your users while they install your application. The scopes can be added or removed from the App settings page, underPermissions & Scopes
section.
For some applications Cobalt sets mandatory scopes which cannot be removed. Additional scopes can be selected from the drop down. Cobalt also has the provision to add any
custom scopes supported by the respective platform.
Once the scopes has been added to the application in Cobalt, go to your Microsoft Azure account and update the scopes as added on Cobalt.
Select the OAuth App created for Cobalt and follow Step 6 and 7 above.
If you are facing scopes missing or invalid scope error. Make sure you are not passing any custom scope not supported by the platform. And, the scopes selected here are
identical to the ones selected in the platform.
Actions and triggers
Once the above setup is completed, you can create orchestrations of your use-cases using Teams actions and triggers. Following are the set of Teams actions and triggers supported by Cobalt.Post Message
Post Message
- Post notification to a channel - Your Bot Posts a notification to a channel in Microsoft Teams.
- Post notification to a user as a bot - Your Bot Posts a notification to a user (proactive messaging) in Microsoft Teams.
Meetings
Meetings
- Get meeting transcript - Get meeting transcript in Microsoft Teams.
Others
Others
- HTTP Request - Make HTTP API calls to any Microsoft Teams documented REST APIs.