Airtable
Setup
Access to your users’ Airtable records through OAuth.
To setup your Airtable app in Cobalt for OAuth, you will need the following credentials from your Airtable Developer account:

 Provide the acquired Client ID and Client Secret under Settings of the app and save it.
 Once the scopes has been added to the application in Cobalt, go to your Airtable Developer account and update the scopes as added on Cobalt.
Select the OAuth App created for Cobalt > Go to
Once the scopes has been added to the application in Cobalt, go to your Airtable Developer account and update the scopes as added on Cobalt.
Select the OAuth App created for Cobalt > Go to
- Client ID
- Client Secret
- Scopes
Pre-requisites
- Airtable Developer account. You can create one here.
If you haven’t already created an app in Airtable, you’d need to create one.
Creating an app in Airtable
To create a Airtable app and acquire the above mentioned credentials, please follow the steps mentioned below:- Log in to your Airtable Developer account.
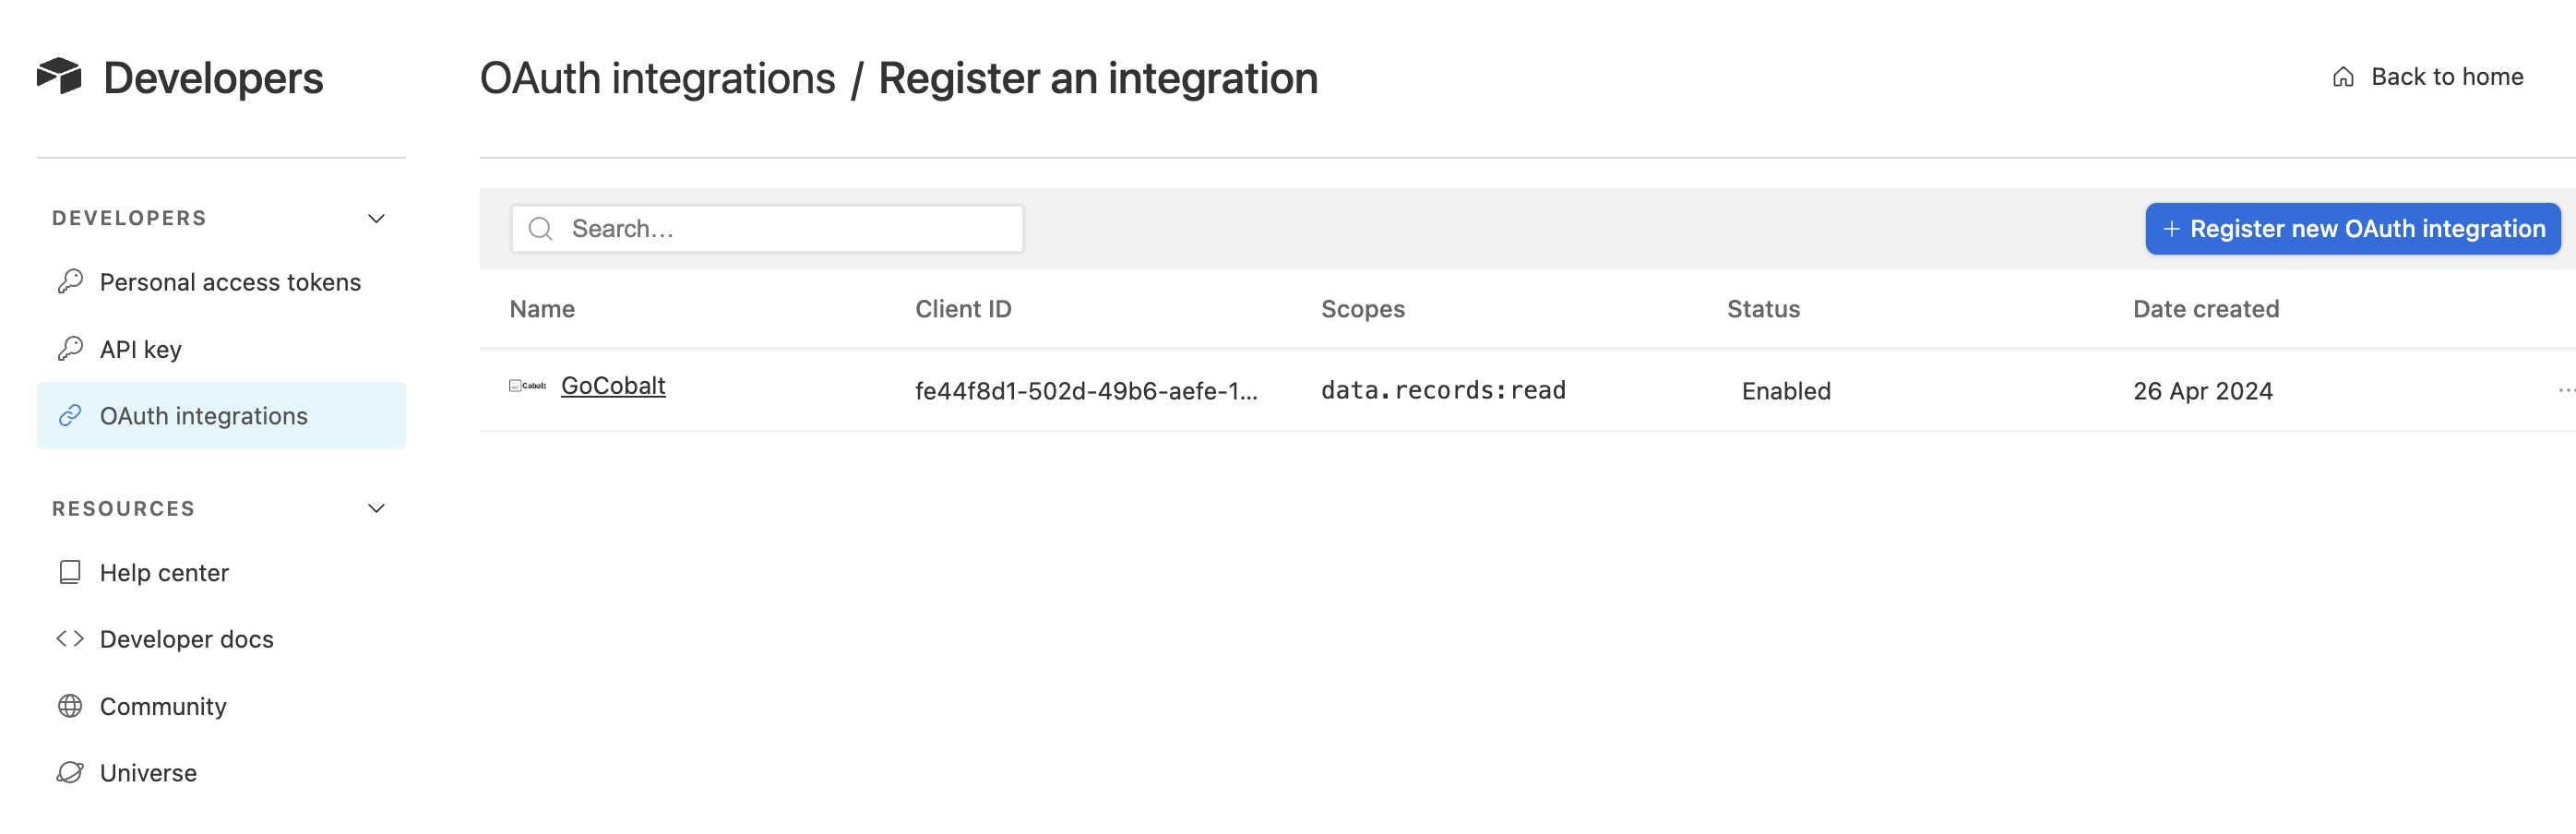
- Go to
OAuth integrationsin the side menu and click on+ Register new OAuth integrationbutton in the right.
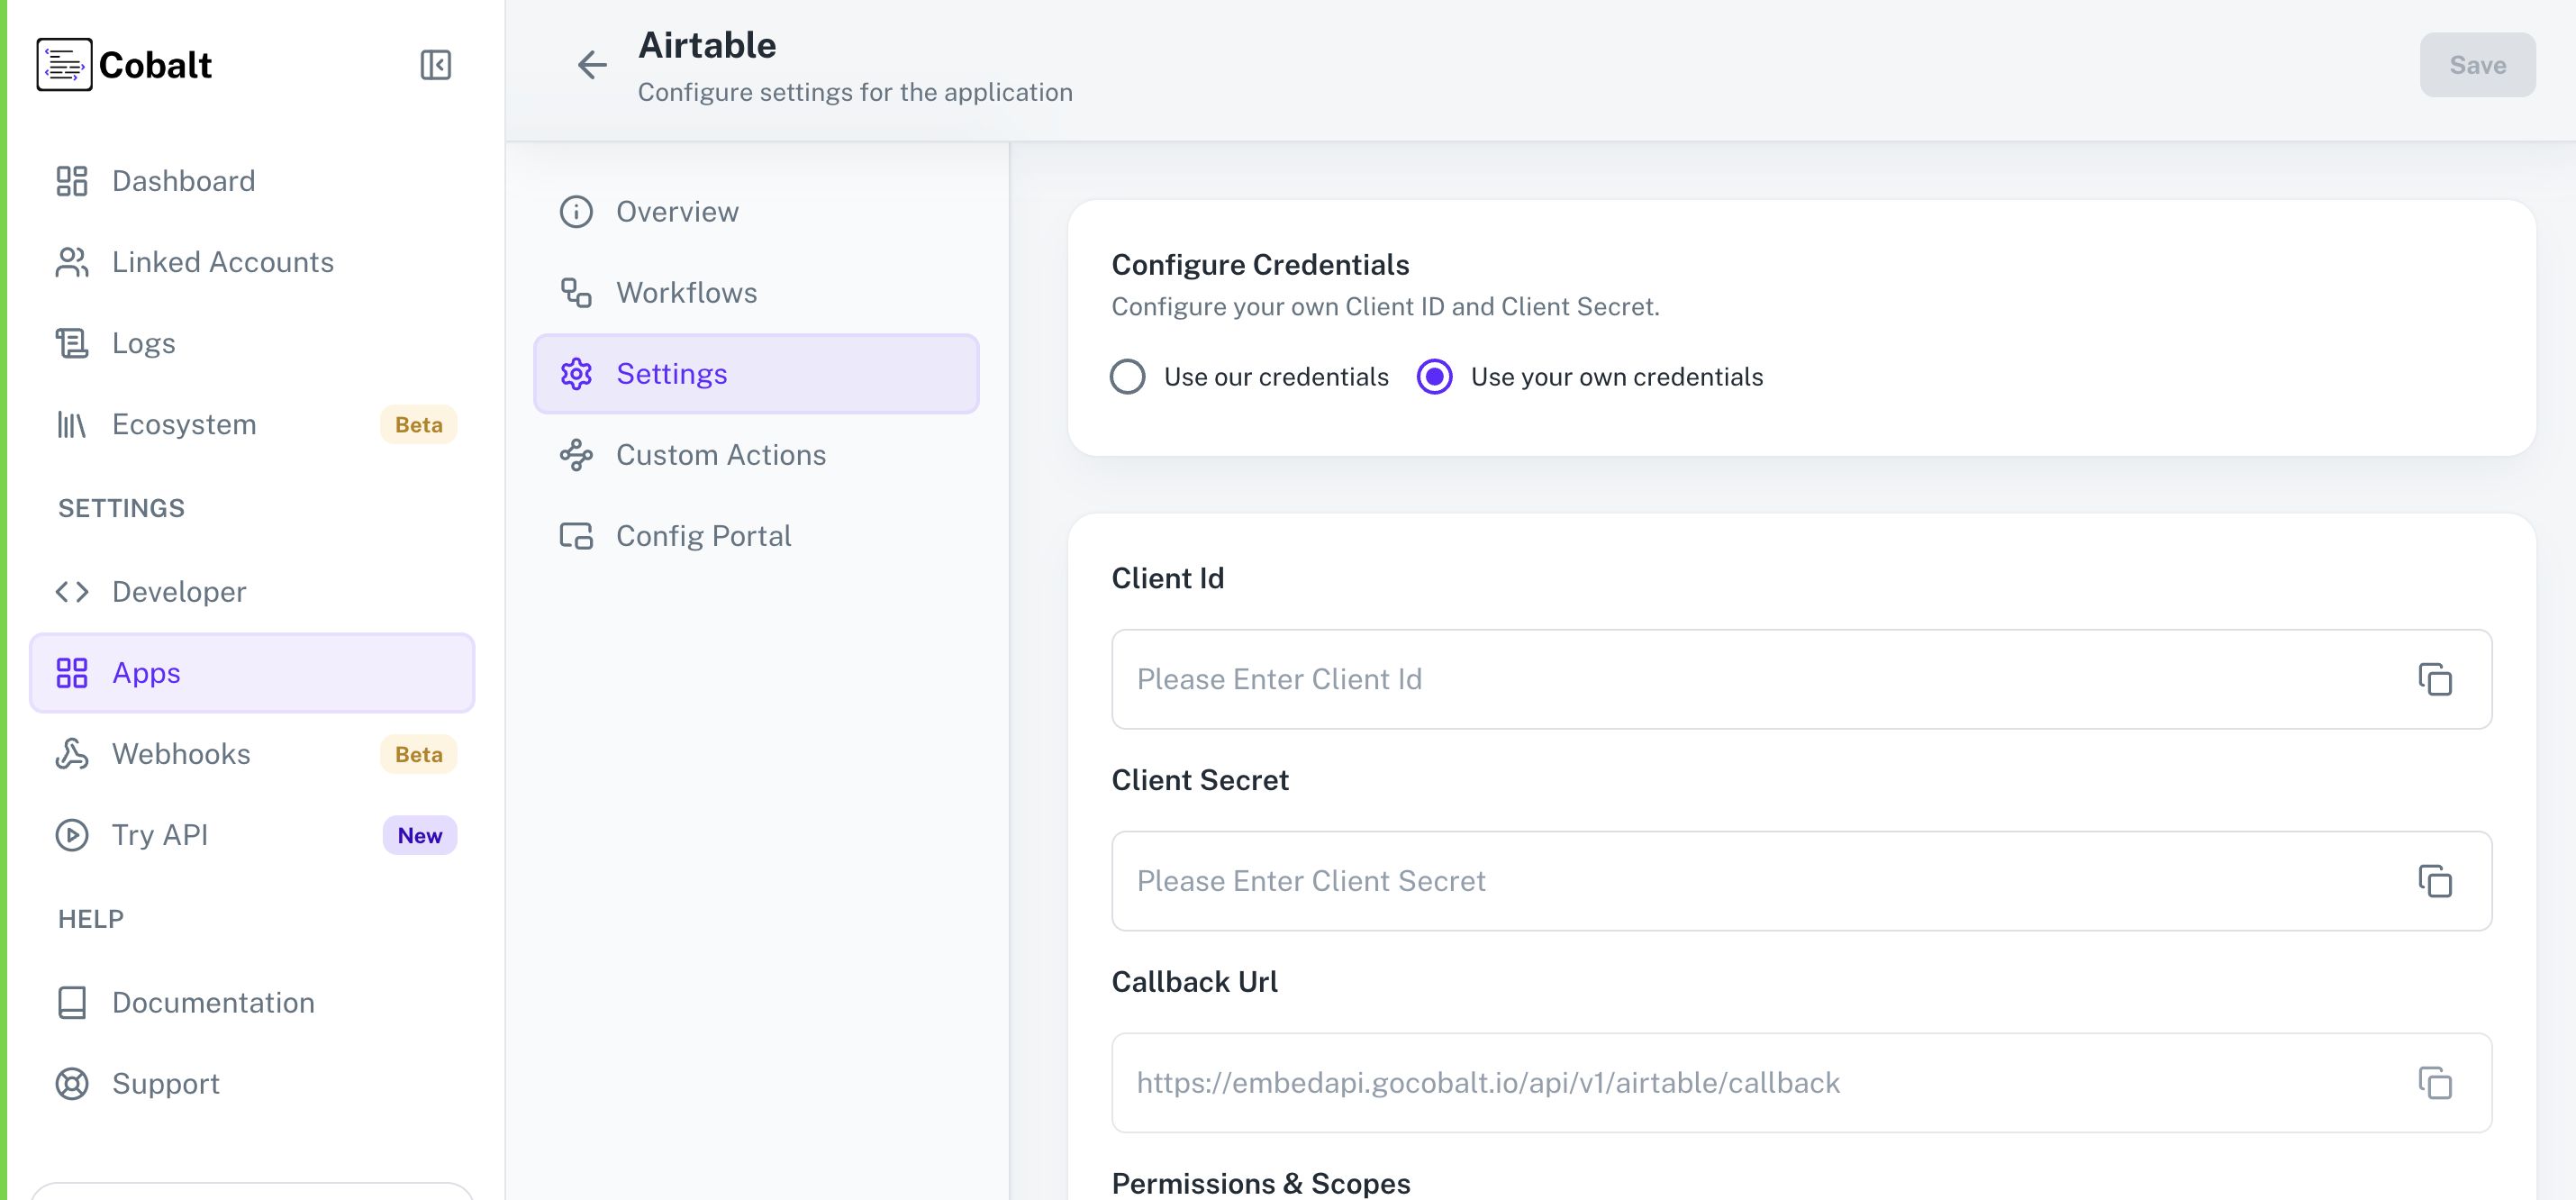
- Go to your
Apps catalogin Cobalt > Search forAirtable>Settings>Use your credentials>Callback Url> Copy it. - In the app, enter the
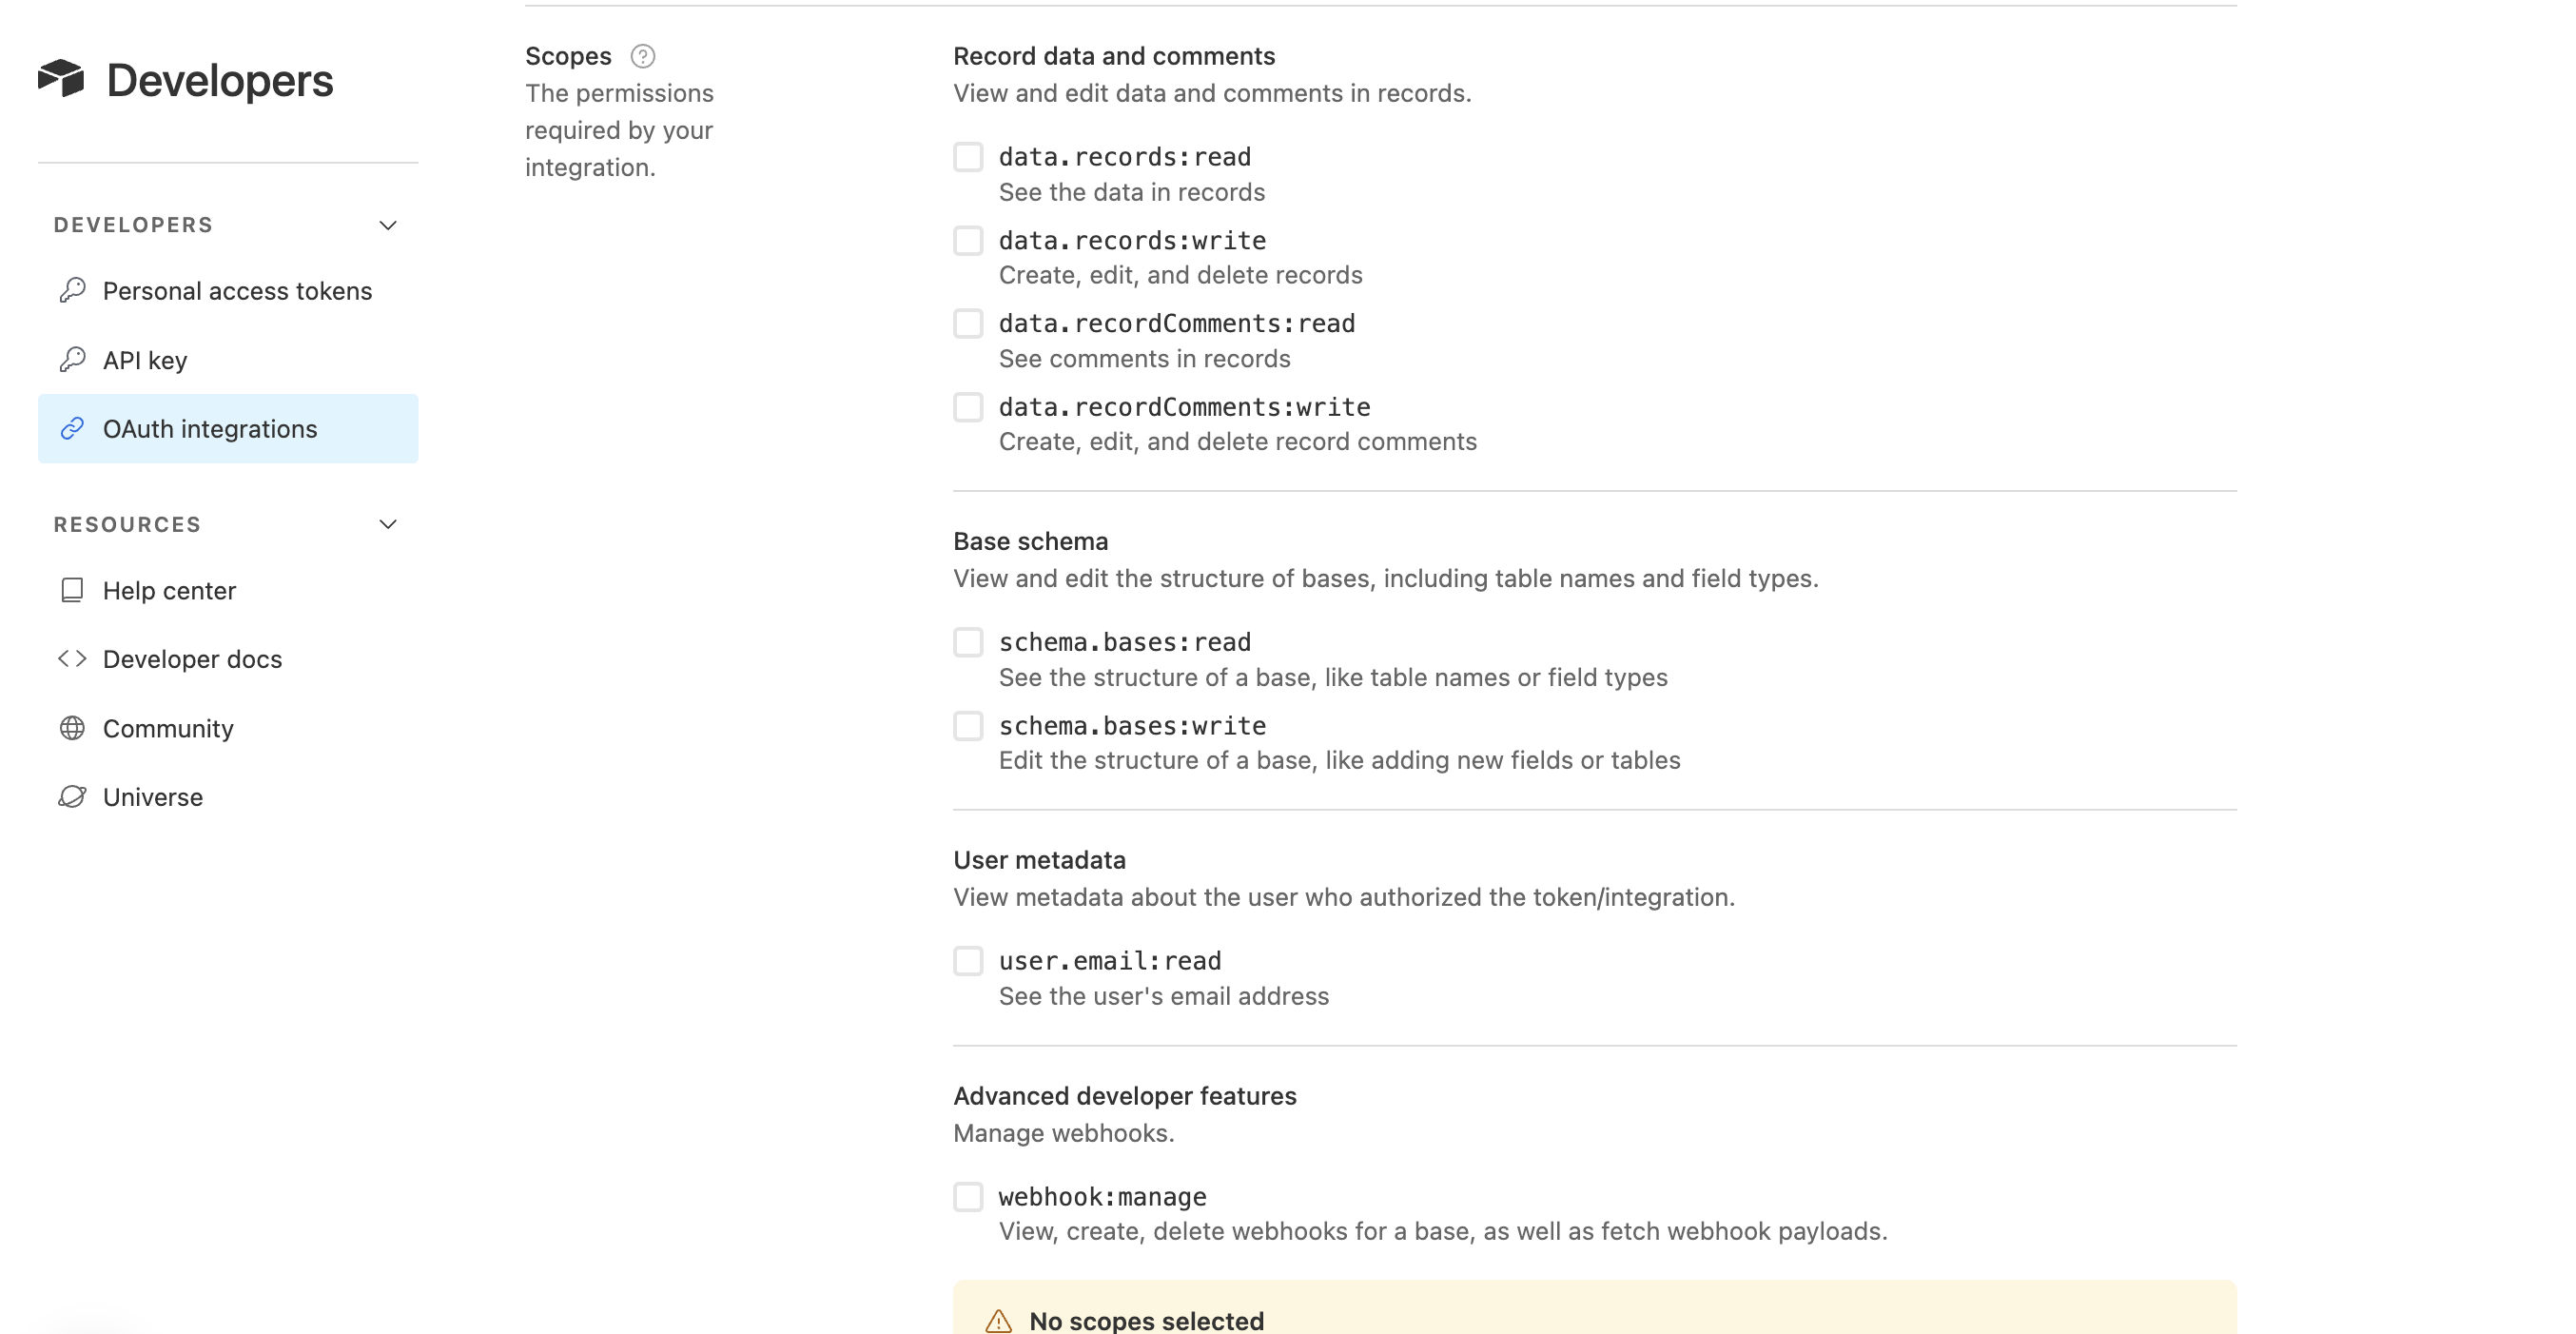
App Name, paste the Callback Url underOAuth redirect URLand clickRegister integration. - Select the required permissions in the Scopes section, as provided in your Cobalt Airtable settings page and click on the
Save changesbutton.
- Scroll to the Developer details section and copy the Client ID and get the Client Secret by clicking on the
Generate Client secretbutton.Copy the Client Secret displayed as it will be shown only once.
Configuring credentials in Cobalt
App settings page lets you configure the authentication settings for anOAuth 2.0 based application. For your customers to provide you authorization to access their data,
they would first need to install your application. This page lets you set up your application credentials.
Provide the acquired Client ID and Client Secret under Settings of the app and save it.
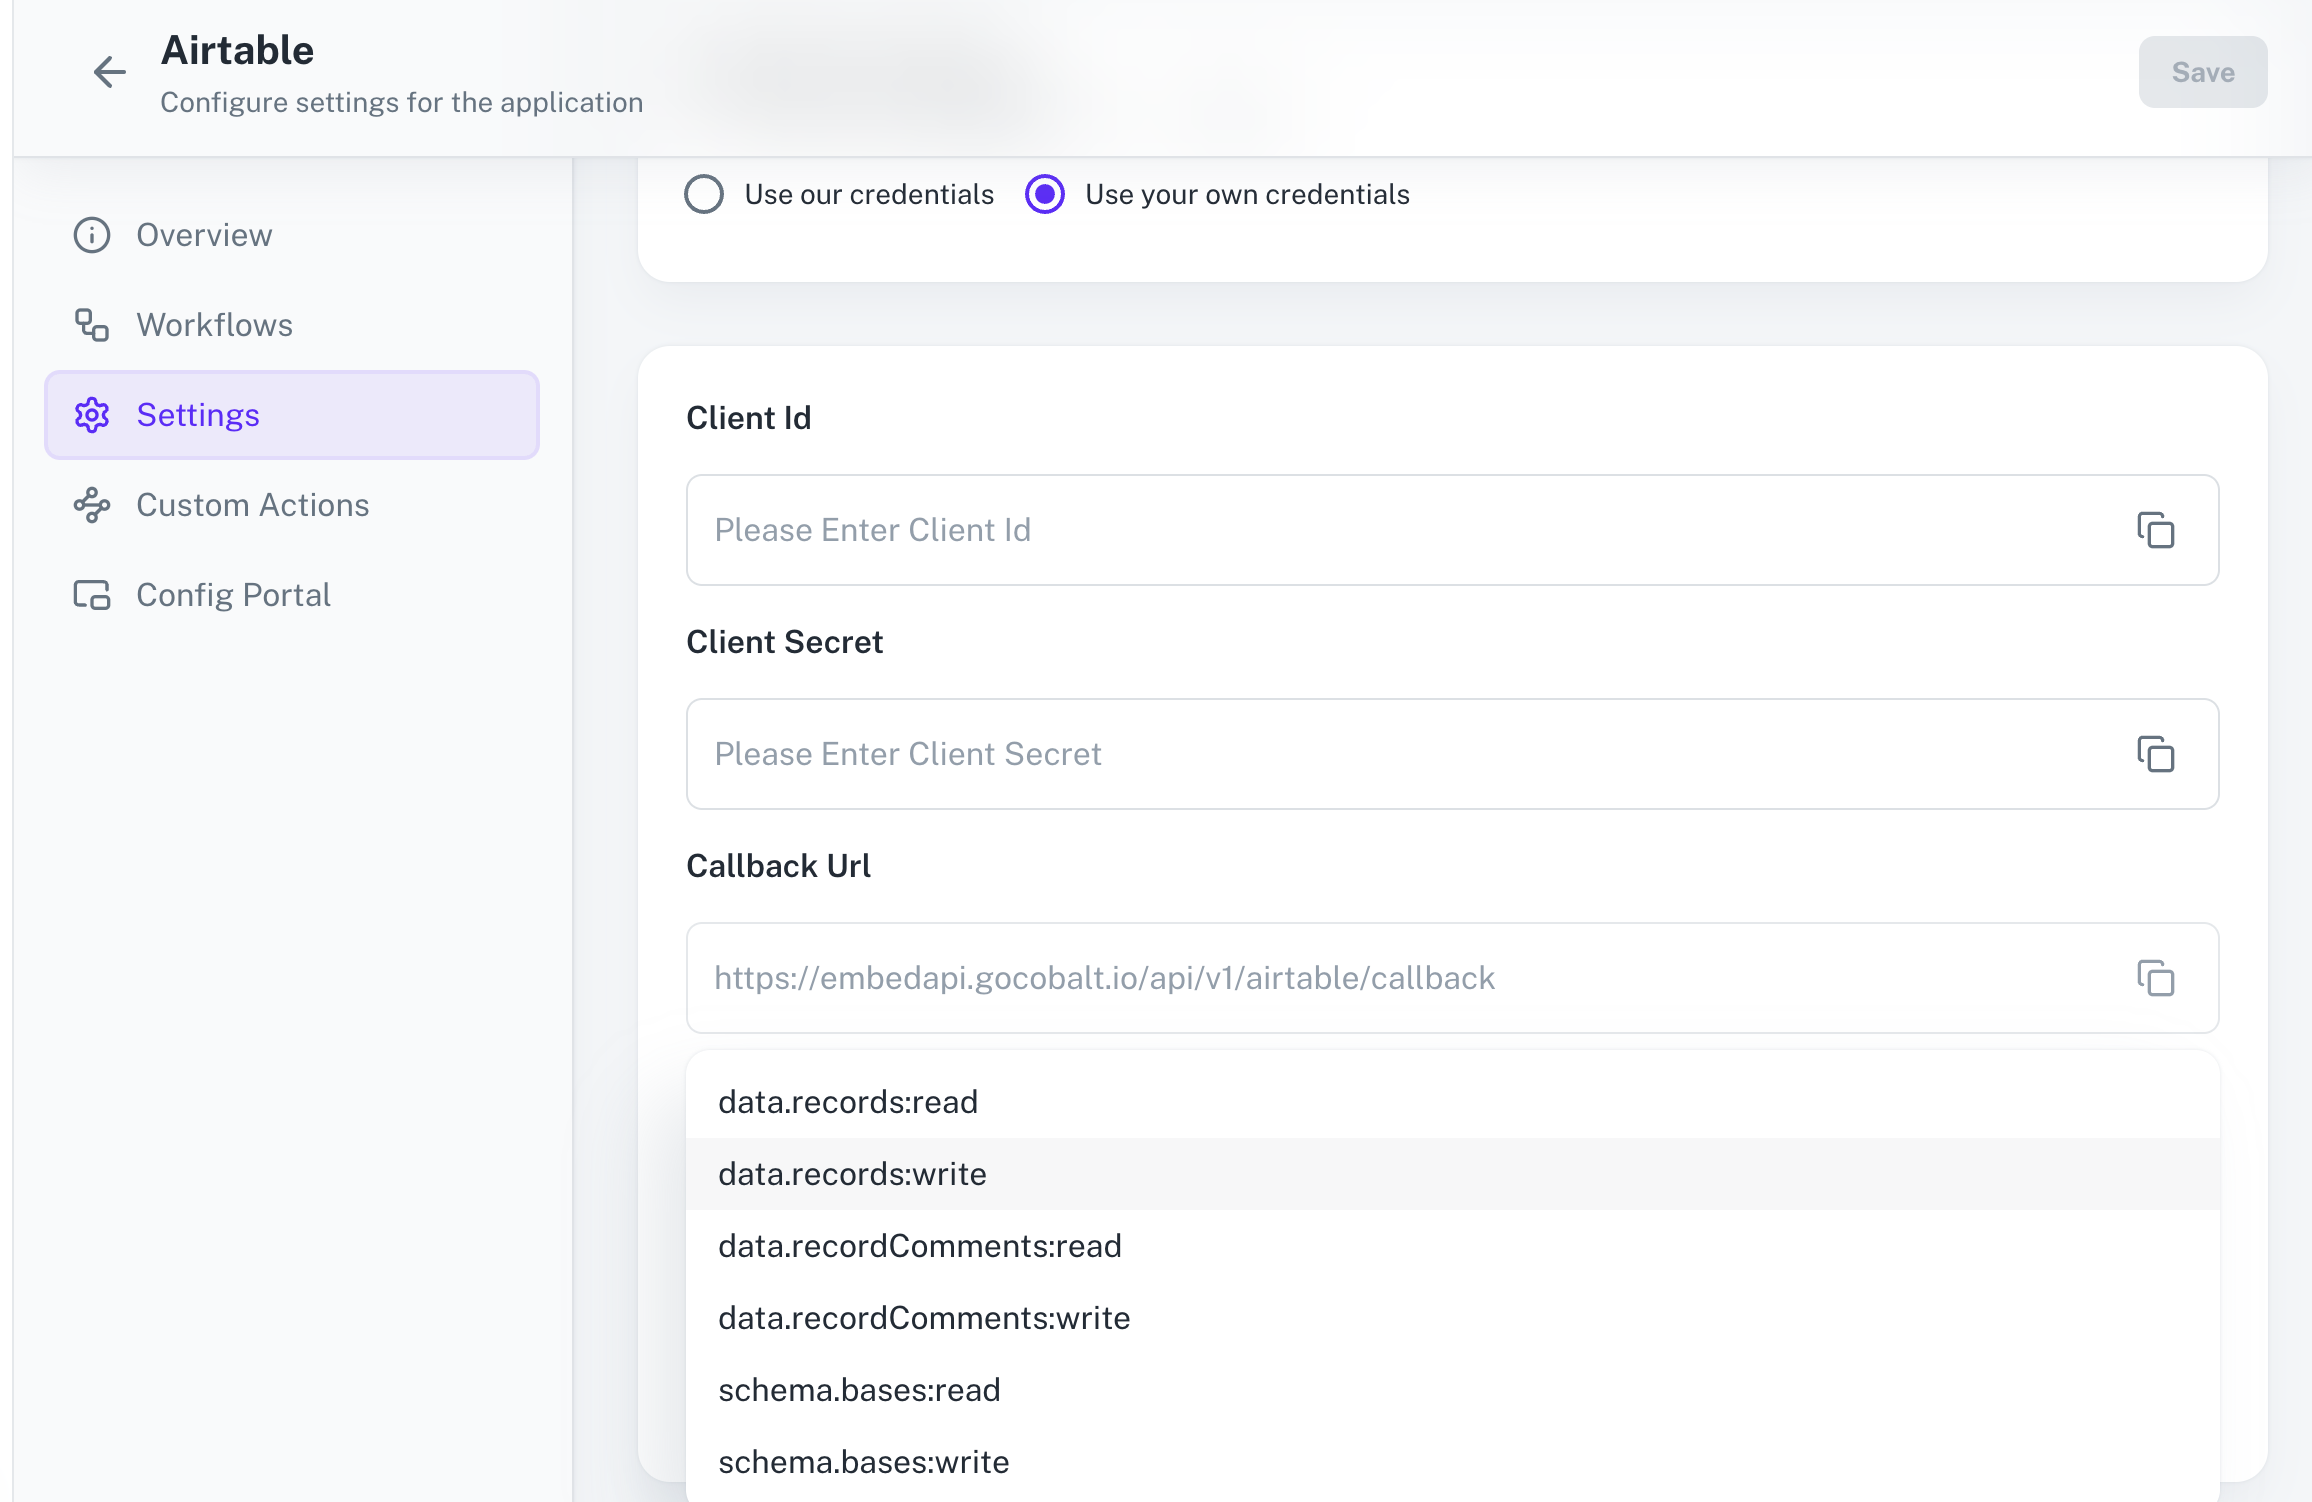
Configuring Scopes
Cobalt lets you configure what permissions to ask from your users while they install your application. The scopes can be added or removed from the App settings page, underPermissions & Scopes
section.
For some applications Cobalt sets mandatory scopes which cannot be removed. Additional scopes can be selected from the drop down. Cobalt also has the provision to add any
custom scopes supported by the respective platform.
Once the scopes has been added to the application in Cobalt, go to your Airtable Developer account and update the scopes as added on Cobalt.
Select the OAuth App created for Cobalt > Go to Scopes section > Add the scopes as added in Cobalt > Click on Save changes.
If you are facing scopes missing or invalid scope error. Make sure you are not passing any custom scope not supported by the platform. And, the scopes selected here are
identical to the ones selected in the platform.
Actions and triggers
Once the above setup is completed, you can create orchestrations of your use-cases using Airtable actions and triggers. Following are the set of Airtable actions and triggers supported by Cobalt.Bases
Bases
- List Bases - List all bases in Airtable.
- Create Base - Create new base in Airtable.
- Get Base Schema - Get a base schema in Airtable.
Fields
Fields
- Create Field - Create a new Field in Airtable.
- Update Field - Update a field in Airtablee.
Record
Record
- Create Record - Create a record in Airtable.
- Update Record - Update a record in Airtable.
- Delete Record - Delete a record in Airtable.
- List Records - List all records in Airtable.
Table
Table
- Create Table - Create a table in Airtable.
- Update Table - Update a table in Airtable.
Others
Others
- HTTP Request - Make HTTP API calls to any Airtable documented REST APIs.