Facebook Ads
Setup
Connect to your Facebook Ads app for OAuth.
To setup your Facebook Ads app in Cobalt for OAuth, you will need the following credentials from your Facebook Developer App Settings:
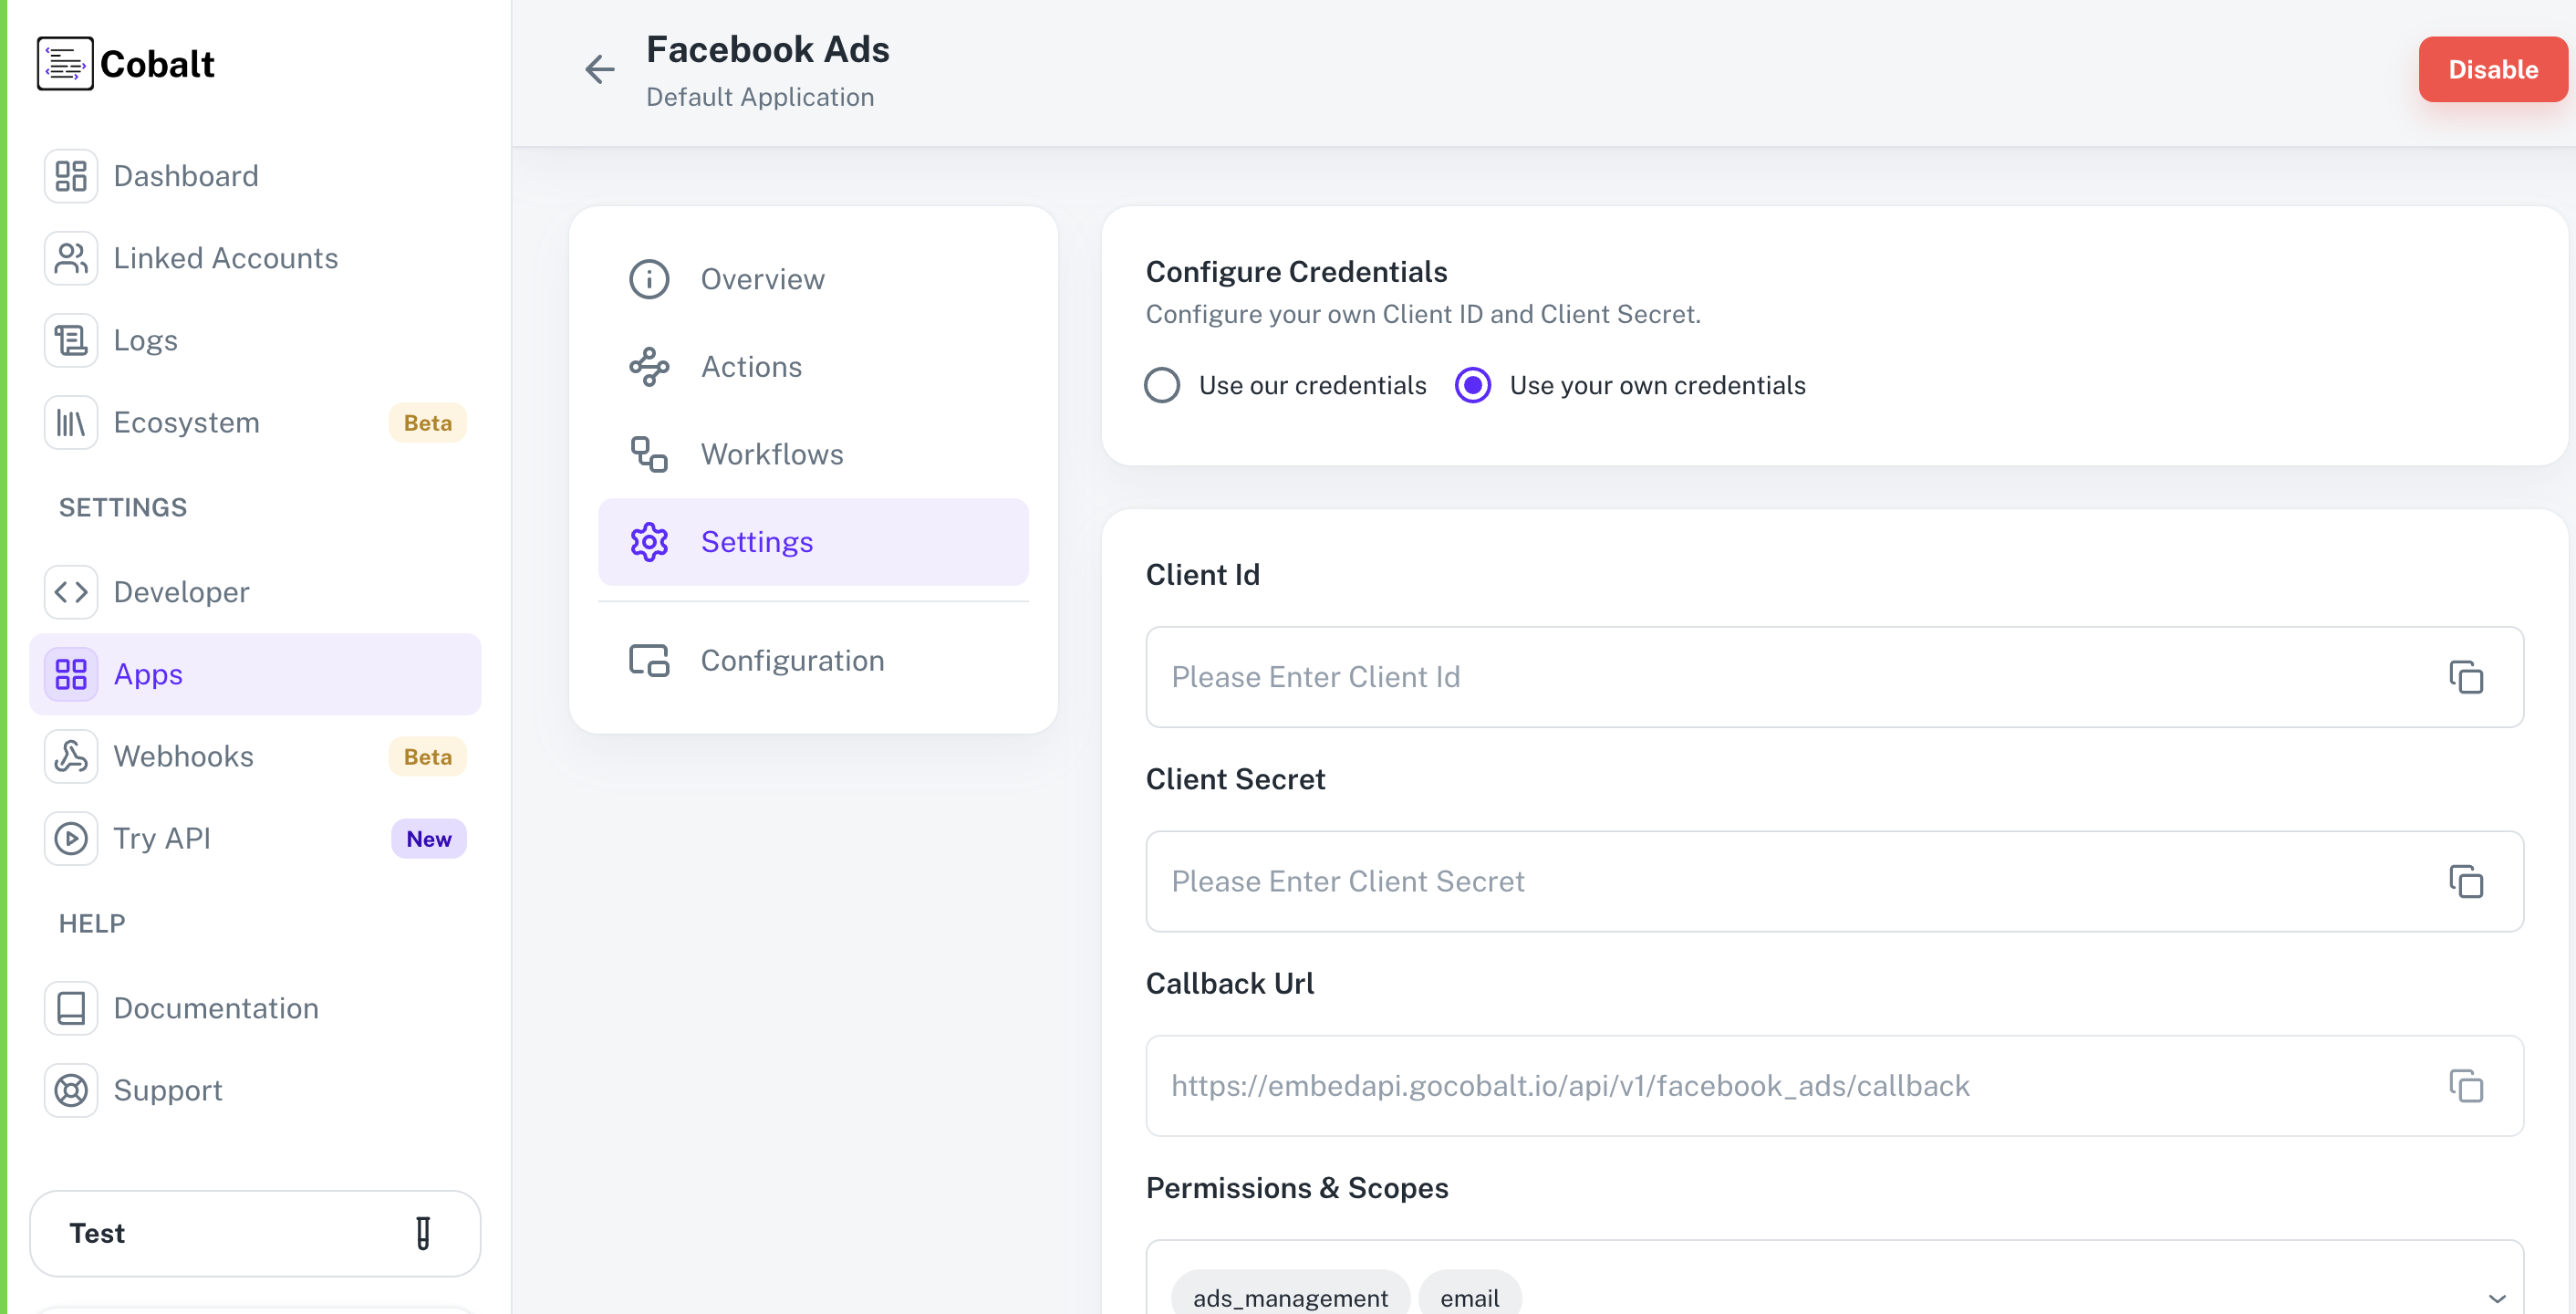 Provide the acquired Client ID and Client Secret under Settings of the app and save it.
 Test the Webhooks
Once approved, you can change the Mode of the app to
Test the Webhooks
Once approved, you can change the Mode of the app to
- Client ID
- Client Secret
- Scopes
Pre-requisites
- Facebook Developer Portal. You can create one here.
Required Settings
- Mandatory Scopes
- Ads_management
- pages_show_list
- pages_manage_ads
- pages_manage_metadata
- leads_retrieval
If you haven’t already created an app in Facebook, you’d need to create one.
Creating an app in Facebook
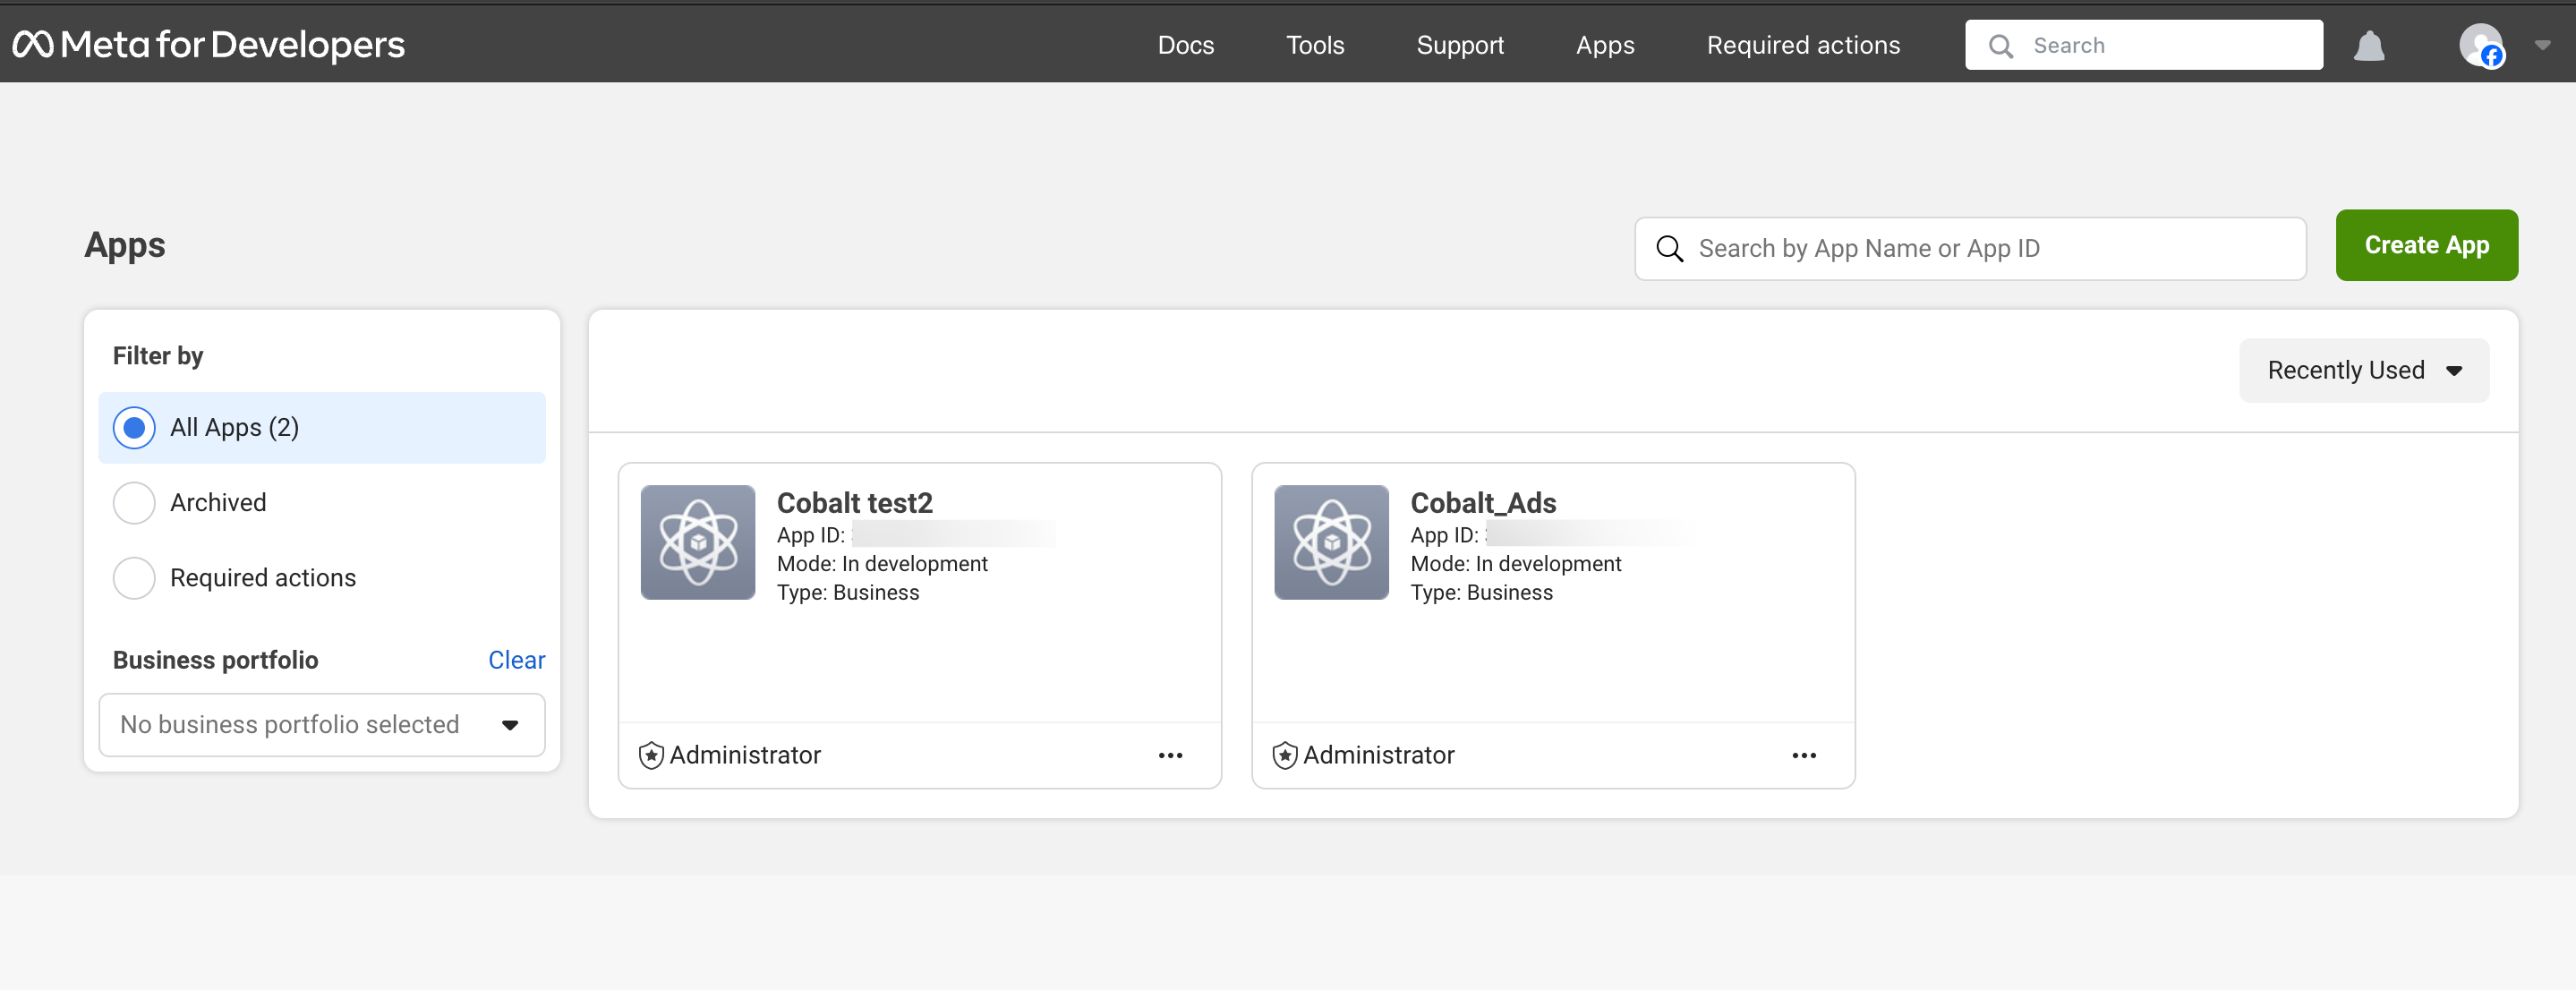
To create a Facebook Ads app and acquire the above mentioned credentials, please follow the steps mentioned below:- Log in to your Facebook Developer Portal.
- Select the
Appstab in the top nav bar and click on theCreate Appbutton.
- Select
Otherfor use-case > ClickNext> SelectBusinessas App-type and click onNext.App Type cannot be changed after the app has been created. - Enter the App Name for your application and click on
Create App. - Go to your
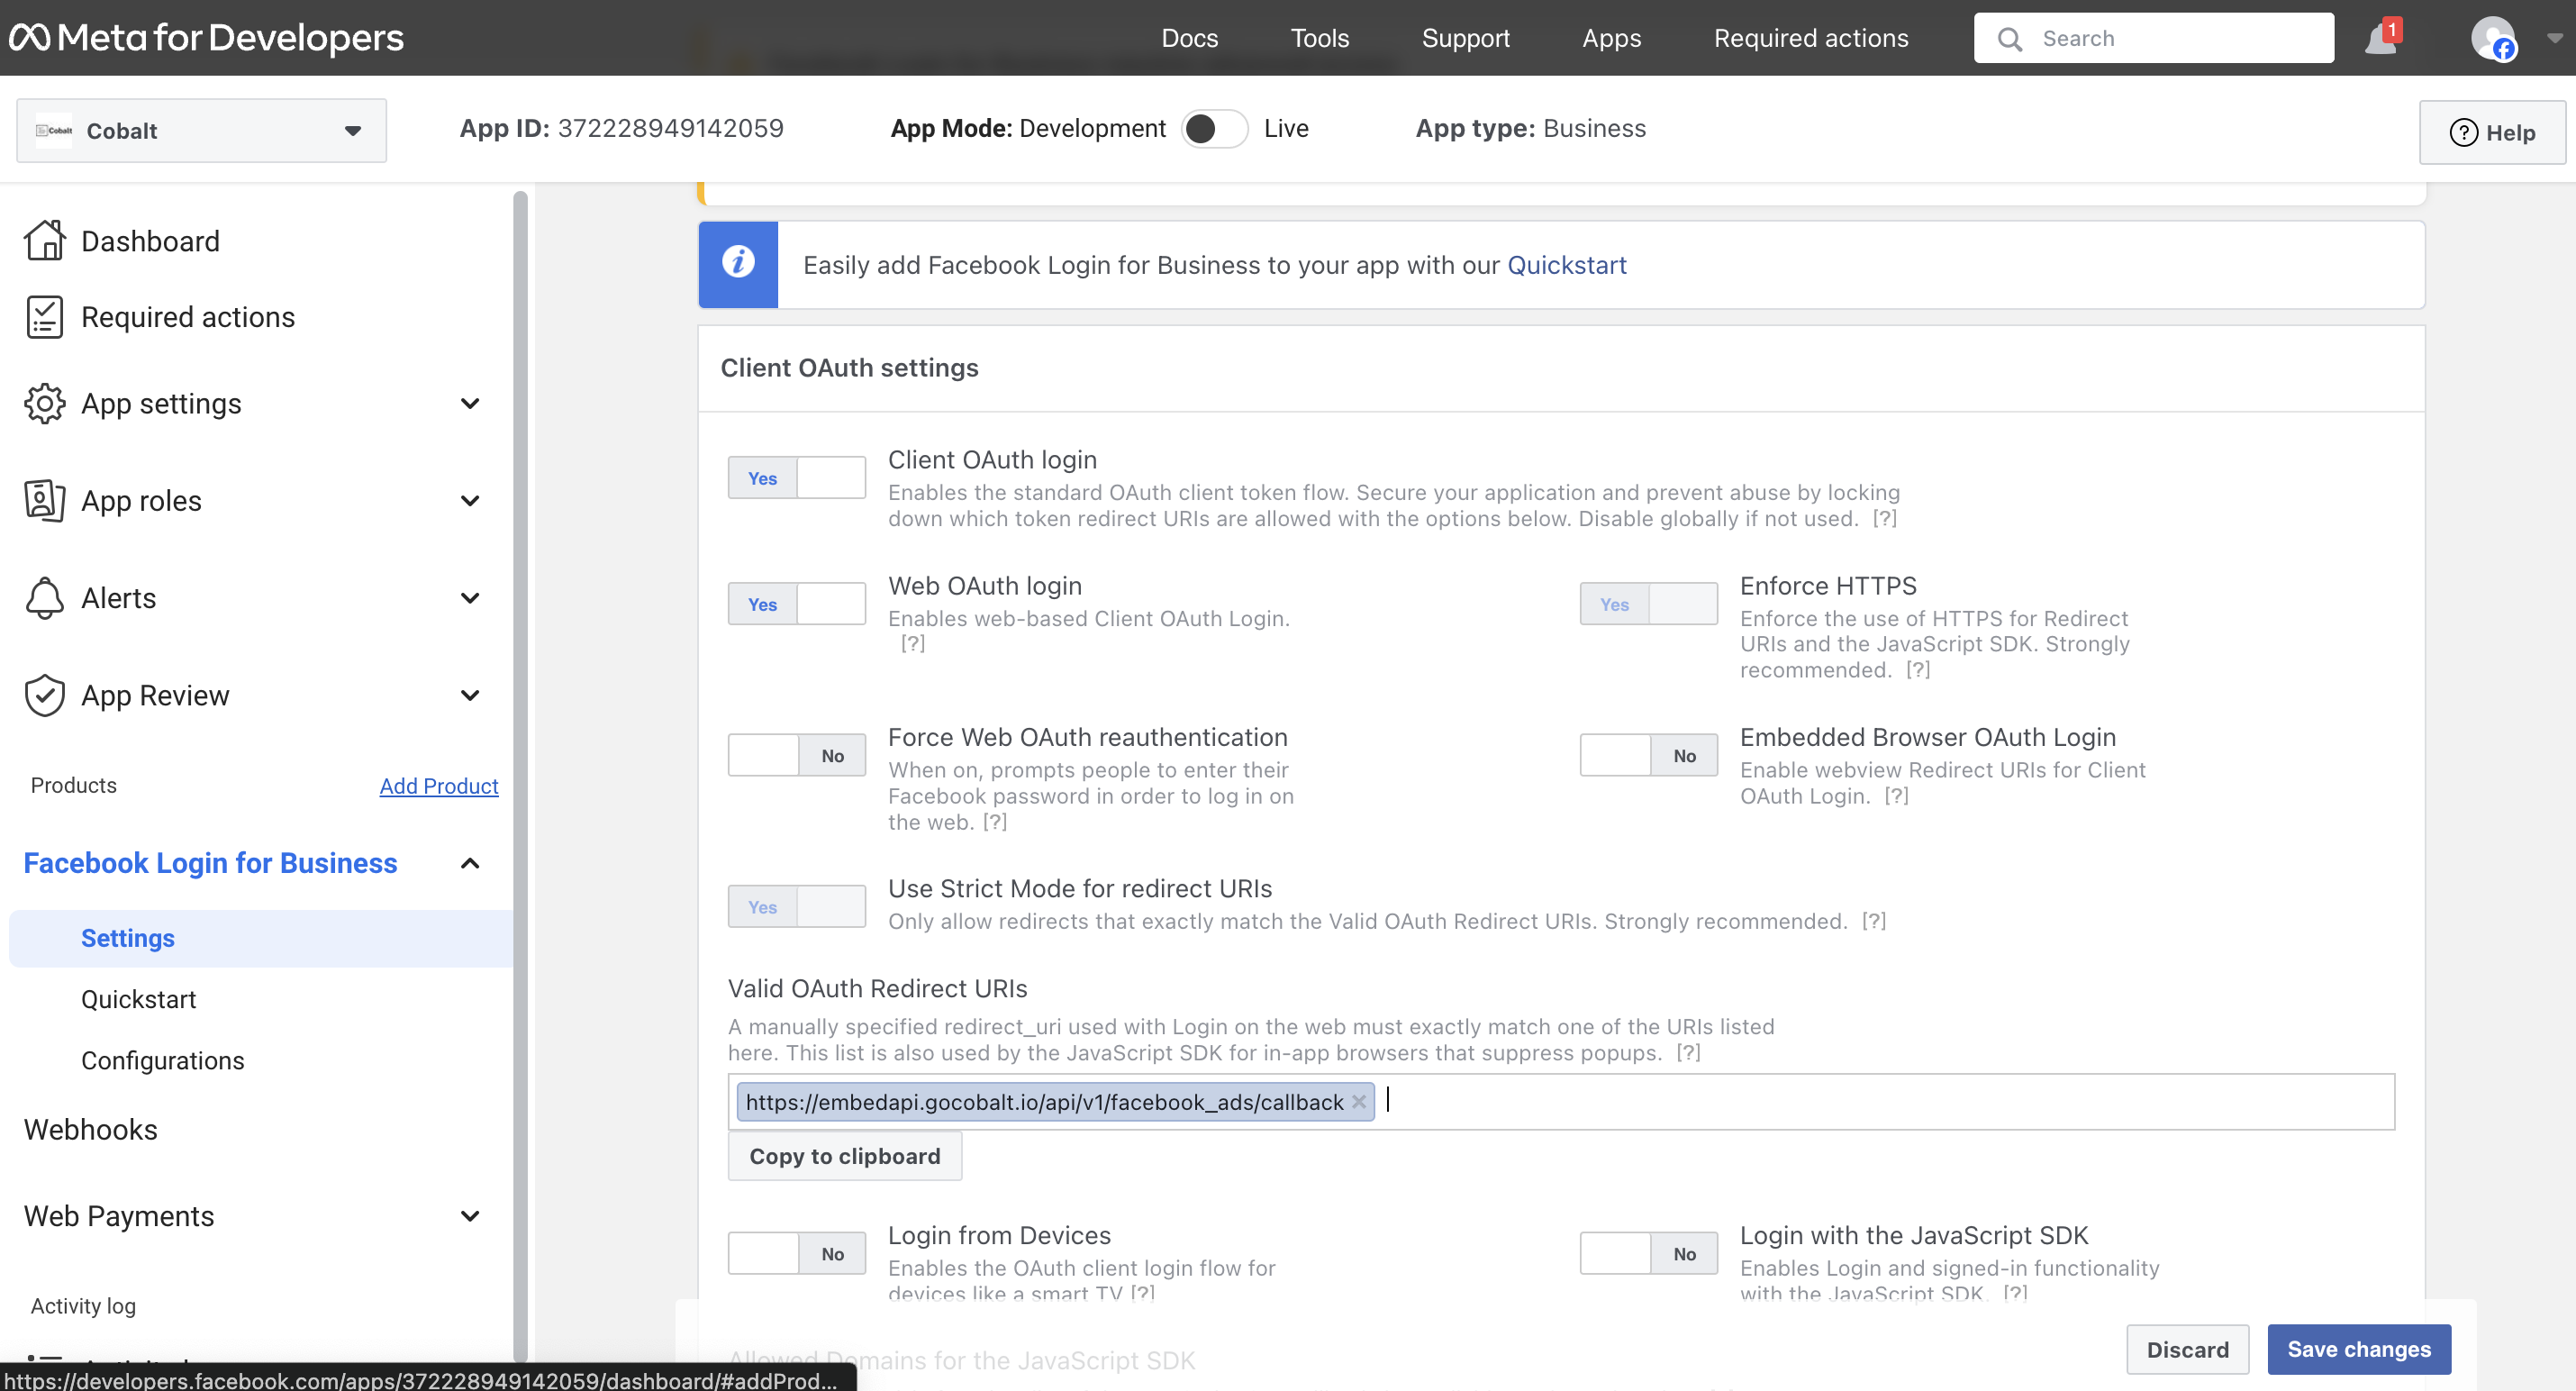
Apps catalogin Cobalt > Search forFacebook Ads>Settings>Use your credentials>Callback Url> Copy it. - Click on
Add Productin the left menu > Click onSet Upunder Facebook Login for Business > Paste the Callback Url under Valid OAuth Redirect URIs and click onSave changes.
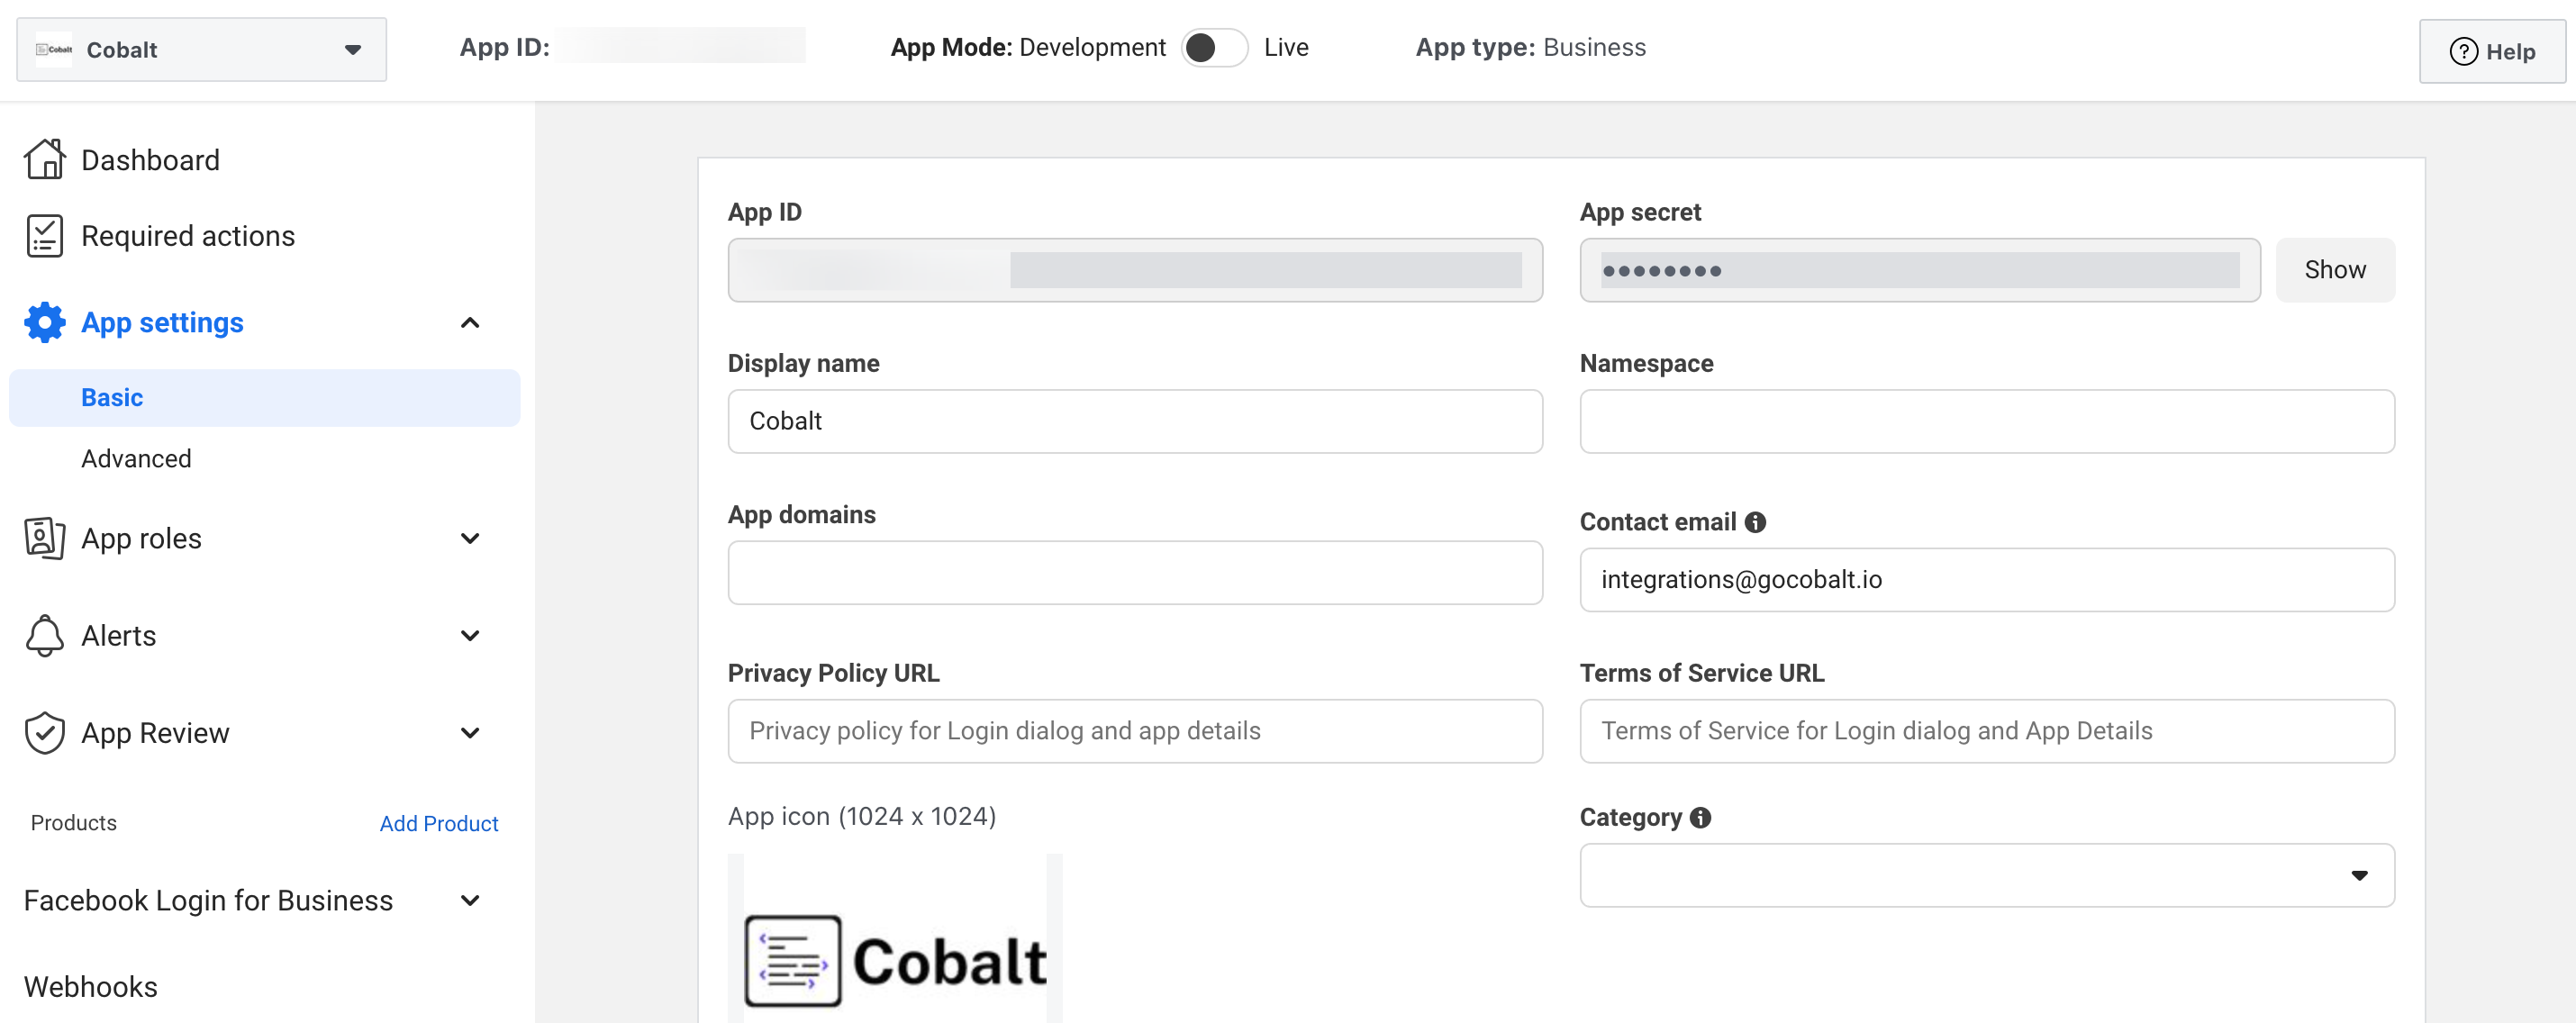
- Go to
Basicunder the App Settings section in the left menu and copy the App ID(Client ID) and App Secret(Client Secret).
Configuring credentials in Cobalt
App settings page lets you configure the authentication settings for anOAuth 2.0 based application. For your customers to provide you authorization to access their data,
they would first need to install your application. This page lets you set up your application credentials.
Provide the acquired Client ID and Client Secret under Settings of the app and save it.
Facebook Ads Single Webhook URL
If you wish to create an orchestration where a workflow is being triggered when some operation occurs in Facebook Ads, you’d need to subscribe to Facebook Ads’ Webhook. Cobalt provides a single webhook URL to manage such event triggers for all your customers. To setup Facebook Ads webhook subscription:- Select Facebook Ads from the application list in Cobalt, and select
Settings. - Copy the
Single Webhook Url. - Go to OAuth app of Facebook Ads > Click on
Add Productin the left menu > Click onSet Upunder Webhooks. - Select Page object from drop-down and click
Subscribe to this object. Paste the Single Webhook URL underCallback URLand the Verify token ascobalt_verify_token. Click onVerify and save.
Ensure that the verify token entered is
cobalt_verify_token. No other value will be able to verify the Webhook.- Subscribe to the
Leadgenevent if not already subscribed.
Test the Webhooks
Webhooks can be only tested while the App Mode is
Live.- Toggle on the App Mode from
DevelopmenttoLive. You can test the Lead Ads Webhook at the Facebook Ads testing tool here.
App Review for Facebook Ads
If the app will only be used by app users who have a role on the app itself, App Review is not required but if the app will be used by anyone without a Role on the app or a role in a Business that has claimed the app, it must first undergo App Review by Meta.Follow the detailed steps for an App Review submission given in the guide here.
Live by using the Toggle given in top Nav bar of the OAuth app.
Actions and triggers
Once the above setup is completed, you can create orchestrations of your use-cases using Facebook Ads actions and triggers. Following are the set of Facebook Ads actions and triggers supported by Cobalt.Ad Creative
Ad Creative
- Create Ad Creative - Create an Ad Creative in Facebook Ads.
- Update Ad Creative - Update an Ad Creative in Facebook Ads.
Ad
Ad
- Create Ad - Create an lead in Facebook Ads.
- Get Ad - Get an Ad in Facebook Ads.
Ad Set
Ad Set
- Get all Ad Sets - Get all Ad Sets in Facebook Ads.
- Create Ad Set - Create an Ad Set in Facebook Ads.
- Get Ad Set - Get an Ad Set in Facebook Ads.
- Update Ad Set - Update an Ad Set in Facebook Ads.
Campaigns
Campaigns
- Get All Campaigns - Get all Campaigns in Facebook Ads.
- Create Campaign - Create a Campaign in Facebook Ads.
- Update Campaign - Update a Campaign in Facebook Ads.
Leadgen Forms
Leadgen Forms
- Get Leadgen forms - Get all Leadgen forms in Facebook Ads.
- Create Leadgen form - Create a Leadgen form in Facebook Ads.
Others
Others
- HTTP Request - Make HTTP API calls to any Facebook Ads documented REST APIs.
- Get Profile - Get a profile in Facebook Ads.