Developer Settings
Events
Events are the trigger entities that are used to define a start point of a workflow and can be triggered using the REST APIs or the Event URL assigned for the Organization.
Think of these custom events as signals sent from your app using the Cobalt SDK or Event API to kick off different processes. Cobalt events are 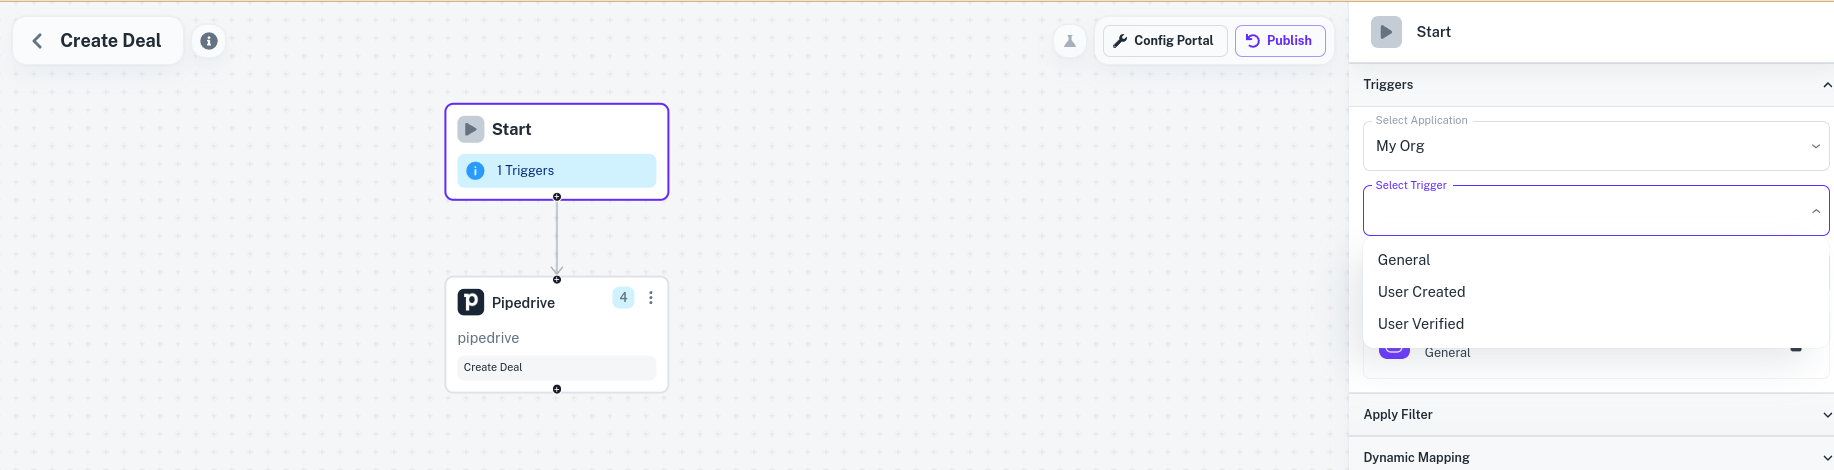 Above image shows a user selecting from their default application events as a trigger for a Pipedrive workflow.
 Change the name and update the sample payload as per your requirement and click
 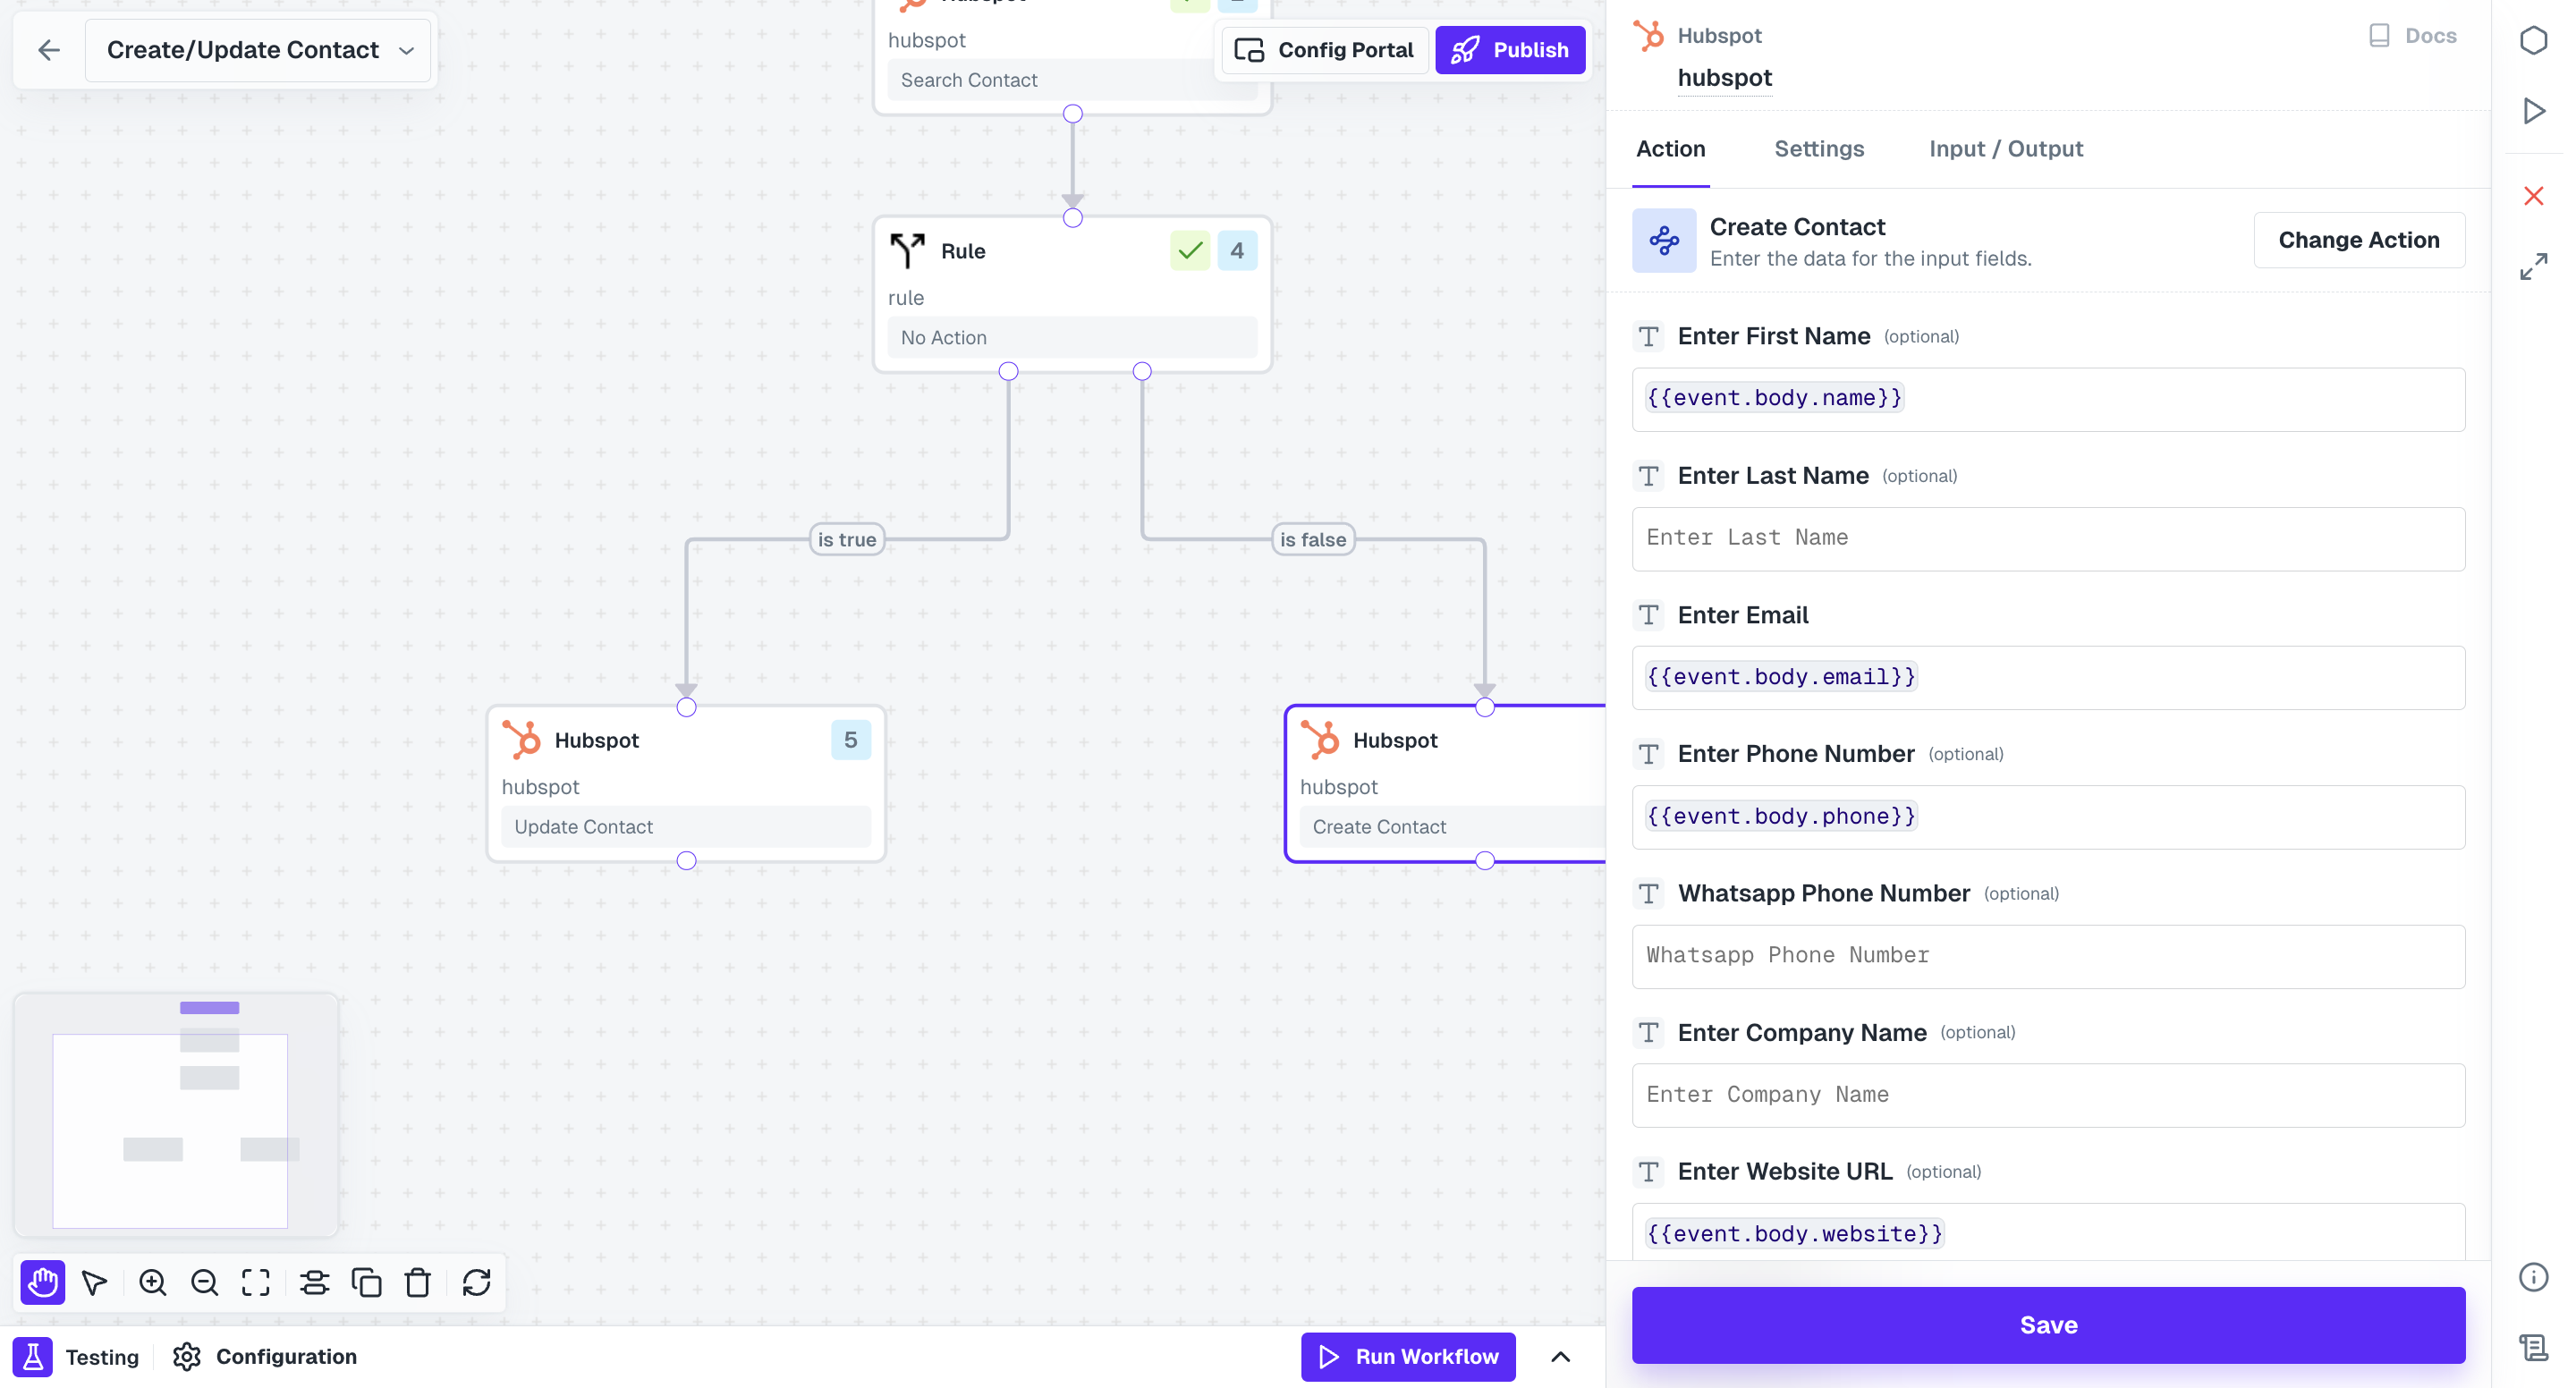 Now, when you actually trigger the event
 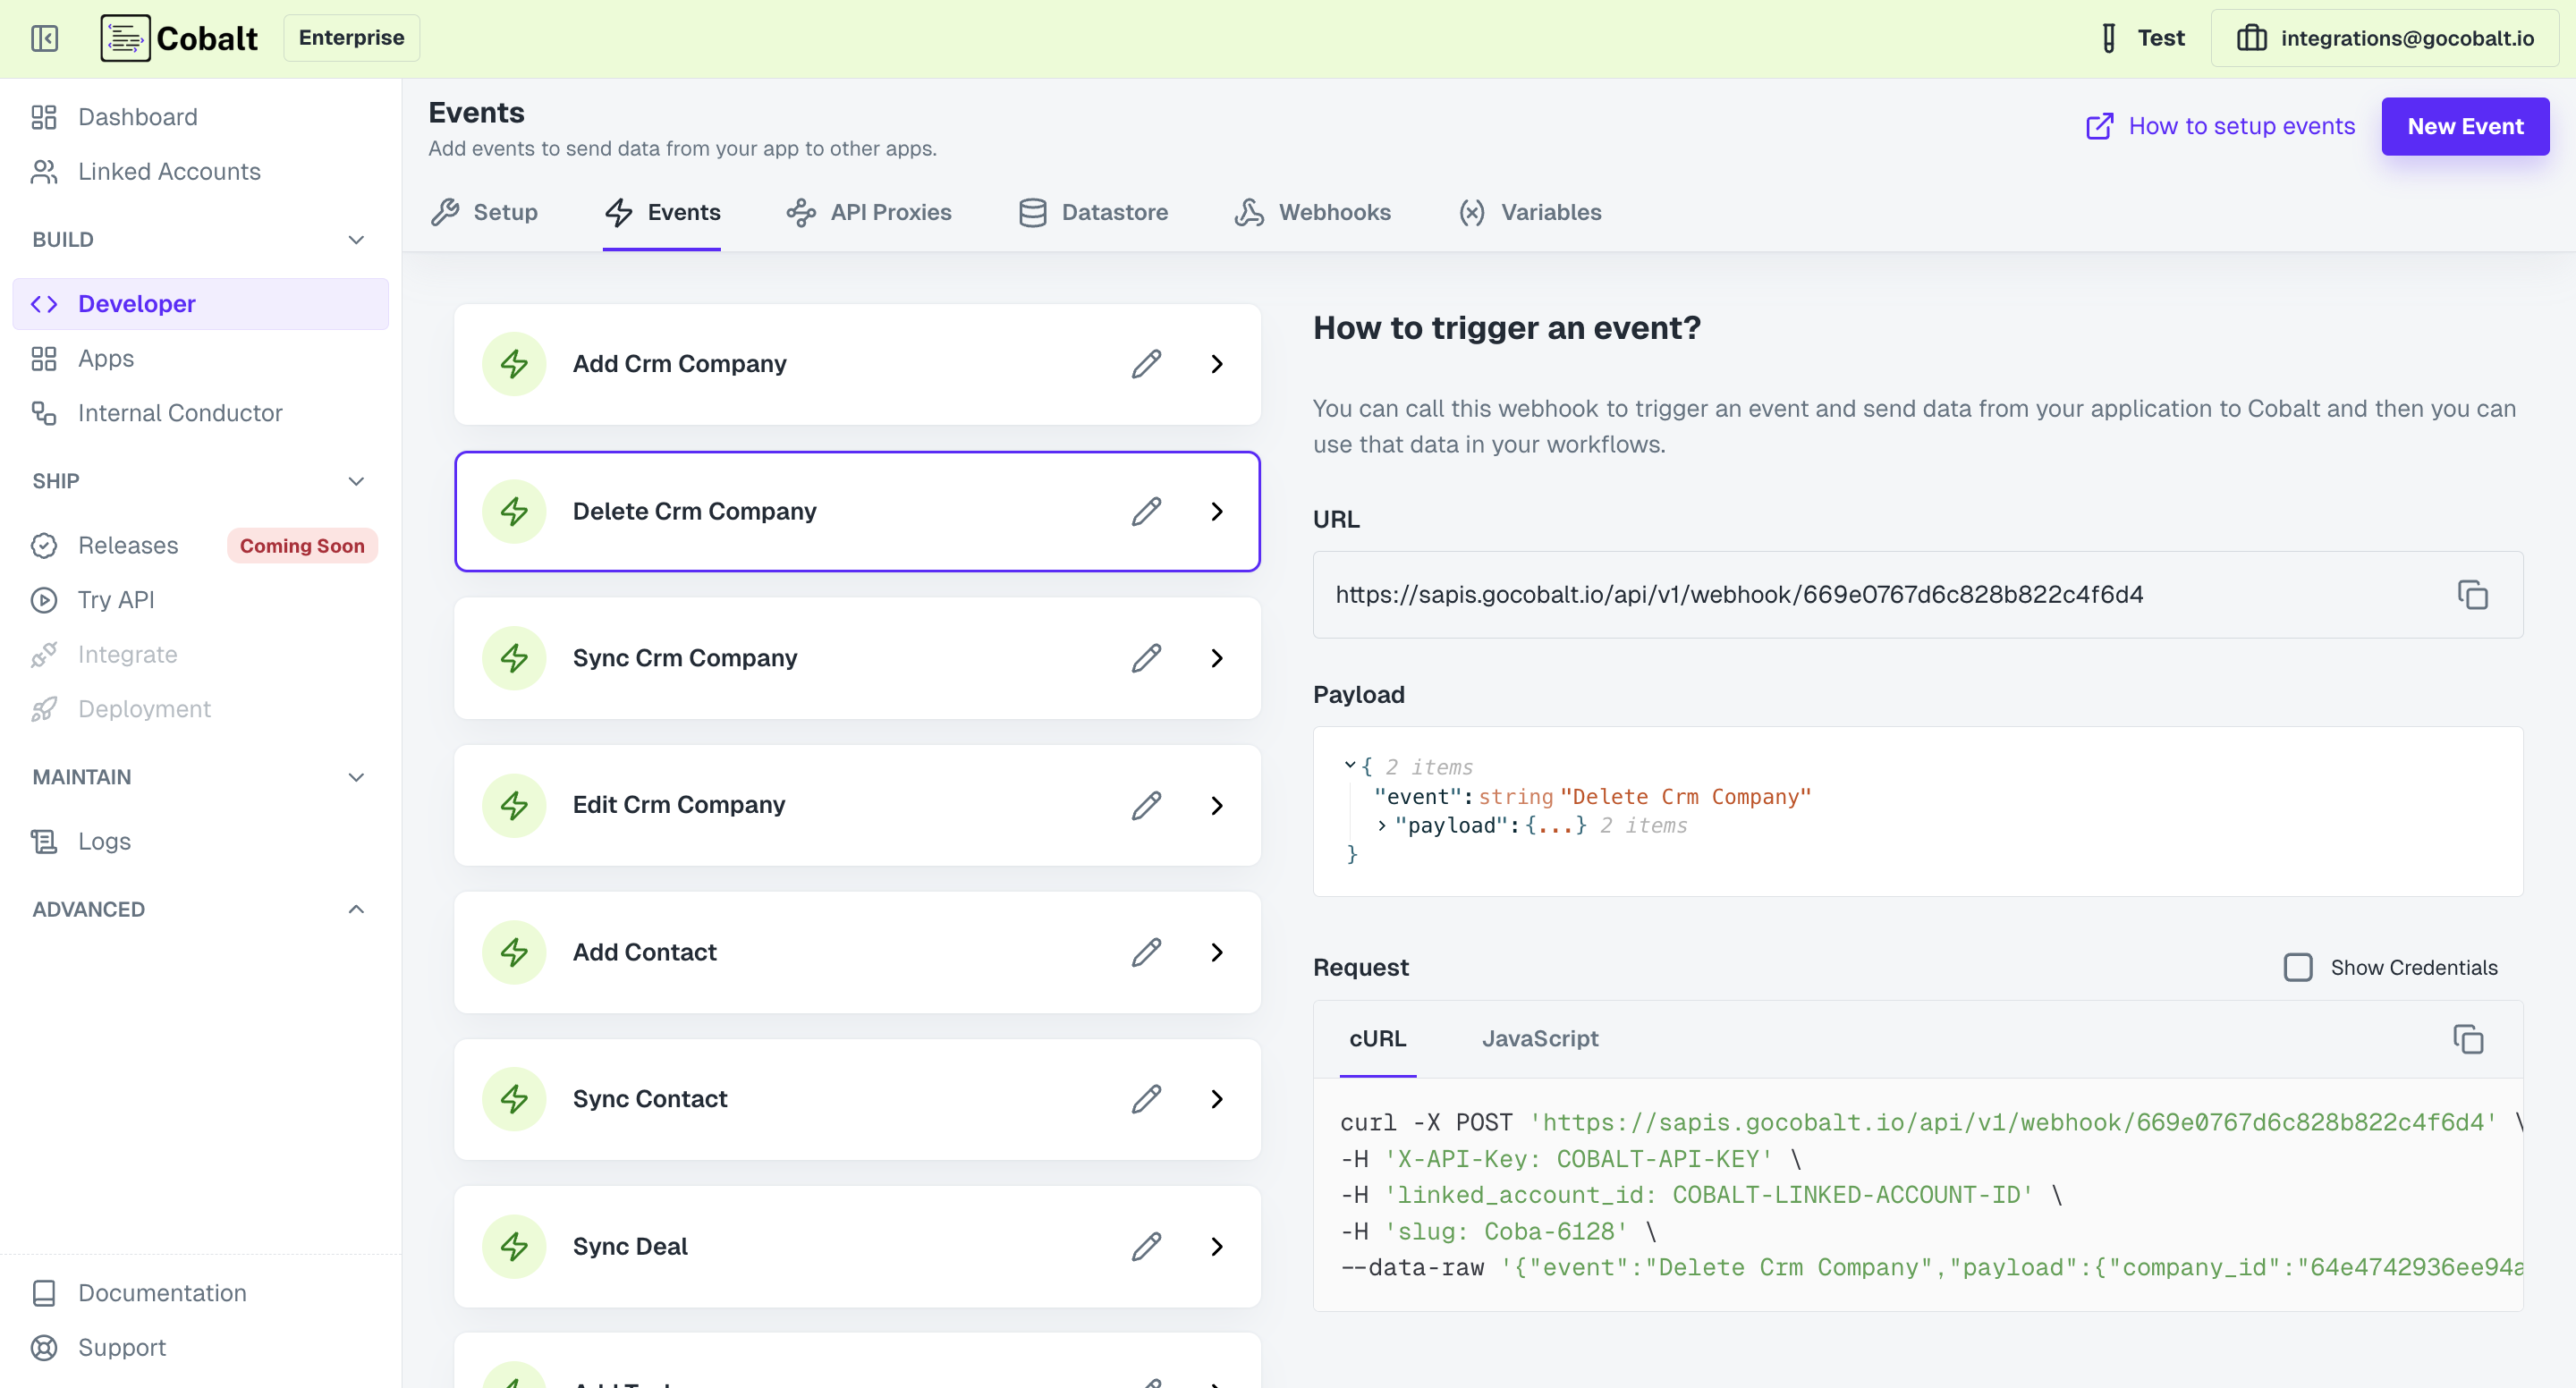 Then you can just make the POST API call with
Event URL can be used as a quick resort to trigger an event. If you wish to have better control on triggering such as triggering the worflow executions for a specific application,
instead of for all application workflows with which the event is associated, kindly refer the REST APIs support for events.
To trigger an event from Cobalt platform so that you can simulate event execution, test workflows and validate the behavior of associated actions, you can use the
Then you can just make the POST API call with
Event URL can be used as a quick resort to trigger an event. If you wish to have better control on triggering such as triggering the worflow executions for a specific application,
instead of for all application workflows with which the event is associated, kindly refer the REST APIs support for events.
To trigger an event from Cobalt platform so that you can simulate event execution, test workflows and validate the behavior of associated actions, you can use the
common models. This means
once you set it up, one event can make several workflows get executed. This is handy when you want the same event to do similar things in different apps. For example, an event
‘User verified’ could set off one workflow in Salesforce and another in HubSpot, making it easy to achieve consistent integration across various platforms without needing extra
technical work.
Above image shows a user selecting from their default application events as a trigger for a Pipedrive workflow.
Creating an event
An event model contains name of the event and the trigger payload. The trigger payload contains sample data schema that can be used as data variables and are used inside a workflow as placeholders while defining the workflow. The actual data passed while triggering the event takes place of those variables inside the workflows. To create an event, go to Settings > Developer > Events, Click onNew Event and select a model.
Change the name and update the sample payload as per your requirement and click Create event. It is expected that you pass on the data as the Sample Payload
while you are triggering this event. This is because, the properties defined in the sample payload can be used as trigger variables inside a workflow.
In the below example, we are using firstName defined inside the Contact event in an Activecampaign workflow.
Now, when you actually trigger the event Contact, this workflow will get executed with name field consisting of the value sent by you as firstName while triggering
the event.
Triggering an event.
Cobalt events can be triggered using various methods. You can make use of theEvent URL. Go to Settings > Developer > Events
Copy the event URL. Then copy the event that you would like to trigger. See below for reference,
Then you can just make the POST API call with linked_account_id and x-api-key in the headers
In the above cURL example, we have not mentioned the
config_id in the headers. The config id essentially defines the default config with which the worflow shall
be executed. If config_id is not mentioned, Cobalt considers the linked_account_id as the config_id by default.Try API feature of Cobalt. Refer here to learn how you can use Try API.