Slack
Building a Slack integration
This tutorial will give an example of how to create a Slack integration that sends message from your app to the Linked Account’s Slack.
Pre-requisites
- Slack App is enabled in Cobalt.
- Slack OAuth app credentials added to Cobalt. Refer here.
- Trigger created in Cobalt. Refer here.
- Linked Account available. Refer here.
Building a Workflow
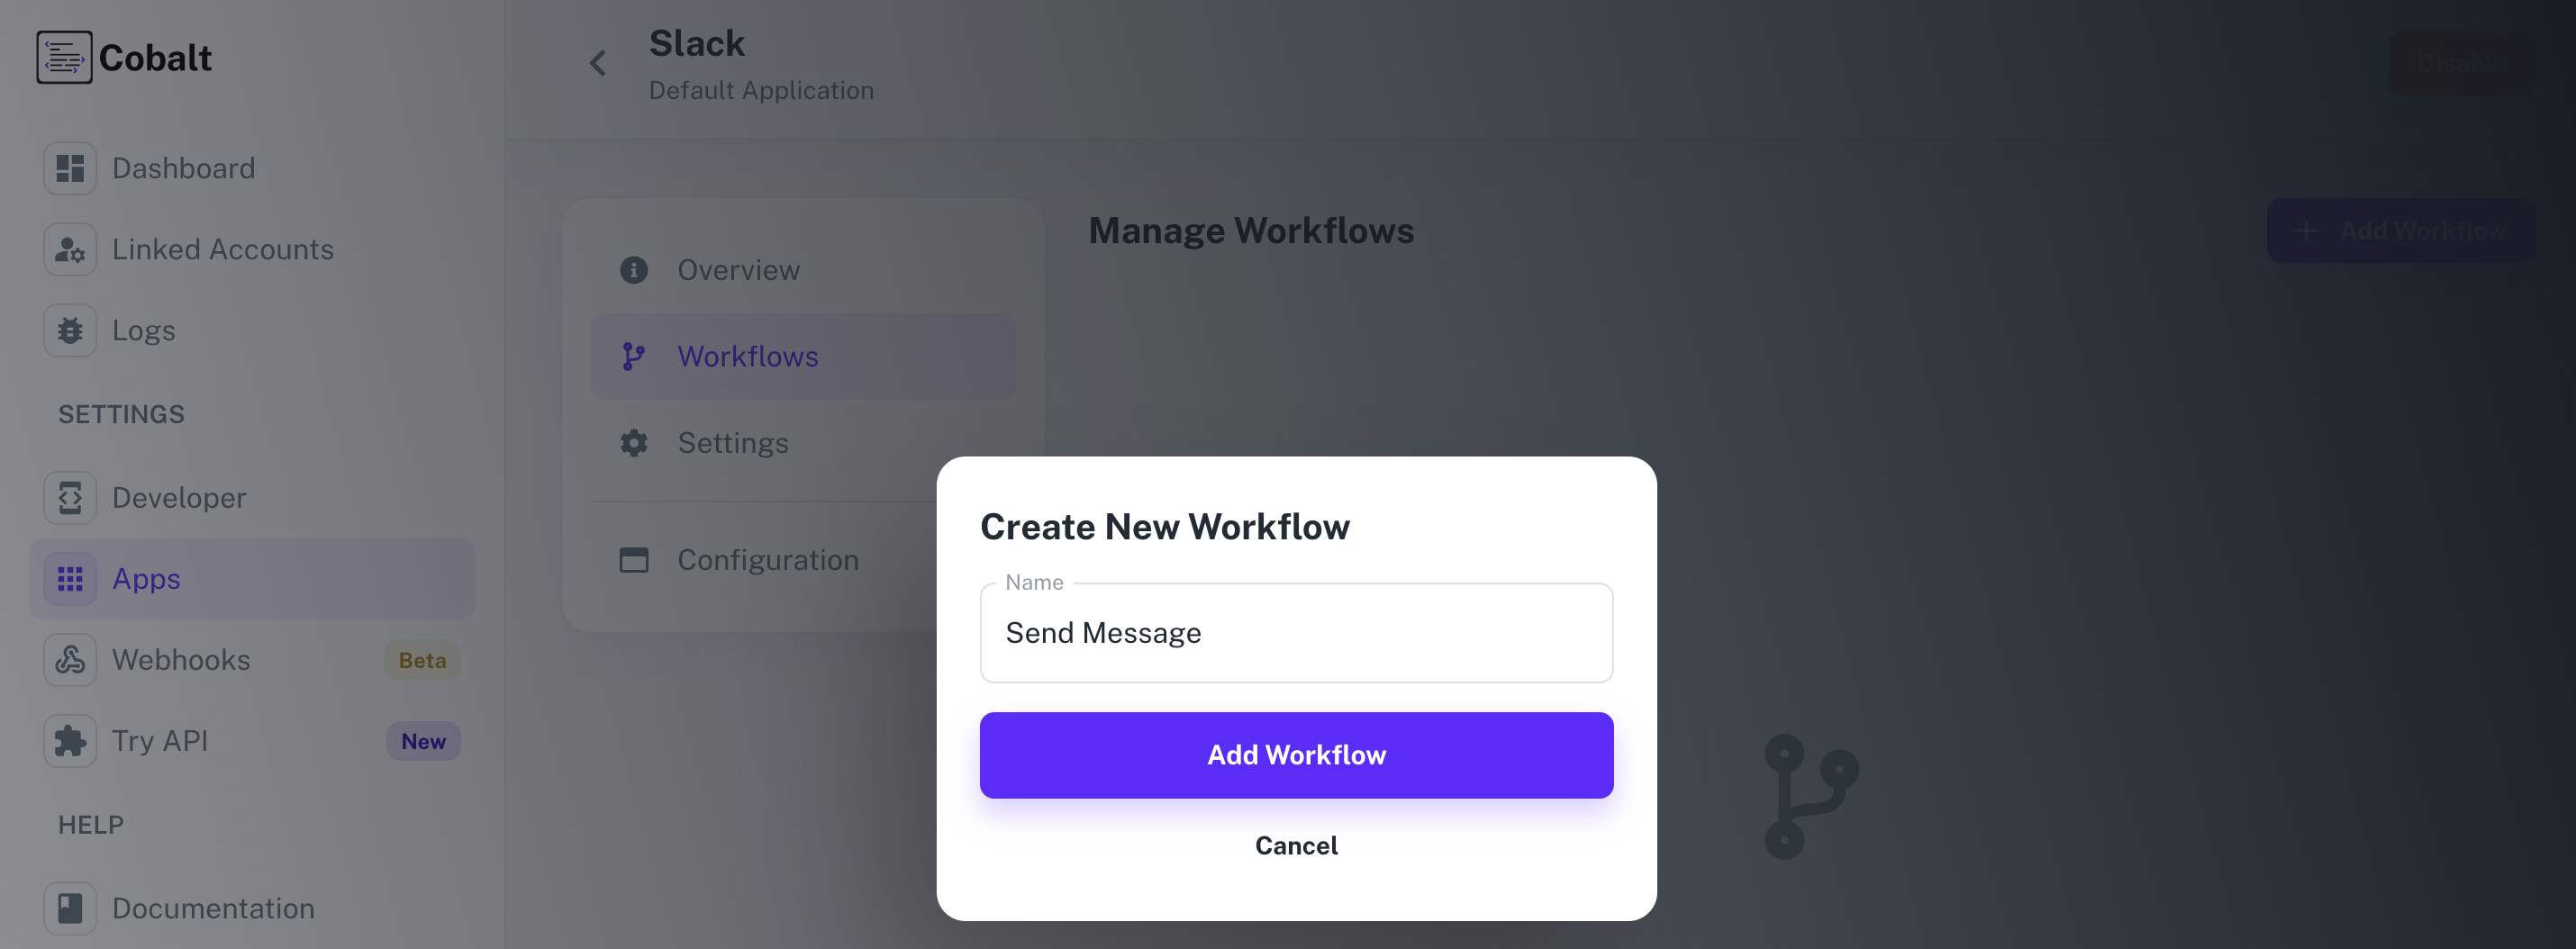
1. Create Workflow in app
- Go to your
Apps catalogin Cobalt > Search forSlack>Workflows>Add Workflow> ChooseManually> Give it a name and click onAdd Workflow.
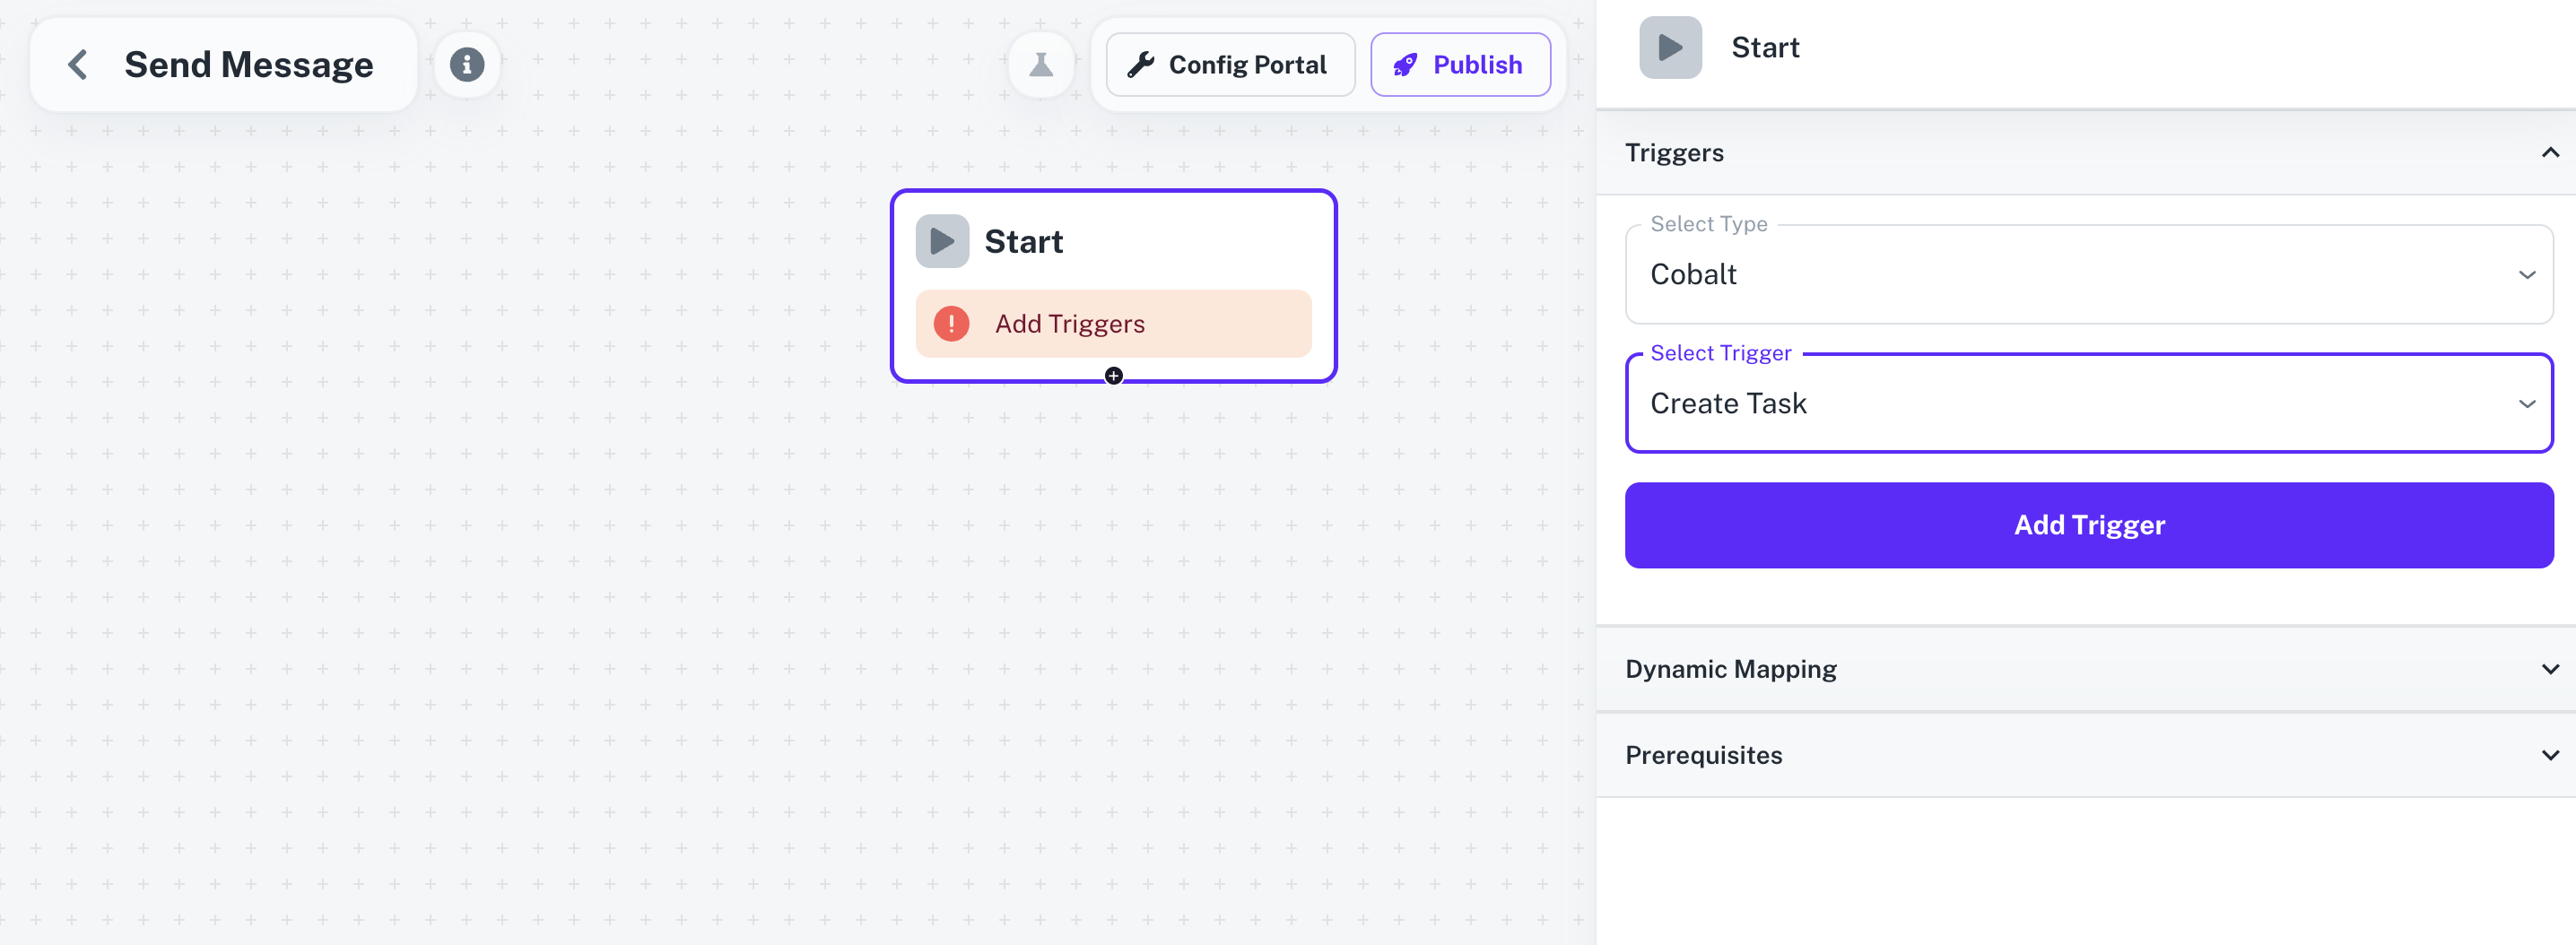
2. Adding the Trigger
To add a trigger for a Workflow in Cobalt, you need to select details about the Trigger like the Type and which trigger to be implemented. To add a Trigger, follow these steps:- Click on the Start node to add a trigger.
- In the right side, select the Type and the Trigger and click on the
Add Triggerbutton.
3. Adding the Slack Action
- From
Actions, add a Slack node to the workflow. - Click on the node and select an Action from the
Choose an Actiondropdown menu. - Since we will send a message to a channel or a user through the action, provide a
User or Channel IDand click onSave.
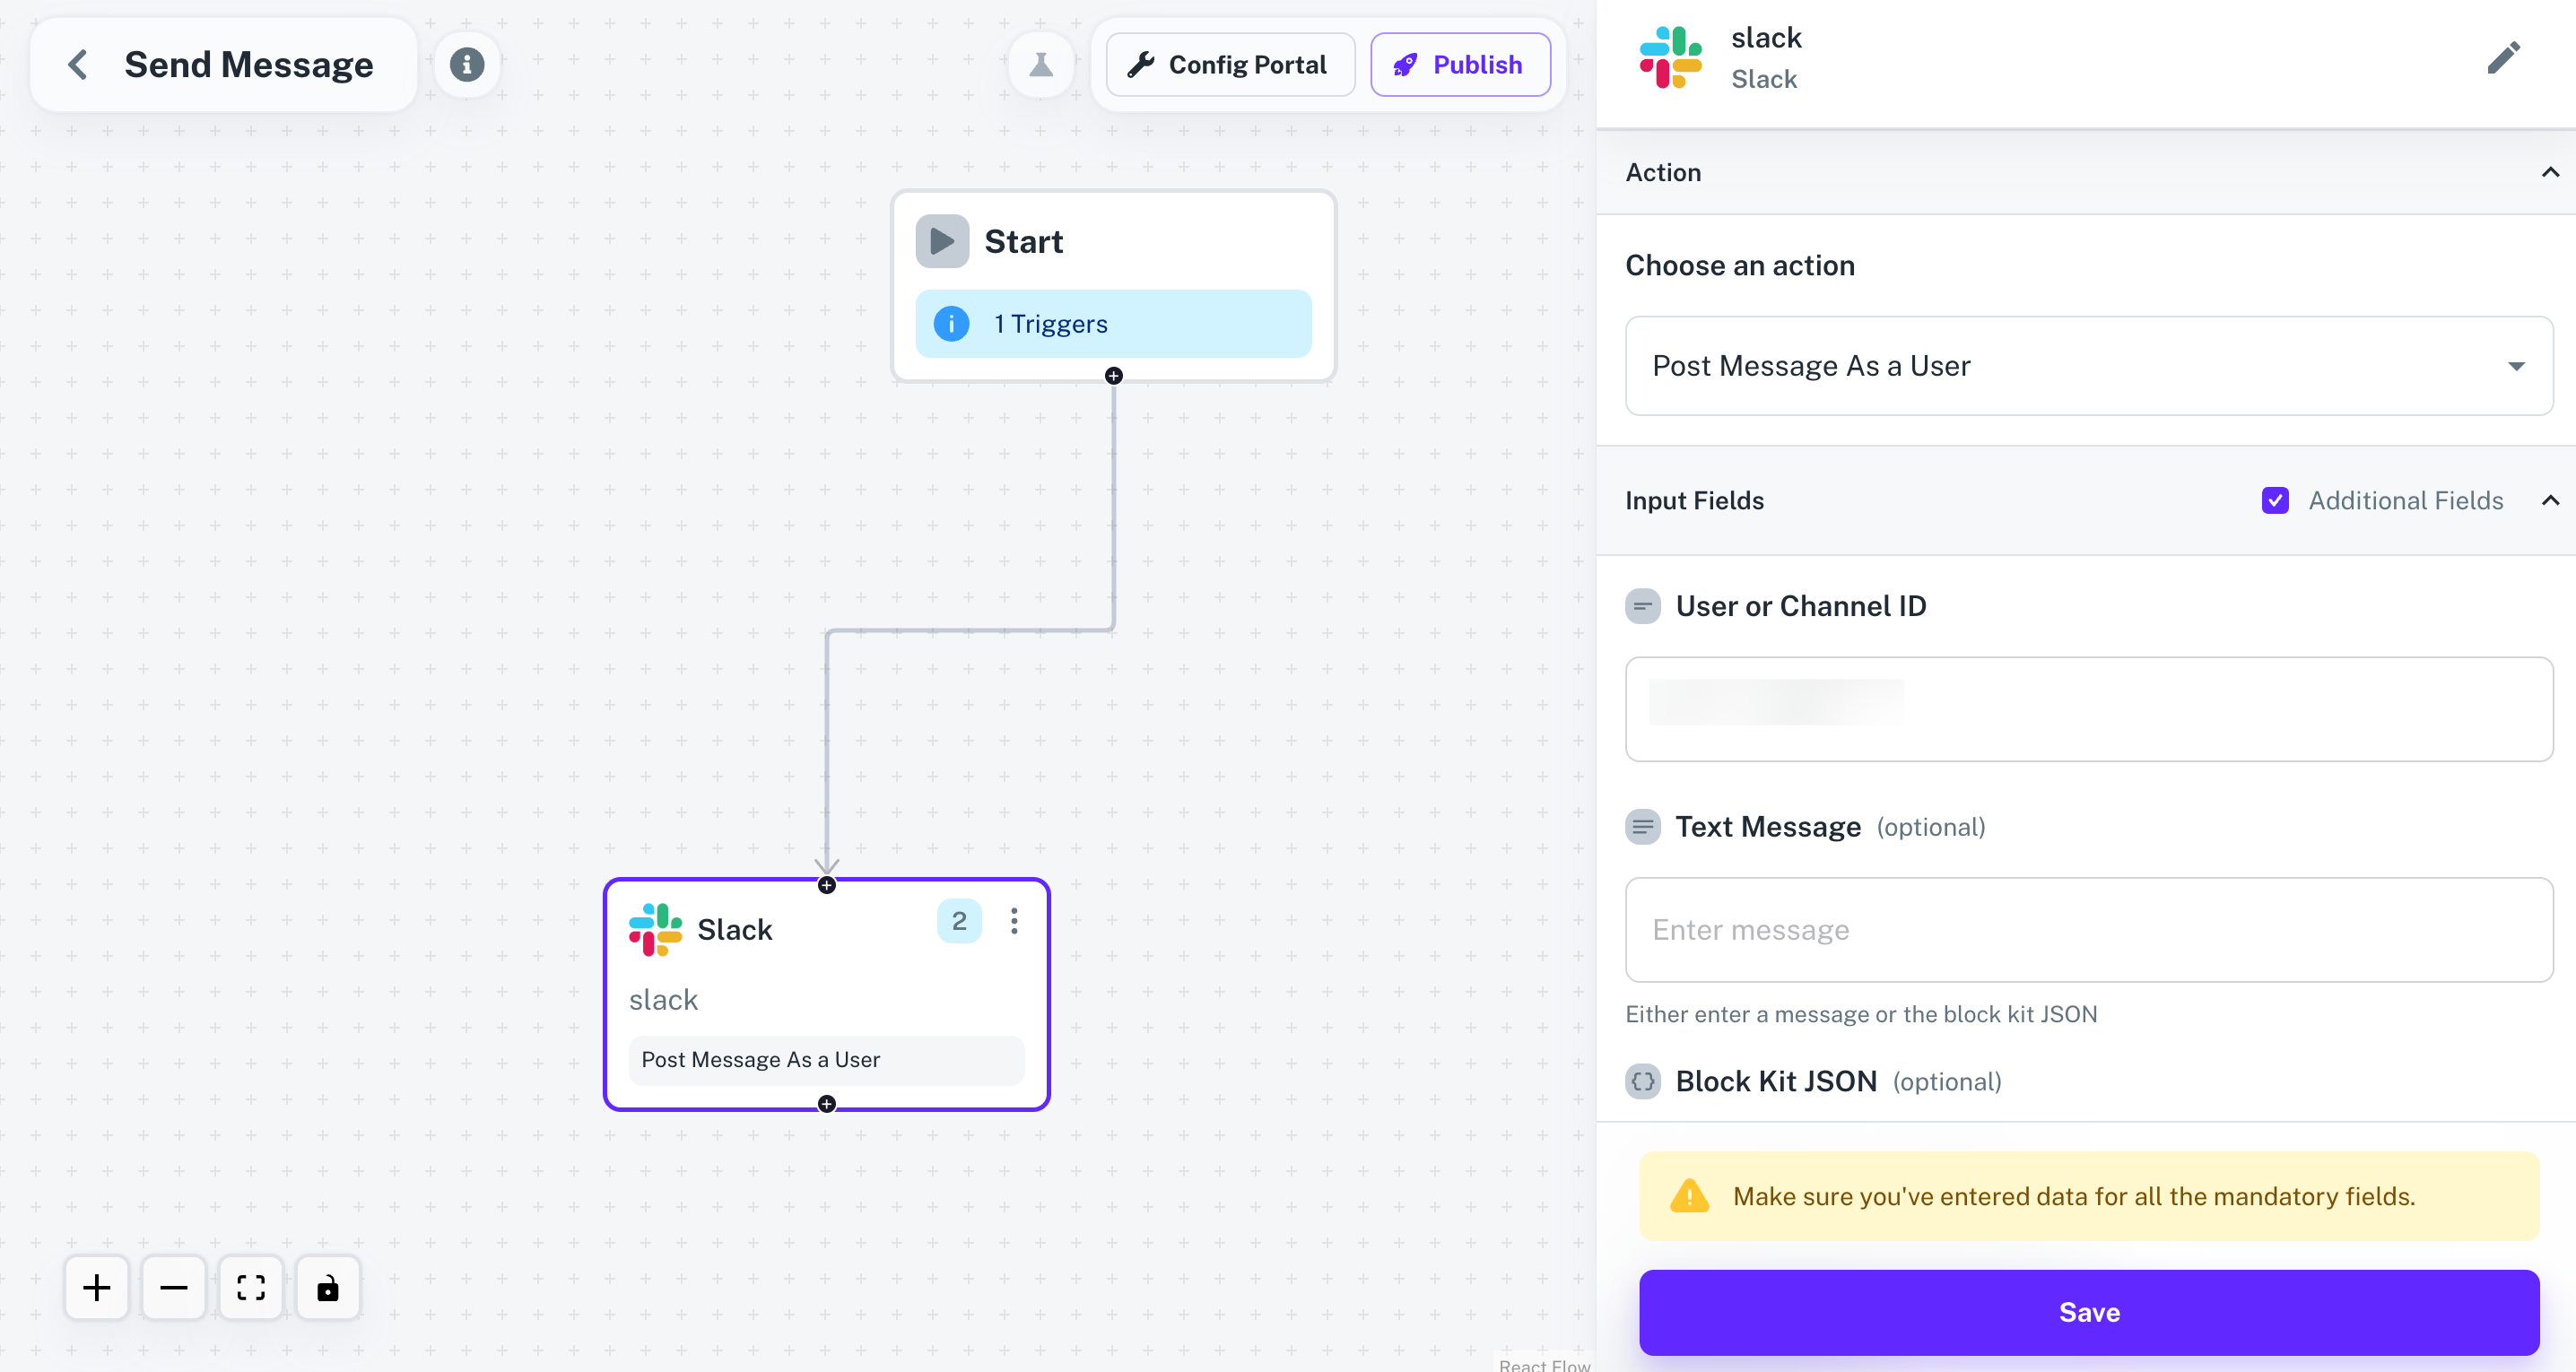
Before clicking on
Save, make sure that you have entered data for all the mandatory fields whichever required.- Connect the two nodes by clicking on
+button on theStartnode and dragging the arrow to the Slack node.
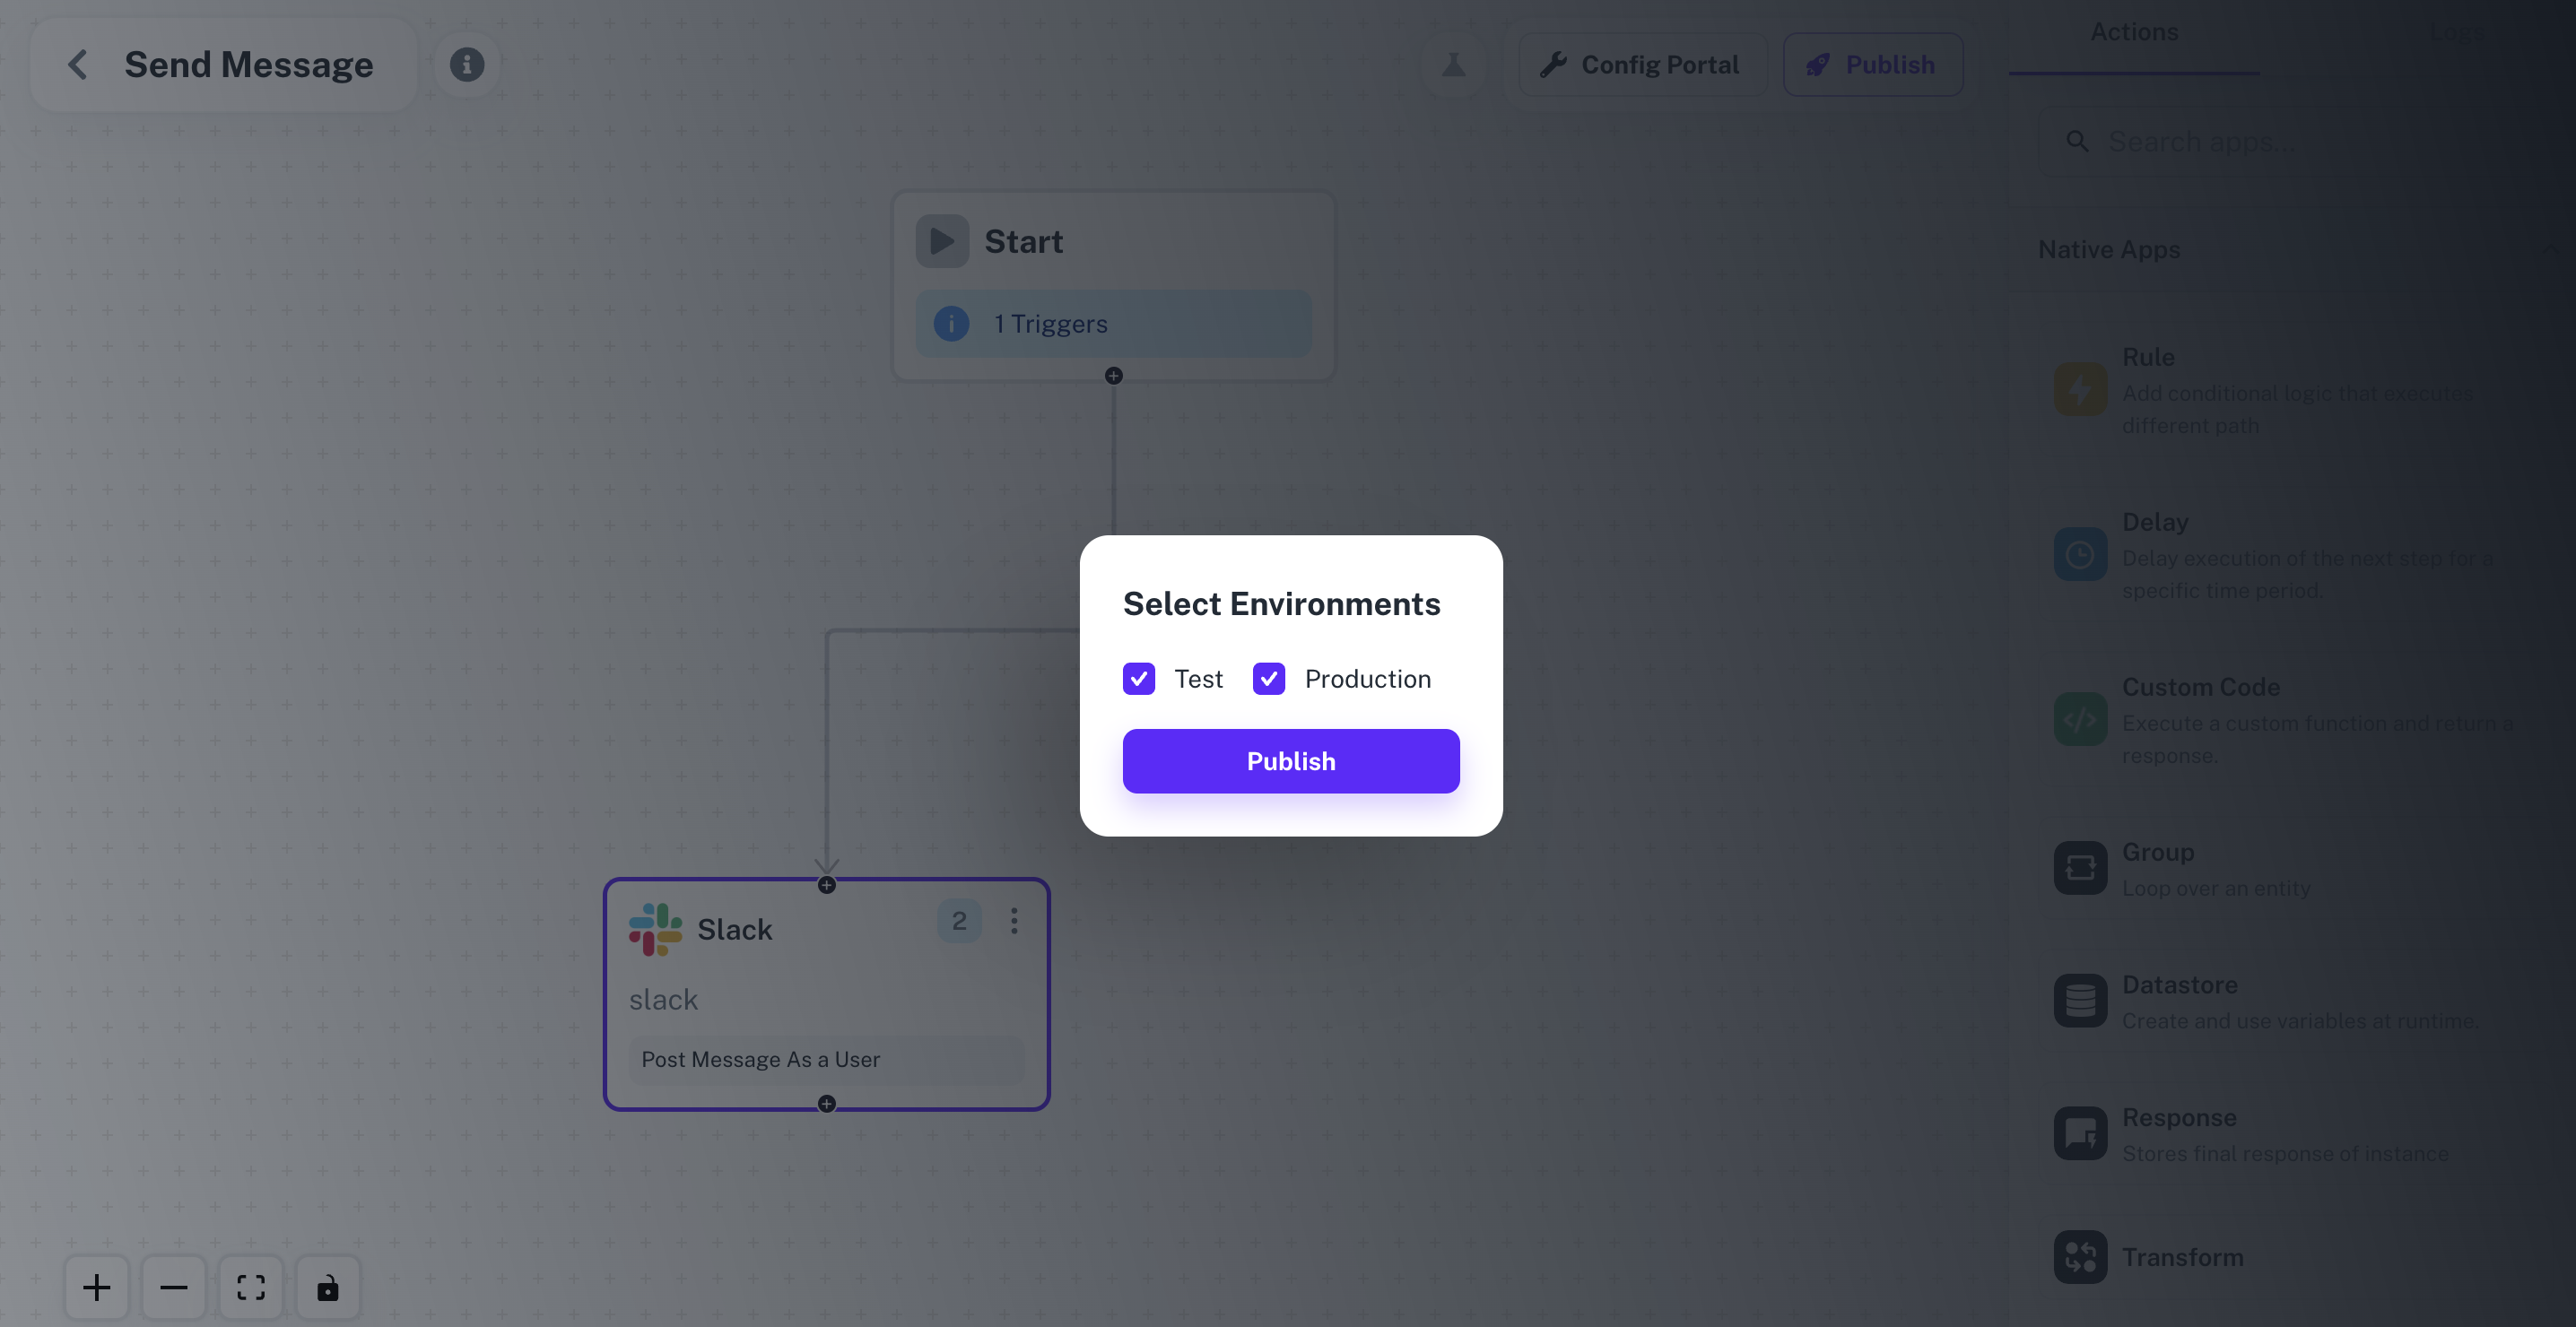
4. Publishing the Workflow
- To publish the workflow, click on the
Publishbutton in the top, Select Environments of the Workflow and click onPublish.
Enabling the Workflow
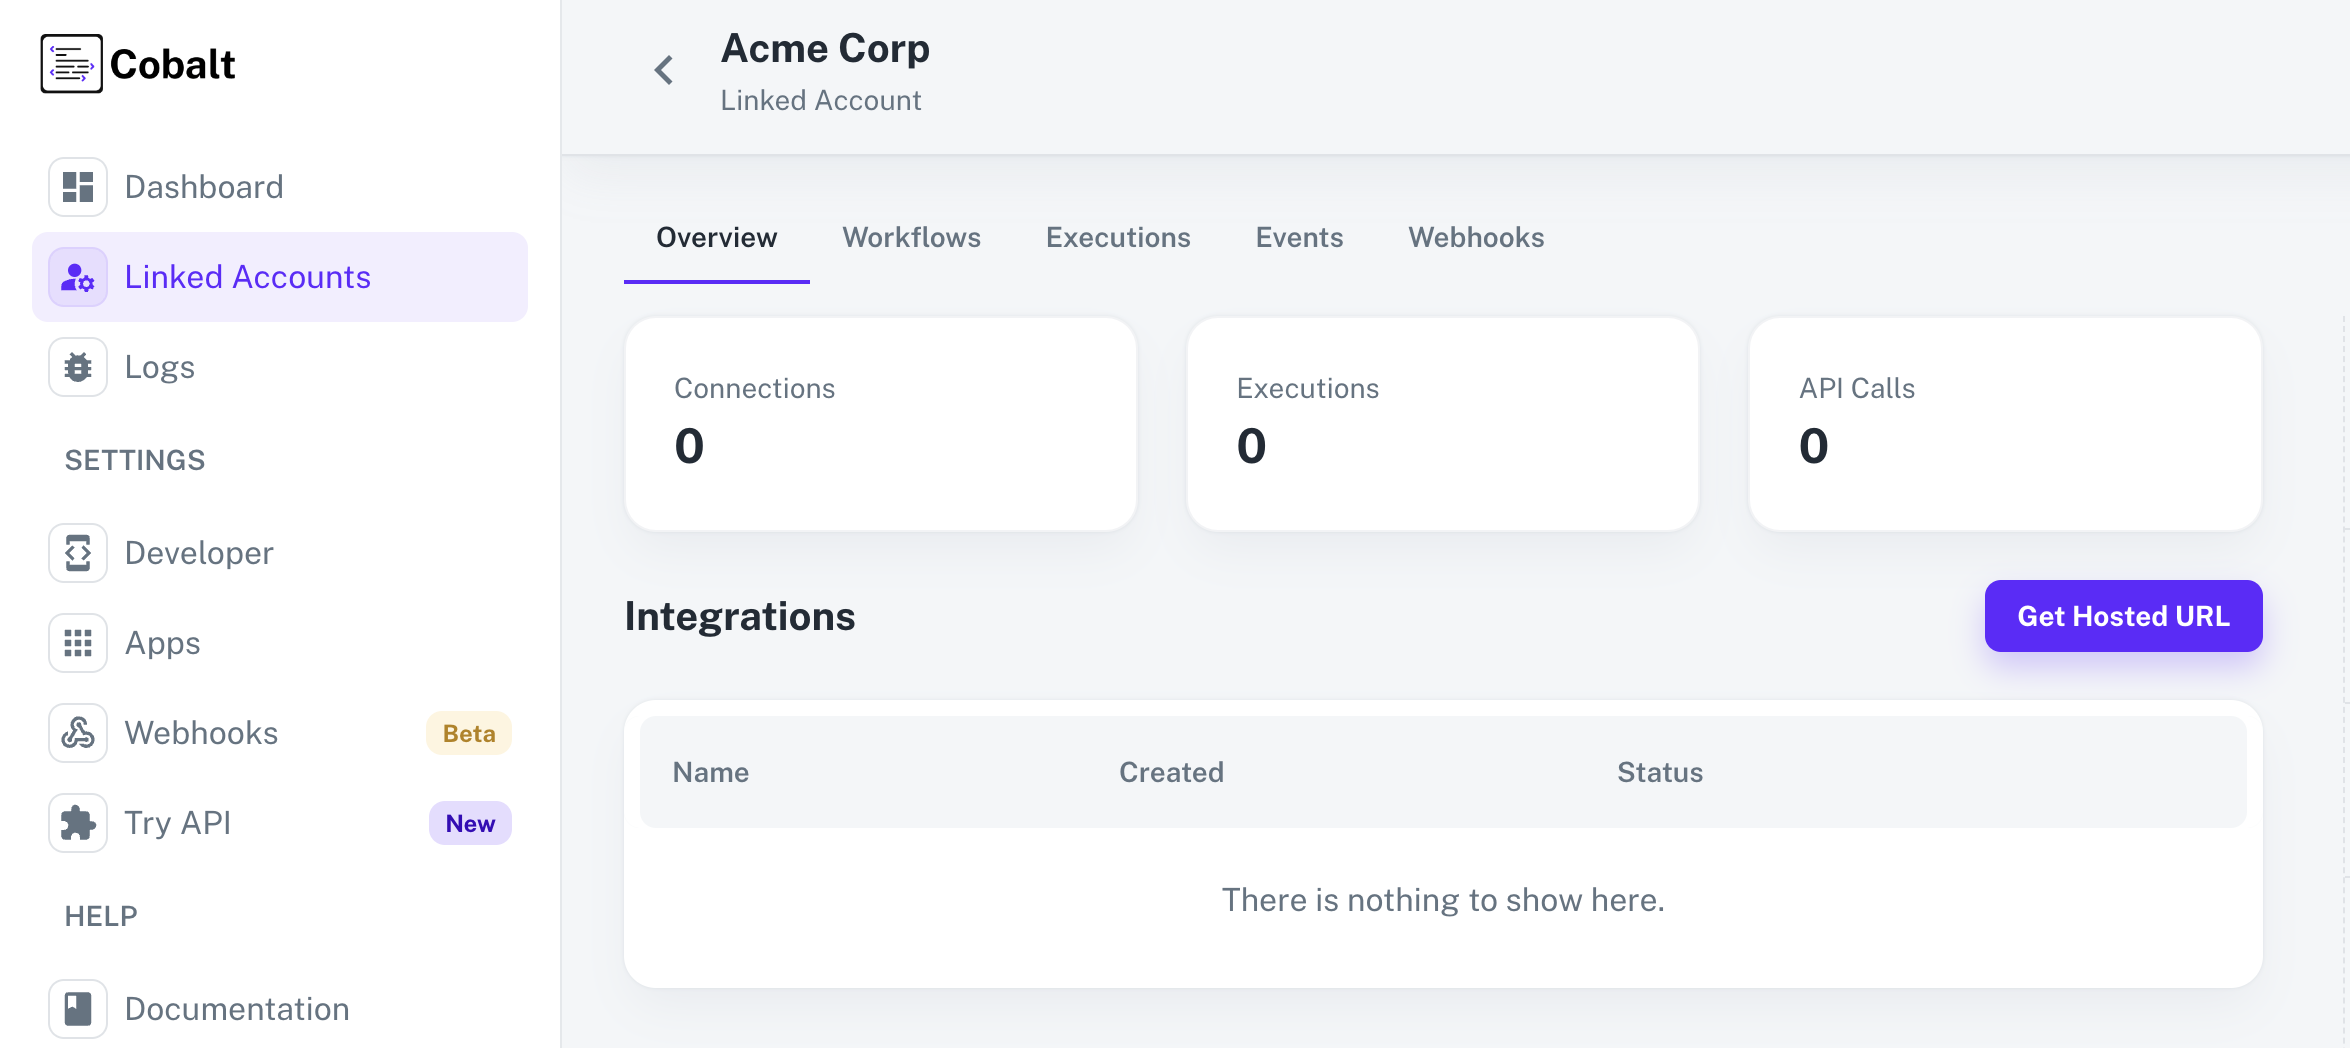
To enable a workflow, end user or a Linked Account needs to Toggle On the Workflow after connecting with the application.- Navigate to the Linked Account in which the Workflow needs to be enabled by getting its’ Hosted URL.
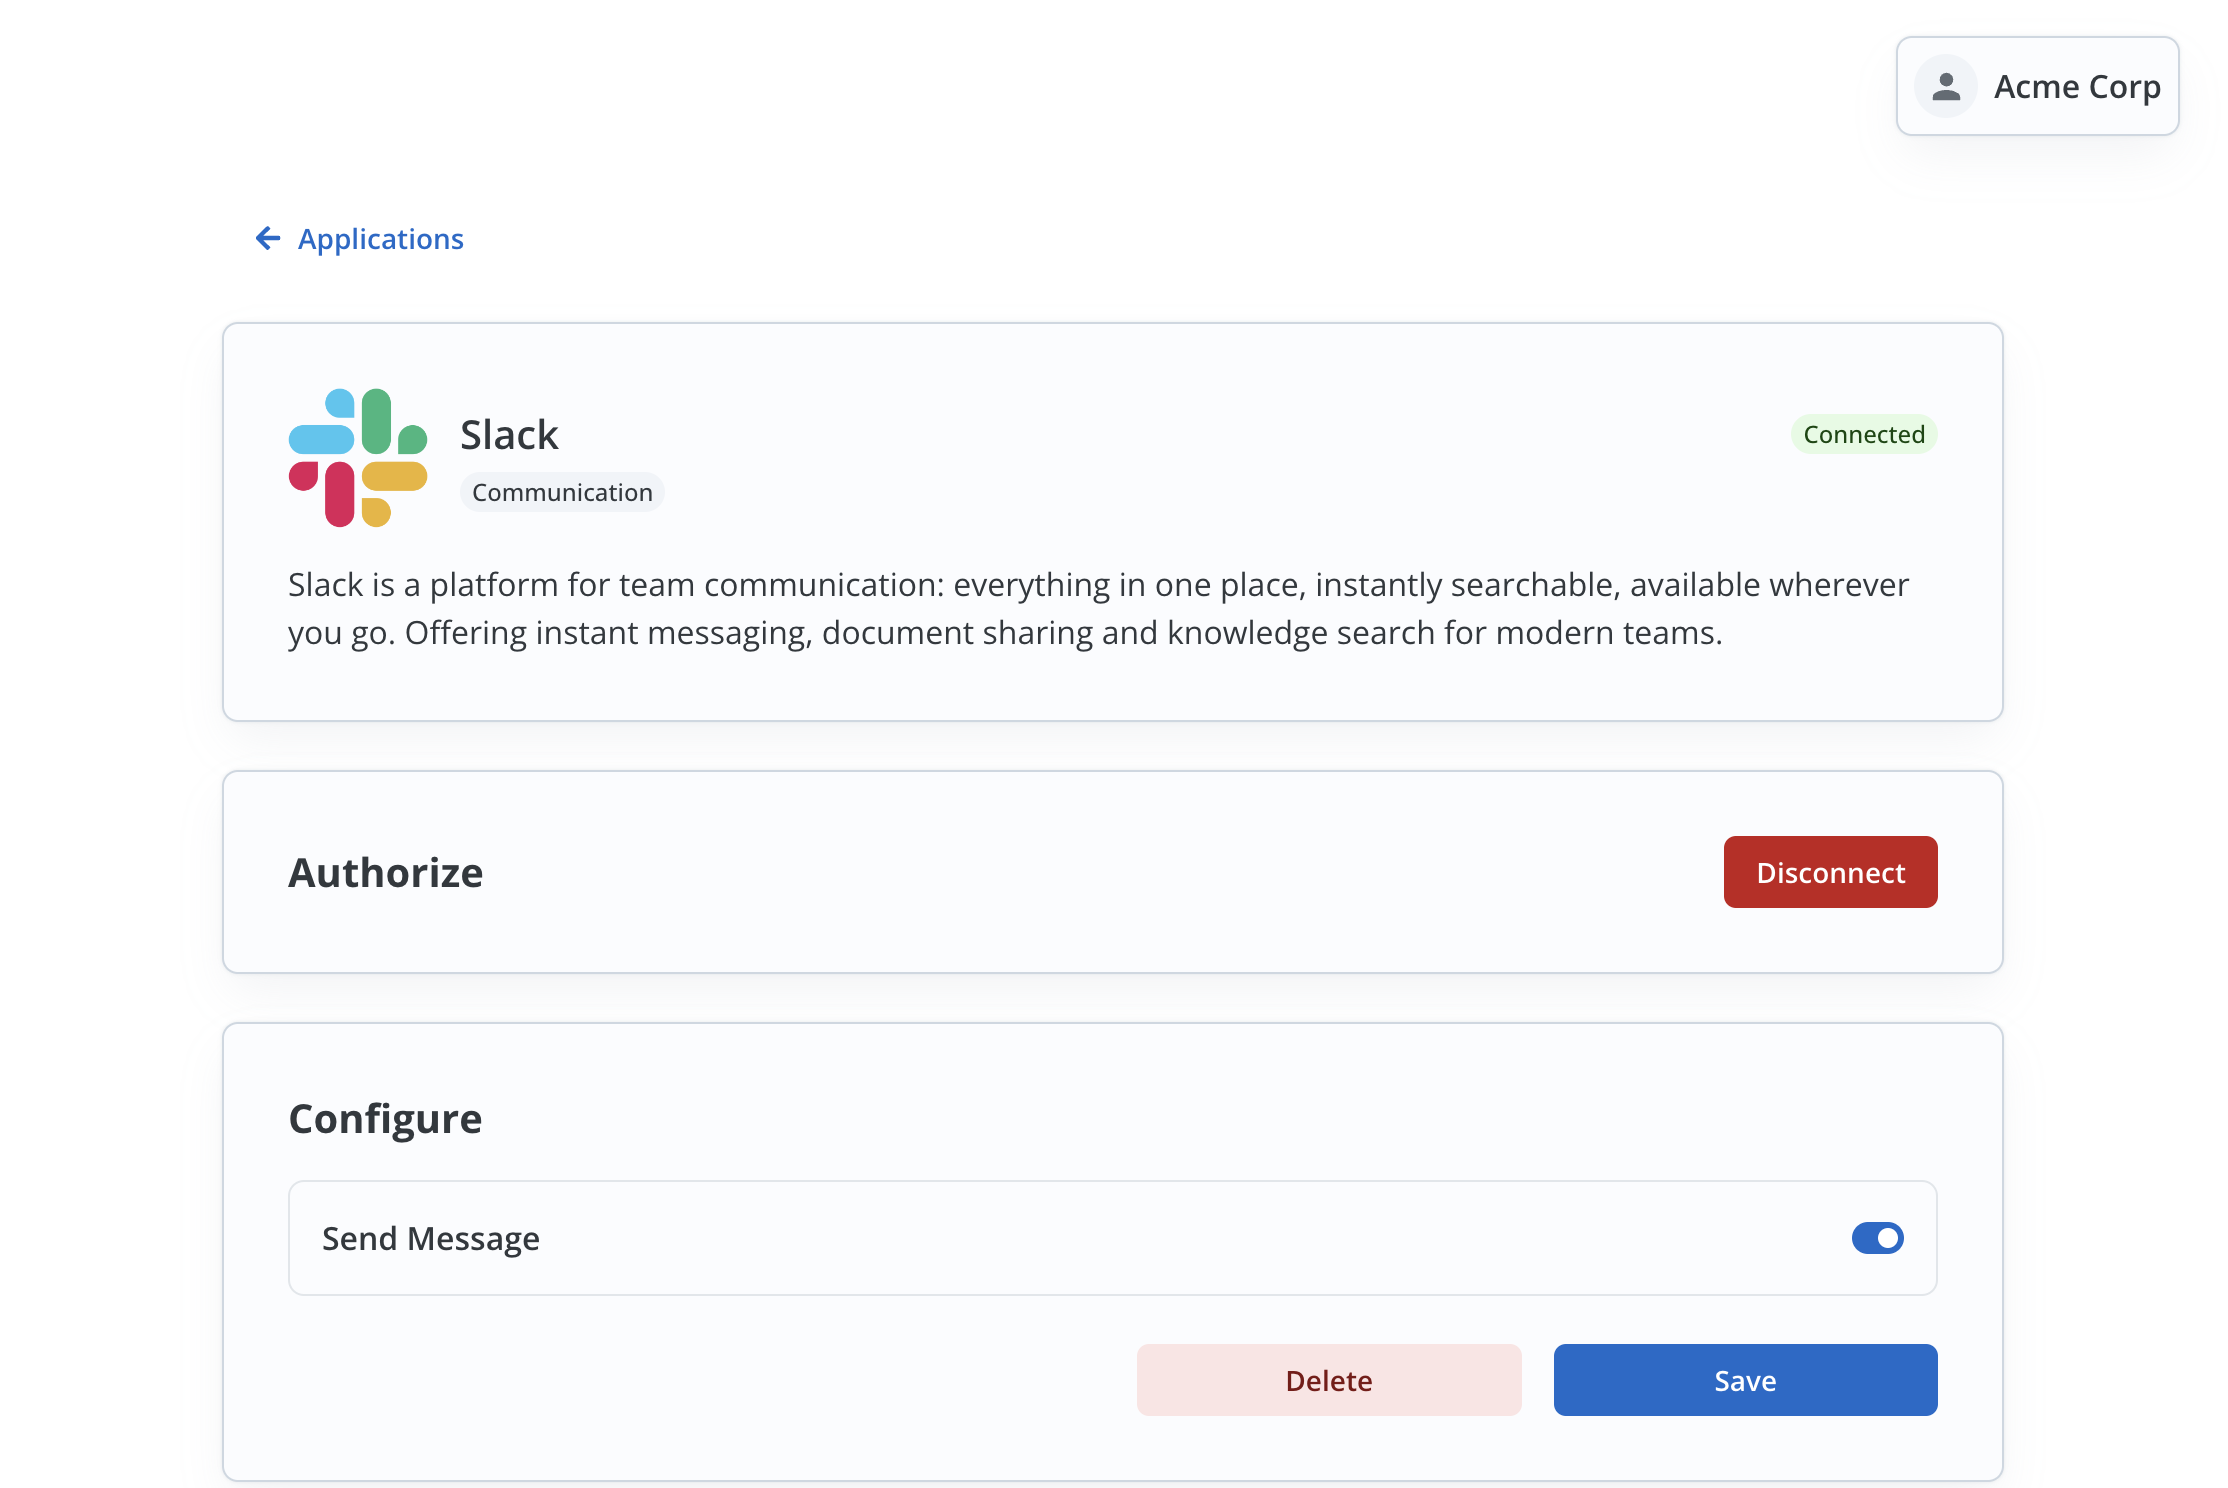
- Go to the Hosted URL and select Slack from
Manage your Integrationslist. - Click on the
Connectbutton, review the permissions and allow them for a successful connection. - After a successful connection, you can see the
Configuresection in the Slack Application page. - Enable the Workflow Send Message by turning the toggle On and click on
Save.
Fire an App Event
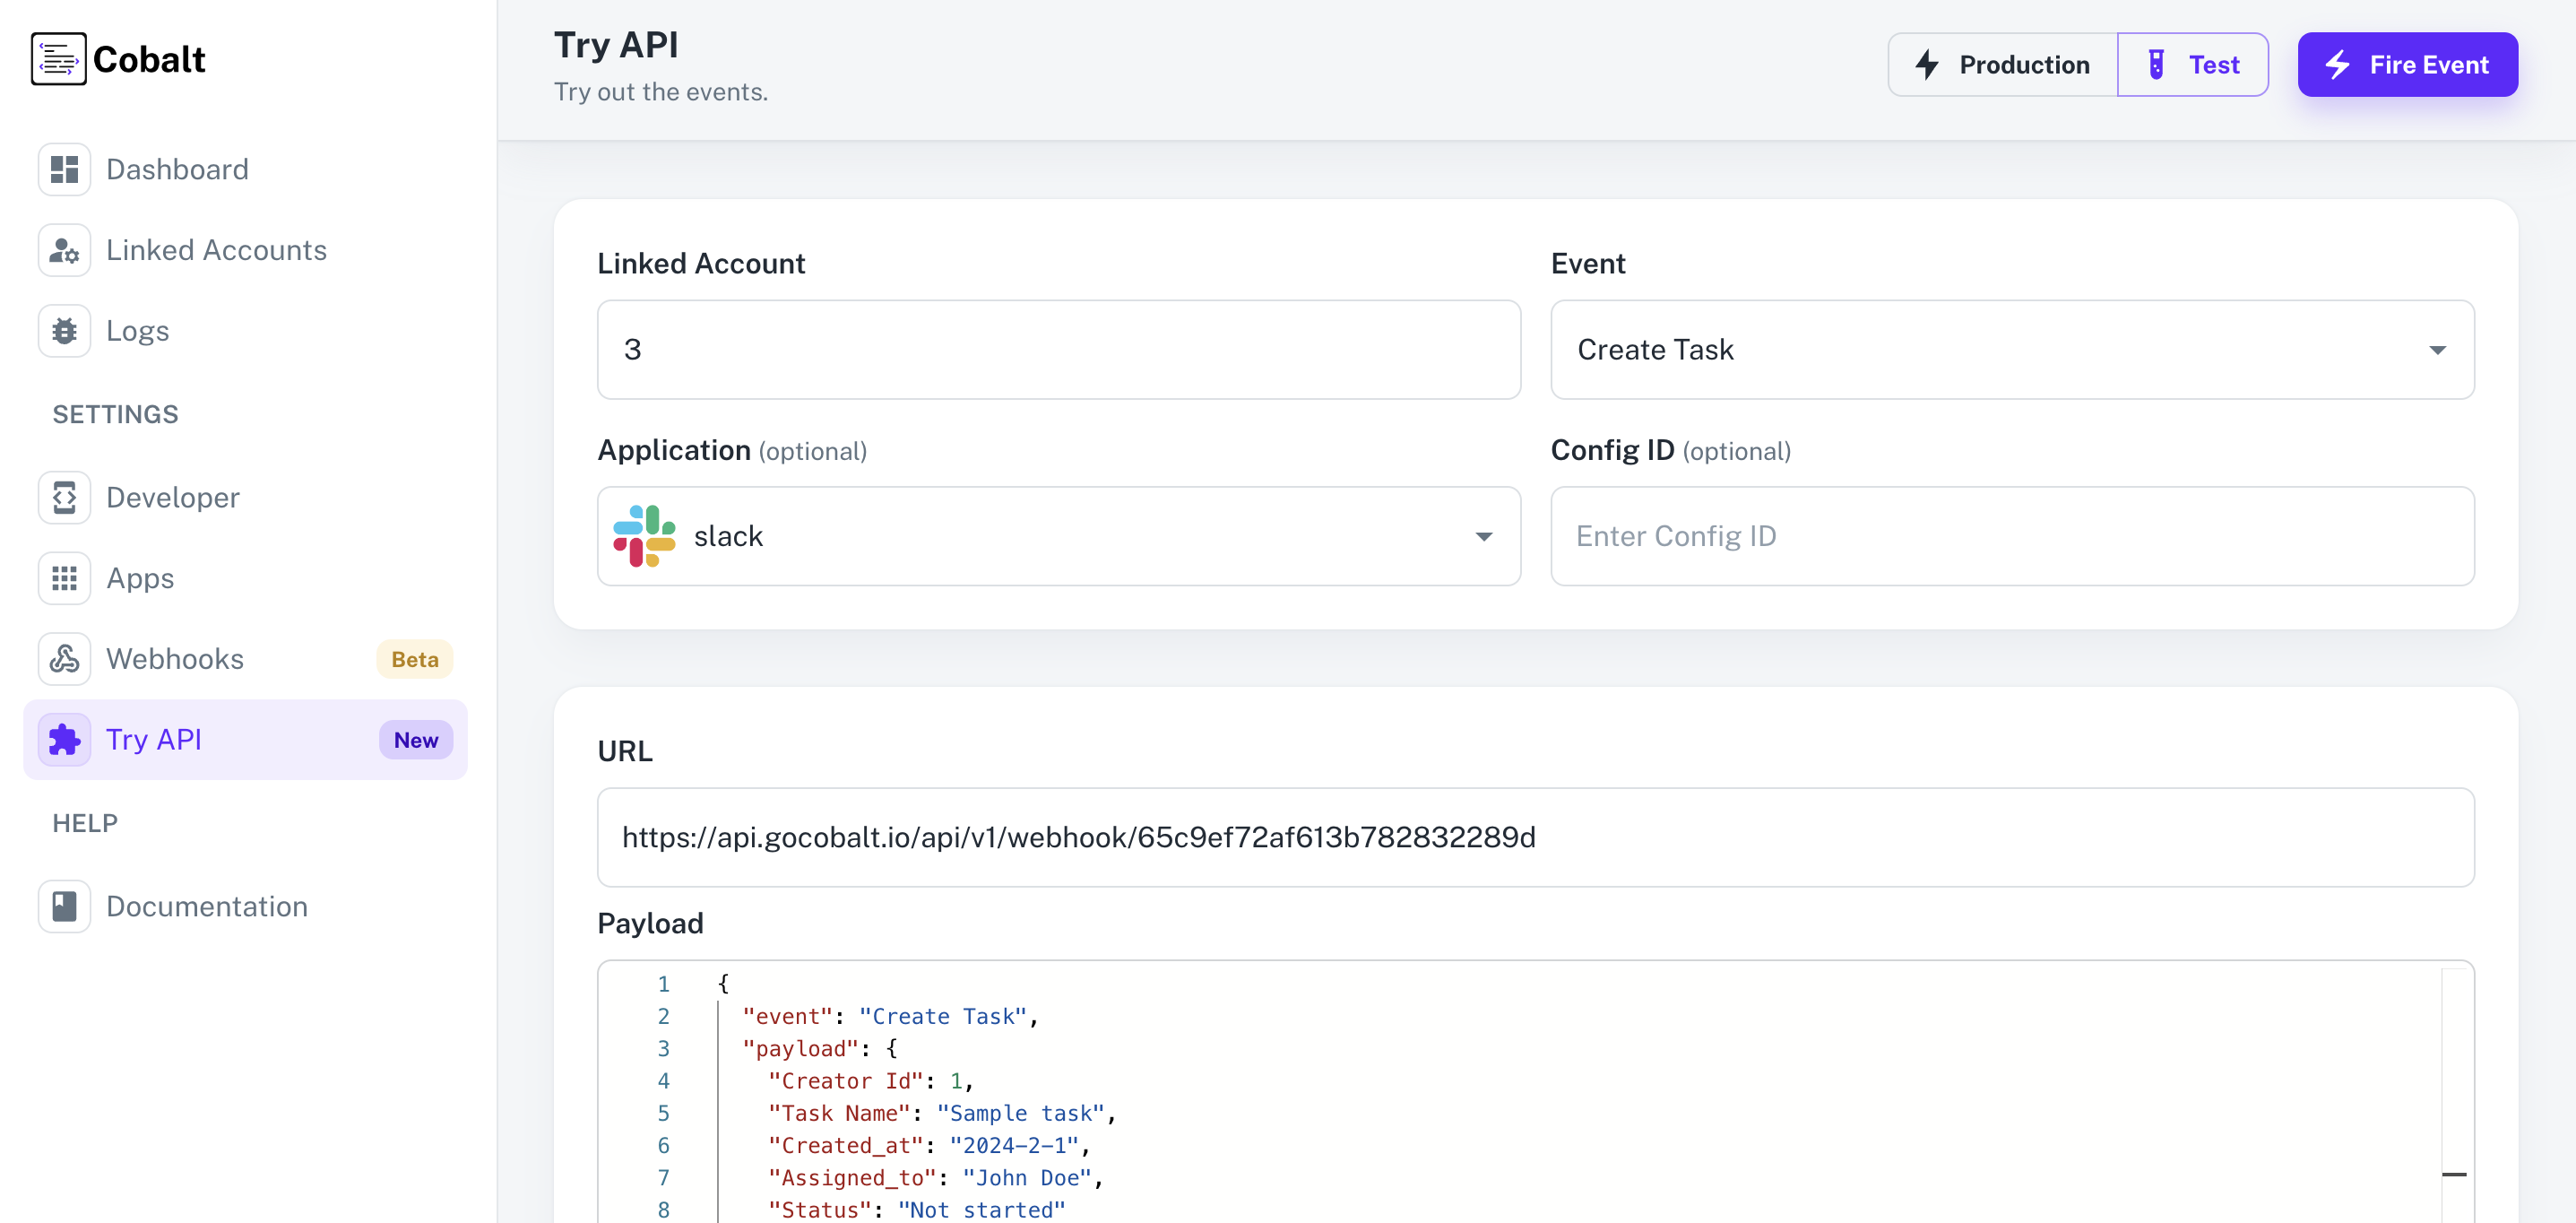
Lastly, we’ll fire an App Event whenever a contact is created in your app by using the Workflow.- Navigate to
Try APIin Cobalt. - Choose the Linked Account created to test the workflow, select the Event and Slack as the Application.
- Click on the
Fire Eventbutton in the top right.
- You can check the status of the event by navigating to
Logs>Eventsin Cobalt.