Nodes
Data Mapper
Node Functionality
Data Mapper works as mapping resolver in the workflow. It can:- Resolve data and fields from third party application based on the mapping provided.
- Resolve data and fields to be sent from your platform to third party app by using mapping.
- Eliminate the need to write a Custom Code to resolve config field mapping.
Learn more about Field Mapping here.
Node Fields
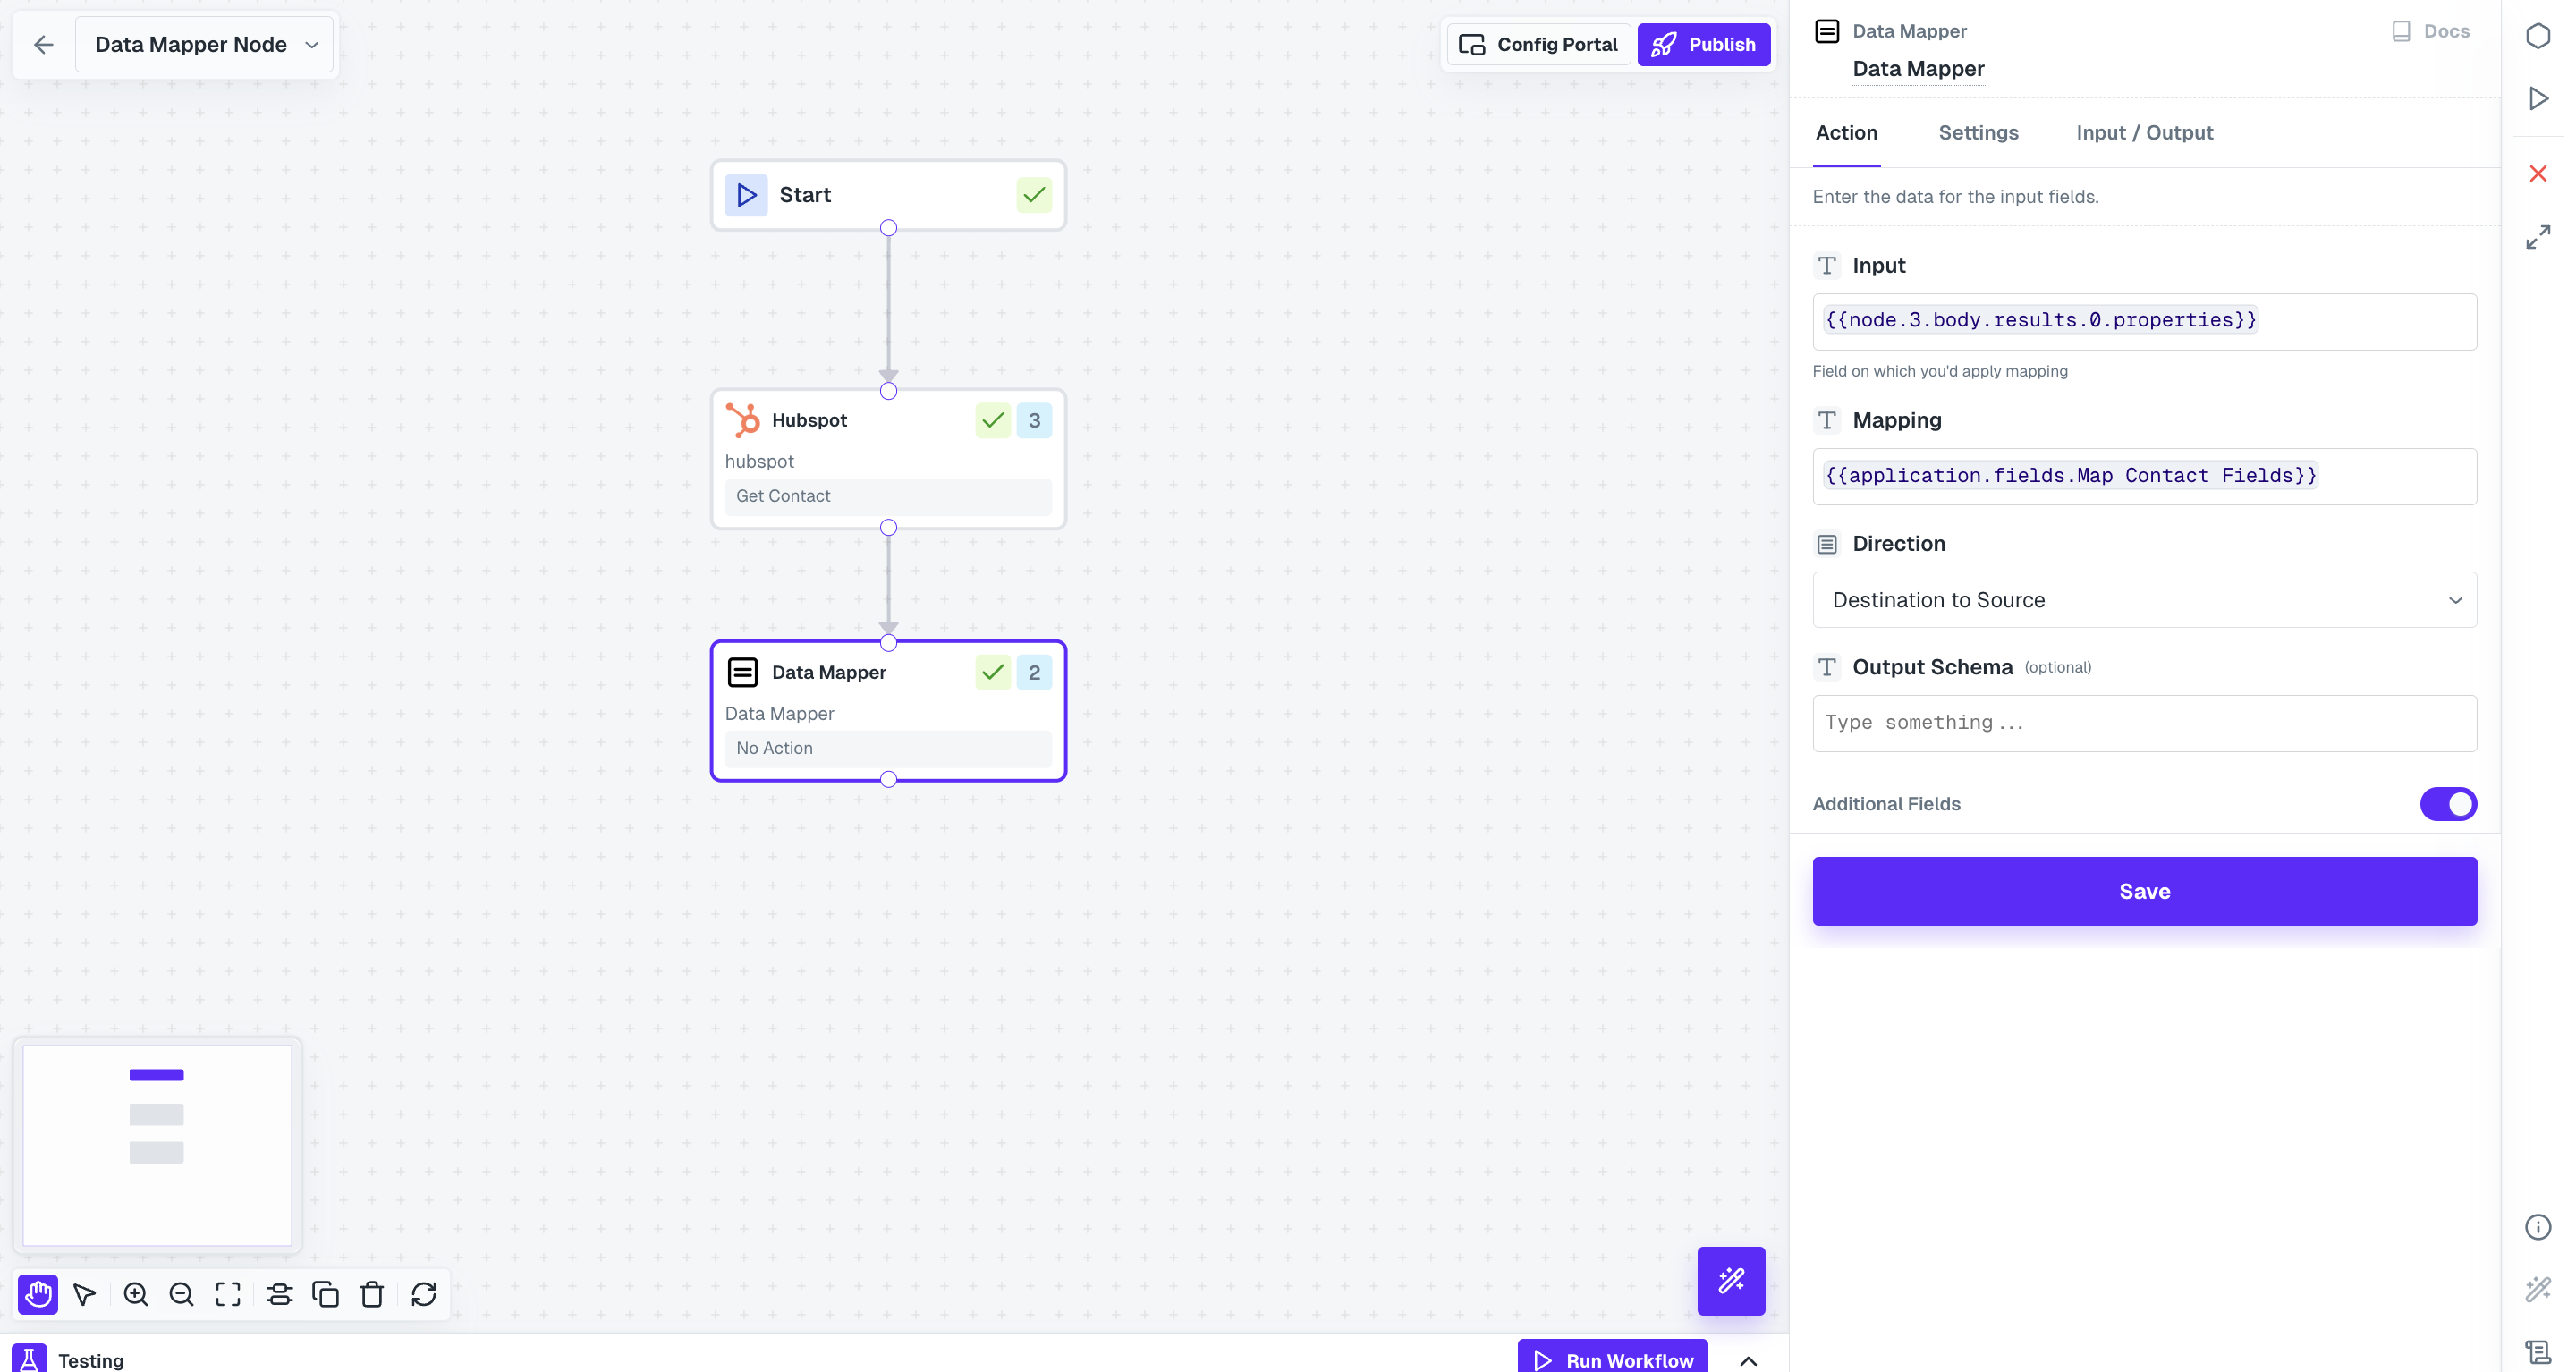
To resolve mapping, following fields need to be configured in the node:- Input: In this field, you need to pass the data on which the mapping will be performed.
- Mapping: Using Templating, you pass the config mapping which will be used to map fields in this node.
-
Direction: In Mapping, there is
Source, which is usually fields on your platform andDestination, which are the name of fields in the third party integration. So you could have two cases: One where you are sending data from source to destination or one where you are receiving data from destination to source. Based on this, you need to resolve the mapping and select the direction.
Input, Mapping and Direction are mandatory fields to be configured in the node.
Example Usage of Data Mapper
Consider a use-case where you are syncing contact data from HubSpot to your platform and your users have the capability to perform mapping. So let’s use Data Mapper node to perform correct mapping of the data from HubSpot.1
Setup HubSpot Workflow
Create a new workflow for Syncing Contact, fetch Contacts from HubSpot and then add a Data Mapper Node.
2
Configure the Data Mapper Node
In the node, provide In 
Input as the data you are receiving from HubSpot.Make sure that the Input provided has the fields that you are mapping. If the fields to be mapped are nested in another object, provide that as the Input.
Mapping, provide the config mapping using Templating.
3
Provide the Direction
Since in this use-case we are syncing data from Destination, we will provide the
Direction as Destination to Source to denote that fields from Destination will be converted to Source field names based on mapping.If the use-case had been to create a new contact in HubSpot, the direction would be Source to Destination as data will be sent from your platform which needs to be changes to field names required by HubSpot.Once done, click on Save.4
Response from Data Mapper
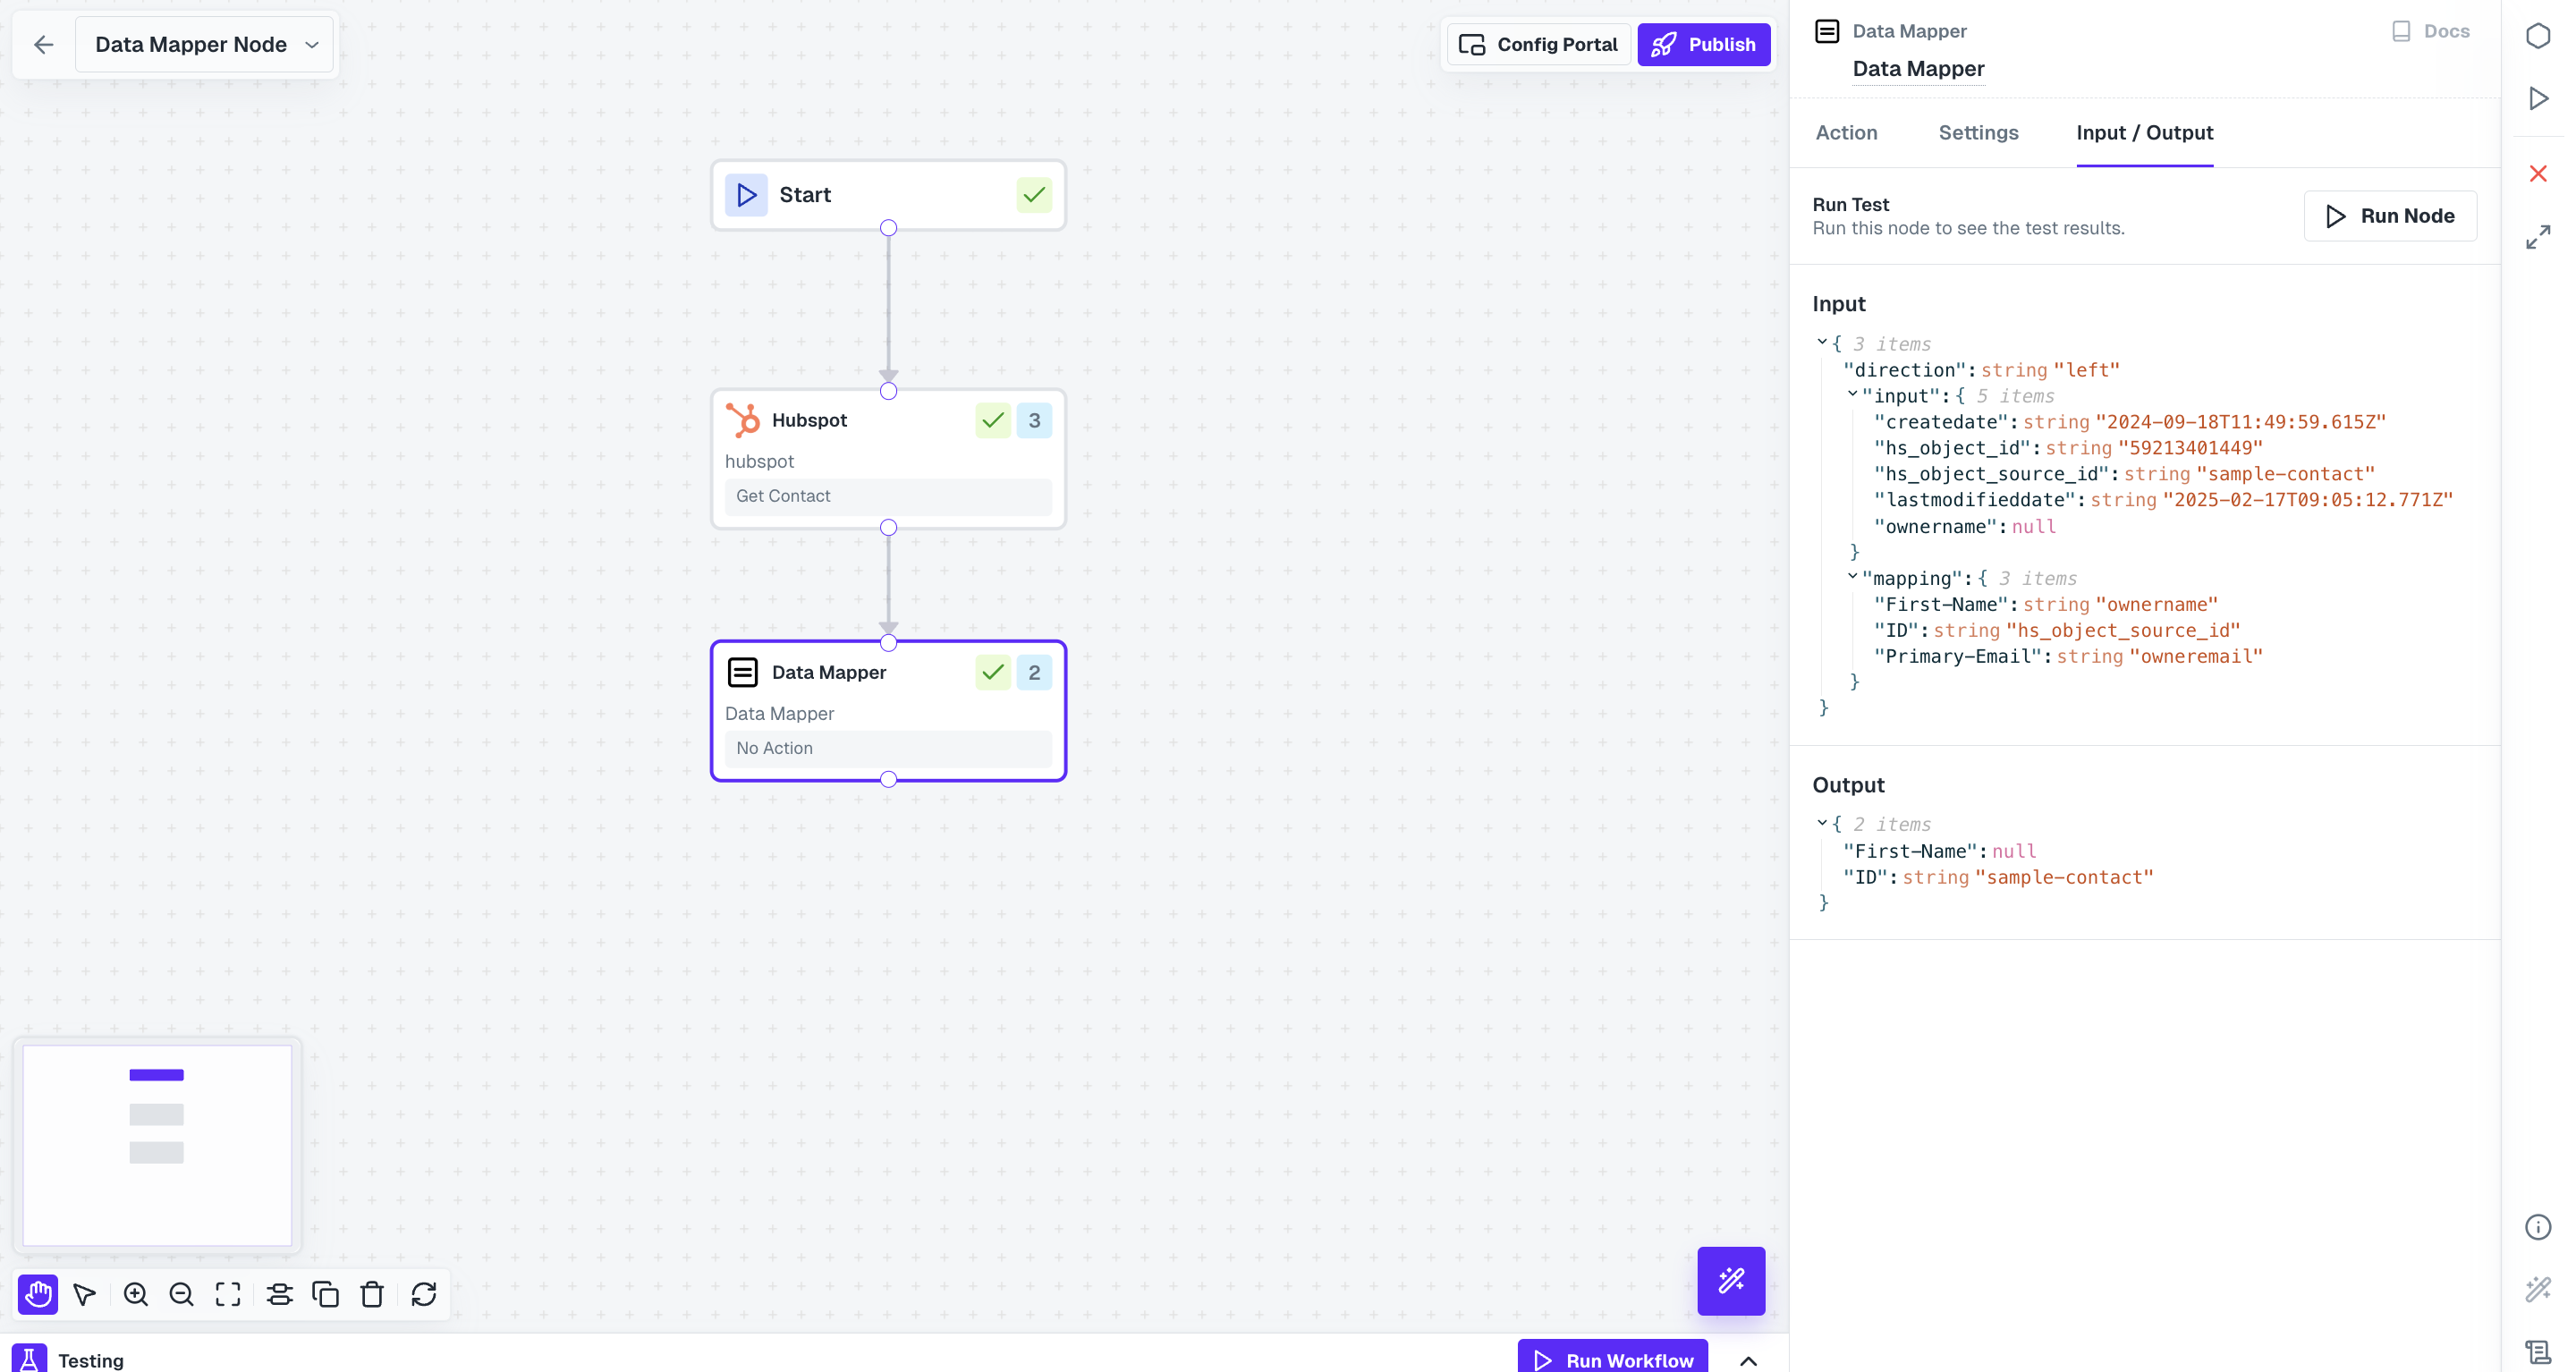
Once the Data Mapper node is executed, you will receive a JSON object with the correctly mapped data.Here is a sample execution of the node with the input and the mapping provided and the output of the node.
Before testing make sure that you have performed the mapping in the integration for the linked account.

You have successfully created a workflow using the Data Mapper node and can perform further operations in the workflow based on your use-case.